Showing posts with label jersey. Show all posts

Tuesday, September 3, 2013

Lazy Tips for Sewing Knits: Basic Steps for Sewing a T-Shirt

First of all, thank you for the awesome support after my last post. I’m still  working on replying to your comments because I want to give quality replies, but please know the advice and love is very much appreciated! 


Untitled


Now, let’s talk basics. My very first knit sewing project was a Sewaholic Renfrew. It was a total revelation to figure out how quickly and easily I could make a wardrobe staple!


The beauty of the Renfrew is that the neck, sleeves and waist are all finished with a folded band of fabric, instead of a turn-and-stitch hem. That means all the edges are neatly finished, and means all your sewing is hidden on the inside, so you can zig zag or serge without it showing!


Recently, a few non-sewist friends were curious how a basic tee is constructed. I thought a picture was the easiest way to explain  and I thought you might like to see it too! 


Untitled


To-Da! That’s all! Isn’t it easy?


Of course, there are different ways to sew it.. some people like to do the cuffs before the side seams, which works too. I like to do that when I’m sewing a… 


Untitled


I’m a creature of habit, so I like to finished everything with finished bands. It’s easy, it’s fast, and it works every time! (I’ll have a tip soon for how I figure out how long to make the band - that took some experimenting!) Sometimes I use knit stay tape and a lightening bolt stitch do a fold-and-stitch finished on the sleeves. I’ve tried a few methods for hemming, but I’ve ended up with wobbly hems and other issues. I like a nice sturdy band best. 


Wait, is that really a tip? Sew a t-shirt this way! Maybe. Not too sure, but I hope it useful for someone! 


What’s your favourite method for making a t-shirt? Got any good tips for hemming a tee? 

Saturday, August 31, 2013

Fall Capsule Wardrobe - Done!

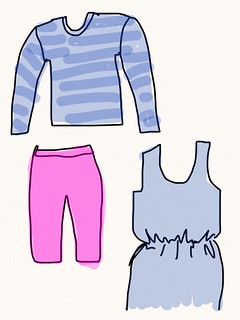
About a week ago I posted some sketched plans for a fall wardrobe


Untitled


…mostly black, white and coral…


Untitled


…with some possibilities in other colours!


Untitled


Well, was the last week of vacation, and I sewed up a storm. I’m done, baby! 


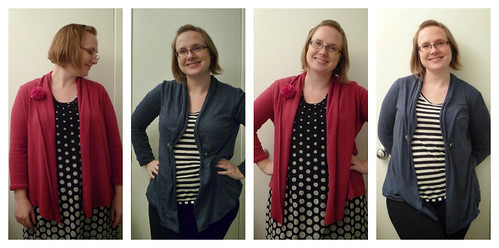
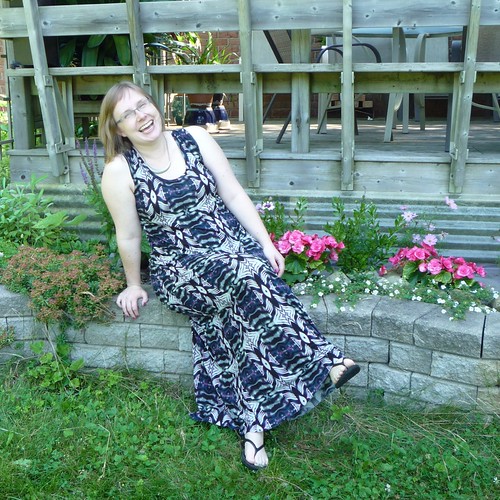
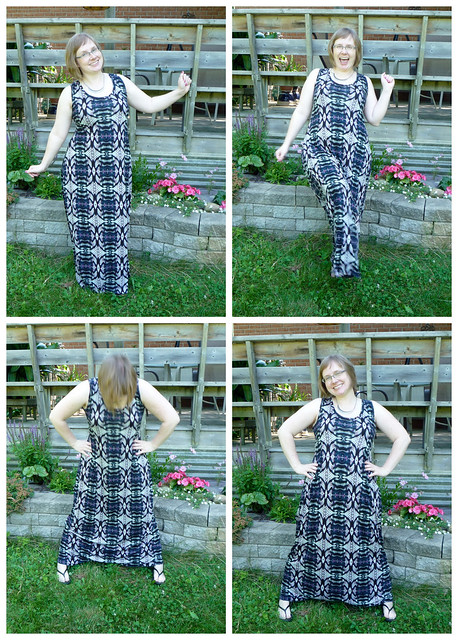
I spent yesterday hanging out with my sister, who was kind enough to take pics for me. I got a little giddy taking pictures in someone else’s back yard for once - as you’ll see! 


Fall Wardrobe Plan


First up: 


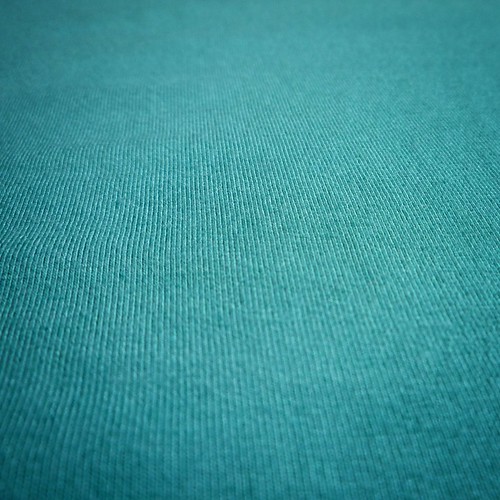
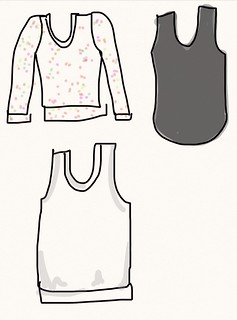
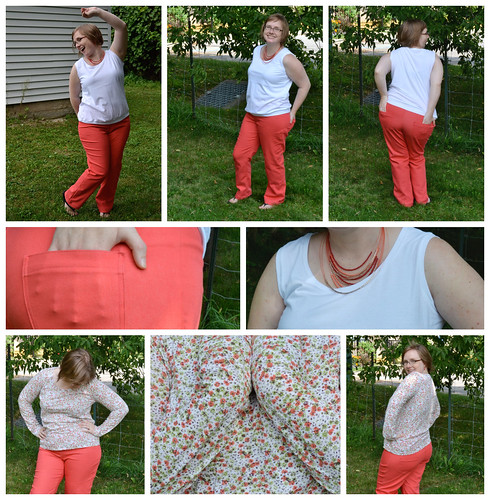
White Renfrew Tank: Leftovers from my first-ever knit project!


Floral Long-Sleeved Renfrew: I can’t wait to wear this in cooler weather! (Yesterday was HOT!) The fabric was a gift from Sally at the Quirky Peach. Thank you, Sally! I love it!


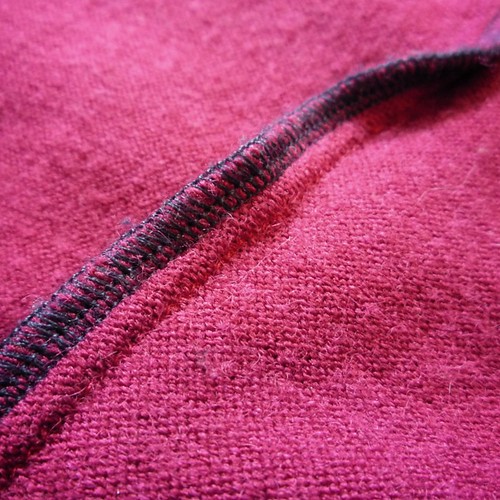
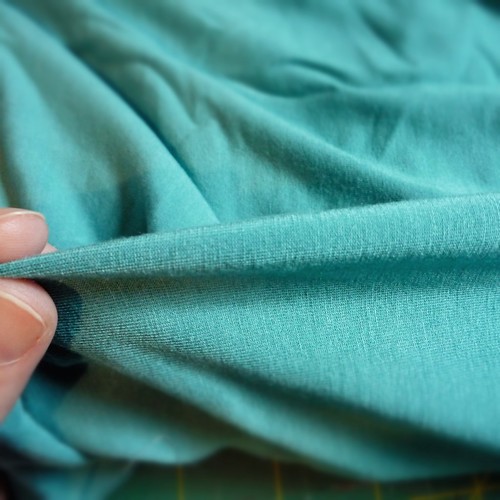
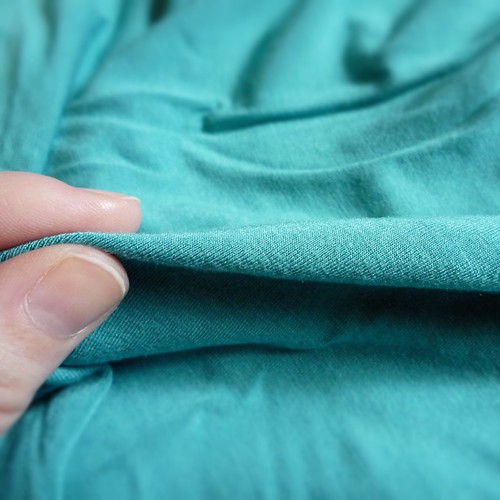
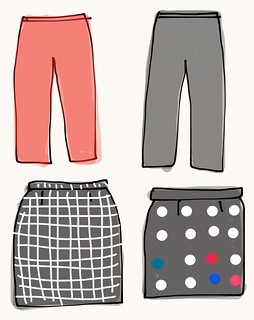
Coral Stretchy Jeans: Hmmm. I love the colour, but I’m not sold on the fit! I added an inch of width to the pattern I always use, since they usually come out pretty skin tight… but now they look and feel a big baggy to me! I’m considering taking them in from the knee down.Also, you can tell in the pocket picture that this thin denim doesn’t hide ANYTHING! I can’t find any denim locally that is as heavy as the stretch denim in my RTW pants. 


Fall Wardrobe PlanNext up: 


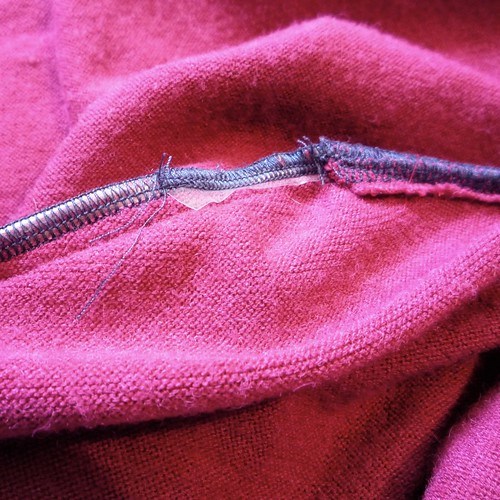
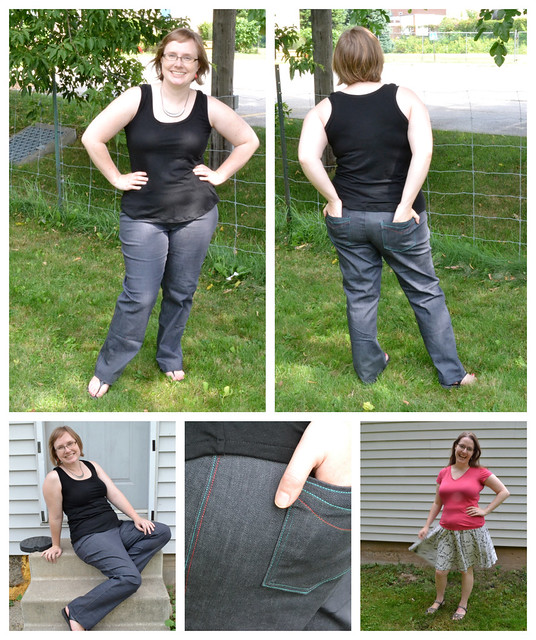
Grey Stretchy Jeans: I had FUN on these! I’ve always avoided contrast stitching, but I went for it on these. Had to make them fun and colourful somehow! I used regular thread and a triple stitch in both red and turquoise. Again, they feel a bit baggy. The fabric is a lovely stretch denim from Gorgeous Fabrics, bought with a gift certificate from my sister for my birthday. (Speaking of which, look how she just happened to match my wardrobe! She’s even wearing a me-made Palova knit circle skirt!) 


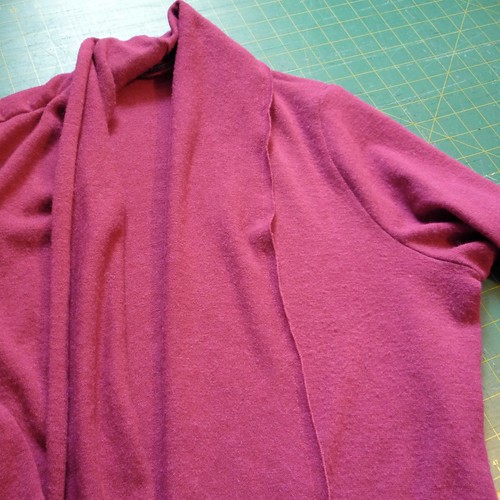
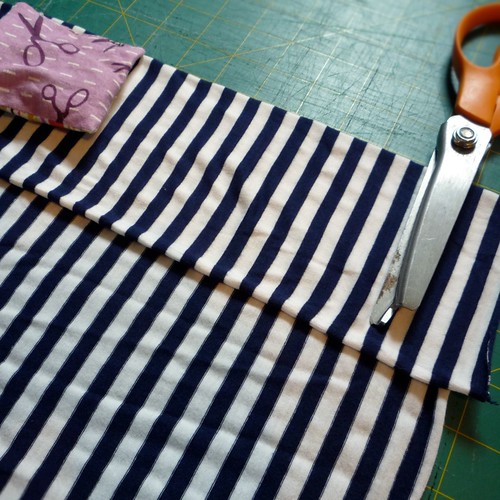
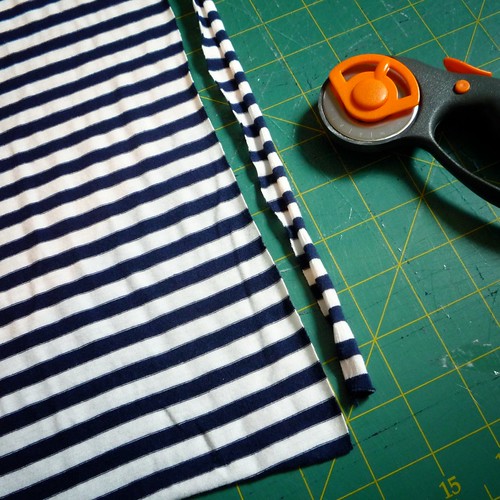
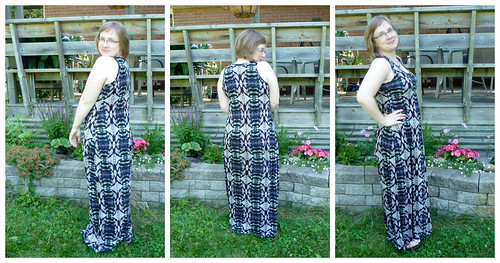
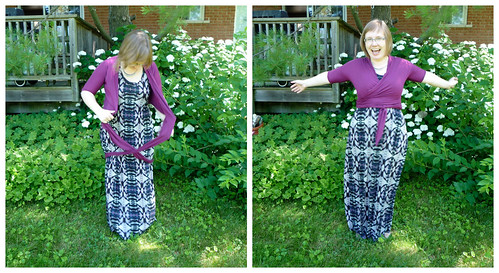
Black Mission Maxi Tank: I’ve used this pattern for 3 dresses and about 5 tanks this summer - it’s a winner! I made this one from a metre of amazing black bamboo knit that Anne gave my years ago to wear as a scarf/shawl sort of thing. I wish our local shop still sold fabric this nice! 


Fall Wardrobe Plan


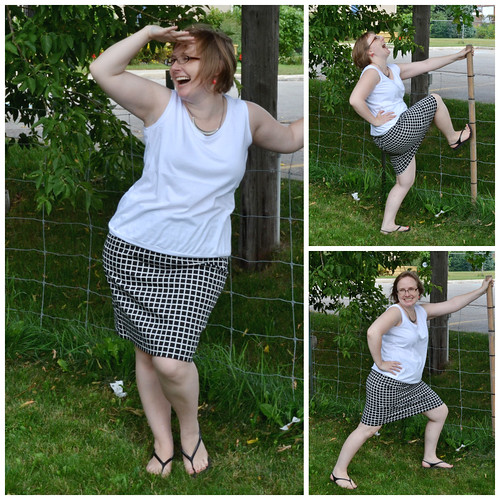
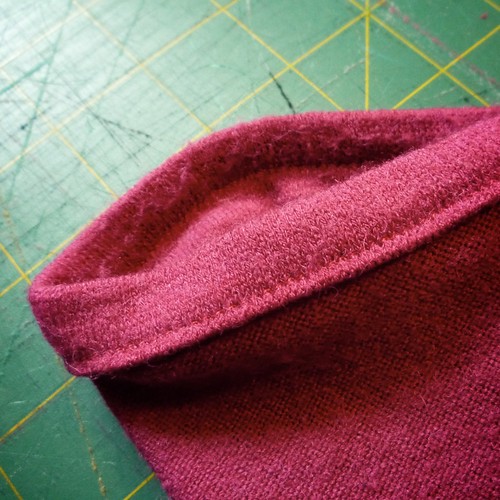
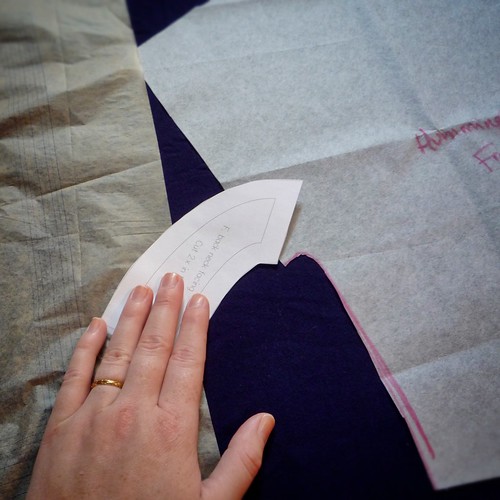
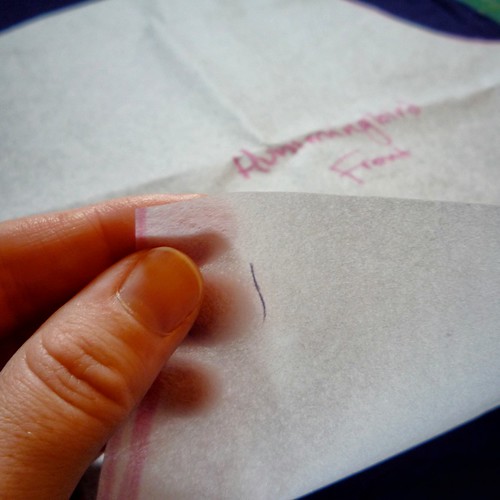
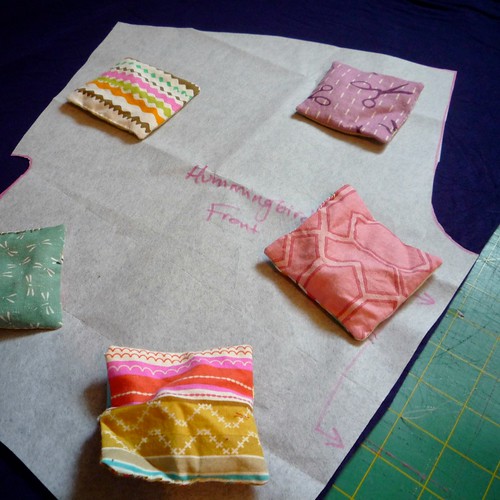
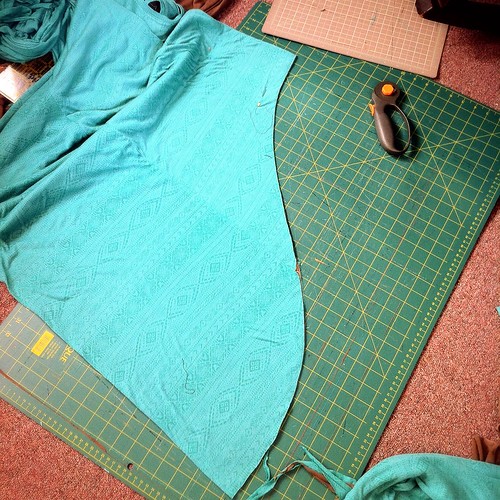
Stretch Pencil Skirt: I”m wearing this right now, and it’s SO COMFY! It’s a heavy, seriously stretchy twill that I bought from the remnant bins last year. The pattern is based on the Cake Hummingbird skirt, including my adjustment for a big booty. I didn’t want to have panels cutting up the print on the front, so I traced a version with darts instead. As you can see below, I just sewed a piece of wide black elastic on was the waistband. No zip needed! 


Fall Wardrobe Plan


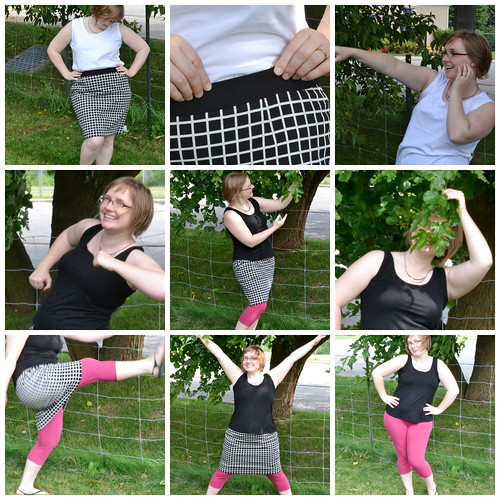
Pink Leggings: I wear skirts with leggings a lot, since I sit/crawl/dance/etc in my work day. I had just enough pink spandex cotton blend to make some short leggings. I use the Style Arc Laura Leggings pattern, and it works great! Just a single seam on each leg and some lazily applied elastic at the waist. poka dot skirt Collage


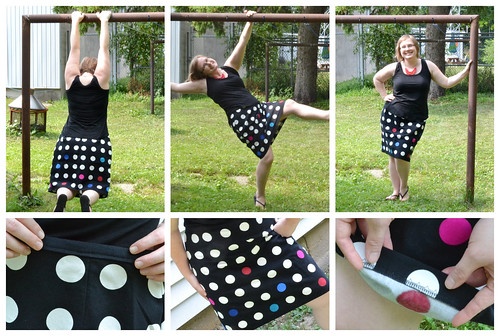
Sharpie Skirt: My favourite! I got the black and white polka dot heavy cotton at Ikea, and used the same Hummingbird hack pattern as above. This one isn’t stretch though, so I may have over compensated with ease! It sits lower than I usually prefer, and is quite loose around the hips. On the other hand, I can sit comfortably and there’s definitely room for heavy fleece tights underneath! 


polka markers


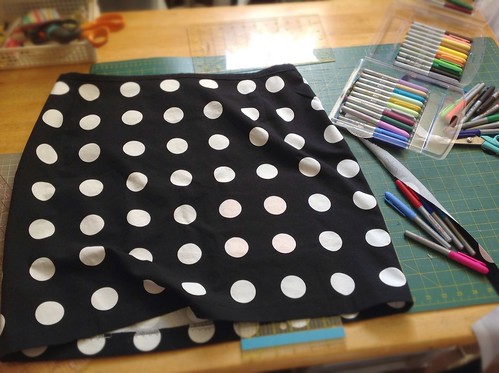
As planned, I made the plain skirt first then coloured in random circles with Sharpie. I still haven’t washed it, but I’m hopeful that it won’t fade TOO badly! If it does, I’ll just colour it in again! I’m looking forward to wearing it with bright cardigans in the winter. 


And that’s that! 2 skirts, 2 tanks, a tee, and 2 pairs of jeans. I like the combination of basics and graphic prints, and the slight twist on my usual colours. Everything will fit into my wardrobe easily and get worn often.


Even better, the sewing process was totally relaxing and zen, since it was all TNT patterns. That’s my kind of sewing! 


Now that I’ve depleted my stash of stretch denim, can anyone suggest a good place to buy some online? I’m looking for medium-to-heavy stretch denim or twill, preferably in bright colours? Thanks!


p.s. Some people have let me know they they are having trouble leaving comments recently… If that happens, could you contact Discus? They say everything is ok on my end, but clearly something is going on… Thanks!

Tuesday, August 13, 2013

Lazy Tips for Sewing Knits: If it works, do it!

Untitled


Look guys, this tip is seriously lazy, and I know that’s not for everyone. Some people delight in perfection - I delight in getting shit done and moving on! That’s a very personal preference, and I’ve never say you were right or wrong for wherever you fall on the spectrum. 


Personally, my theory is that sewing is a problem-solving adventure, and whatever works is good enough


Let me illustrate by showing you the construction details of a pink sweater-knit cardigan I blogged about last winter. 


Sewn Cardigans with McCalls 5890This one!


One this one sweater, I’ve got…


sweater fold cuff


…turned-and-stitched cuffs…


sweater straitght stitch


…edges stay-stitched with a lightening bolt to prevent stretching…Sweater serge and stitch


…navy serging and pink stitching…sweater elastic


…terribly inserted clear elastic to stabilise the shoulders…


sweater safety pin


…and best of all, a safety pin holding the collar down at the back neck! sweater full


Yup! That’s 6 totally different construction techniques on one sweater! And despite the safety pin and navy serging, I wear this sweater at least once a week. It has held up through many washes, and no one else is the wiser about it’s technical “flaws”! When I made it, I was new to sweater knits, and altering the pattern so much that the instructions were pretty useless. As I came to each part of the sewing process, I just tried whatever made the most sense in my head. 


That’s the beauty of sewing for me - there really isn’t a right or wrong way to do things, as long as you end up with something wearable at the end! I know it can be intimidating to start sewing knits because we want our clothes to look perfect inside and out, or we feel like we *need* a serger/coverstitch/some-other-tool to make it just right. That can be paralysing.. so in the meantime, I say: Jump in. Try it. Fake it ‘til you make it. If it works, do it! 


Do you need things to be perfect inside and out? Or are you happy with whatever works? 

Saturday, August 10, 2013

Lazy Tips for Sewing Knits: Pattern Paper Matters

Untitled


My last lazy tip was about cutting tools (wherein I pledged allegiance to my rotary blade). This one is also about cutting, in a round about way! 


When I cut knits, I never ever bother with pinning the patterns to the fabric. Some of you do though, and I puzzled this week over why you might need to… and here’s what I came up with: 


Tracing your patterns onto something “grippier” than tissue or paper lets you cut accurately and easily with barely any pics or weights! 


Let me explain…


pattern paper


On the left, we’ve got a normal tissue pattern. In my experience, trying to cut around tissue patterns (even already pre-trimmed to size) is awful. The pressure of the wheel next to the tissue makes the pattern piece shift and jump and twist, and it’s really hard to accurately cut the right shape. 


In the middle is printer paper from a PDF pattern. It’s more solid, but again, it tends to slide around too easily on the fabric and needs to be very carefully help in place while you cut. 


By contrast, on the right is my favourite stuff: kinda like Swedish tracing paper, it’s basically like interfacing without the glue. In my local store it’s call Trace-a-Pattern, and it sells for about $4/m. Oh, and it’s 60” wide! Score!  (If you live in Ontario, it’s usually stored under the cutting table on a roll at Fabricland!) 


pattern paper trace a pattern


What I love about this stuff is that it grips onto the fabric, and bends and flexes with the pressure of the roller as you cut. That means that you get a much more accurate cut! It also irons beautifully, so you can fold it up to store it, then press it flat in a jiffy! (Unlike taped-together PDFs - I’ve melted a lot of tape trying to iron them flat again!) 


If you’ve used a rotary cutter, you’ll know that sometimes it creates a “tidal wave” of fabric pushed just in front of the blade. (Ok, I need to sharpen my blade, I know!) With this Trace-a-Pattern, the pattern itself grips the fabric and helps to tame the wave! 


pattern weights


Here’s my cutting set-up!


I made these pattern weights ages ago (when I was making my first ever dress, perhaps?) Mine are just 10 washers inside a little pouch, but anything heavy works. I only have 6, but that’s enough to cut any size pattern piece for me. (I’ll be honest, I wouldn’t usually put so many on a little pattern piece like this! :P)


As long as I’ve traced my pattern onto Trace-a-Pattern, the cutting is really easy! Sometimes I don’t bother tracing, especially if I’m not sure the pattern will become a TNT. In general though, I love reusing patterns, so it’s worth the time to trace it. 


Have you noticed a difference cutting out patterns made with different materials? What’s your favourite to work with? 

Tuesday, July 30, 2013

Lazy Tips for Sewing Knits: Cutting Tools

Untitled


Today’s tip is: USE A ROTARY BLADE!!!! Just do it, m’kay? I will confess that I have never tried cutting knits without a cutting mat and rotary blade, so I’m totally biased - I just can’t see how it could be done with any accuracy! 


One of the things that baffled me while watching The Great British Sewing Bee was watching everyone meticulously pin their pattern to the fabric, then cut with shears. That method is so slow, and as you cut, the scissors lift and distort the fabric. A rotary blade and mat lets you cut smoothly and quickly without pinning. 


Untitled


(Look, Ma! No scissors, pins, or even weights!) 


I have a large self-healing mat, which I put on the floor so that the jersey doesn’t stretch or distort by hanging off a table. I also have a smaller cutting mat that I move around if part of the pattern piece doesn’t fit the big mat. (For example, the Tiramisu skirt piece is wider than my mat, so I slide the little mat under one corner.) That lets me cut big pattern pieces without distorting the jersey by shifting it around on the mat! 


cutting tools large rotary


This is the most common size of rotary blade that I’ve seen. It has a 45mm diameter, which is about 2”, maybe? It’s great for straights and gentle curves. Keep your blade sharp, especially for thin tissue knits or cheap jersey - those can be the devil to cut, and leave messy fluff stuck in the cutting mat! 


cutting small rotary blade


This little guy is my secret weapon for tight curves. I’m not sure of the exact size, but I think it’s less than 2cm or 1”. I also use this blade for cutting notches into woven fabrics… I’m much less likely to cut too far than with the big blade! 


Here they are together, for size comparison: 


cutting tools


Do you use a rotary blade to cut fabric? If you use scissors, what do you like about that method? And has anyone had good luck with rotary blade sharpeners? I have one but I can’t get my blades very sharp! 

Thursday, July 25, 2013

Lazy Tips for Sewing Knits: Finding the Grainline

Untitled


Oh knits, how do I love thee? Let me count the ways: 


  • comfy

  • cheap

  • easy to fit

  • endless prints and fibres

  • fast and easy to sew! 

I’ve blogged about countless knit tees, tanks, dresses, leggings and skirts, so I thought it might be more interested to start talking about my process. Watching other sewists on TV or in person always reminds me just how differently we handle the business end of sewing, from cutting to pinning to sewing to following instructions! 


So here’s my second lazy tip for sewing knits: Finding the Grainline!


grainline


On knits, the grainline is easy to see. The little v stitches on the right side make columns, just like on a knitted sweater. 


grainline straight


To fold my fabric on the grainline, I never match the selvedge edges. As I talk about last time, the selvedges can go wonky, and they aren’t reliably straight or parallel. Instead, I pinch roughly where I want to fold the fabric with both hands, and check the grainline. If the lines go straight down the fold, like above, then I’ve got the grainline. 


grainline crooked


If the lines go diagonally off the fold, like this, then I need to shift the fold  until they are straight. grainline ready to cut


Once I’ve got the grainline, I lay it down on the table and fold the rest of the fabric length. 


Seriously, maybe that’s too obvious to even be a tip? I’m pretty relaxed about finding the grainline before cutting of folding the fabric… As long as you are close, I really don’t find that it affects the finished garment much. Getting it roughly lined up is good enough, unless you have stripes or a symmetrical pattern to deal with! 


(Don’t go cutting things cross grain though - the direction of stretch matters! Ask me how I know…)


How do you find the grainline for knits? 

Tuesday, July 23, 2013

Lazy Tips for Sewing Knits: Trimming the Selvedge

Untitled


I love sewing knits. Sure, I was intimidated by them at first, but once you get the feel for working with them, knits are so forgiving and fast to sew!


There all kinds of great tutorials out there on how to sew knits, but I thought I’d share some of the quick and lazy ways that I choose, cut, and handle with knits! Nothing couture, nothing fancy… just the tricks that I’ve learned along the way. In return, I’m really hoping you’ll share your own tricks in the comments! 


First up: Trimming the selvedge! 


selvedge curl


Knit fabrics and woven both have selvedge edges. But have you ever noticed that when you prewash some knits, the selvedge shrinks smaller than the rest of the fabric?


selvedge doesn't line up


See how the stripes match up near the scissors? But just 10” along the fabric, by the pattern weight, the stripes are already mismatched? If you are trying to match up prints, that can be a big problem! 


selvedge trimThe easy solution is to slice off at least an inch of fabric along the selvedge. (See how the trimmed piece is shorter than the main fabric? If you are dealing with a few metres of fabric, that difference in length can really add up!)  Once your trimmed off the selvedge on both sides, you are ready to cut and sew! 


That’s my tip for now! Next time, I’ll show you my lazy way to find the grainline! 


If you haven’t sewn much with knits, are there any fears I can help you with? If you do sew knits, how did you learn? By trial and error, or by reading or taking a course? 

Monday, July 15, 2013

Mission Accomplished!

If you are around the blogosphere much,  you know awful puns about “missions” can only mean one thing…Mission Maxi!


… someone made a Mission Maxi


There isn’t much new to say about this pattern - it’s well known, well drafted, and simple to sew. It is also my ideal summer dress. Cool, comfy, and fun to wear! I made a few tanks from this pattern last month (like the striped one here) so it’s already earned it’s keep!


Mission Maxi!


Impressively, this dress can be made with less than 2m of fabric! I made a size 16 on top, and 18 from the waist down, and I could still cut the front and back side-by-side across the width of the fabric. Win!


One of the other lovely things about this pattern is that it’s drafted to be snug at the bust then curve out quite dramatically over the hip. This means that the top fits snuggly, but the waist and hips skim nicely! A definitely win for pear-shaped women like me! 


Mission Maxi! 


One modification i’ve made to all my versions is to widen the straps and use my own binding pieces. I want the dress to comfortably cover bra straps, so I added about 1cm to each side of the straps. This reduces the racerback shape, which is too bad, but does make it a lot more practical to wear! 


Mission Maxi!


The fabric I used is a nice drapey knit from the ends table at Fabricland… I think it was about $5/m? (As you may have noticed, there were some, uh, issues with pattern placement, but that’s nothing new!) I top-stitched the bindings to add some stability, even thought that’s a stepI usually skip with t-shirts etc. Didn’t hem it though - why bother?Mission Maxi!In other happy news, this dress is perfect with my Pavlova wrap top


And that’s that!


I made this dress 2 days ago… and I’ve already made another since. I think I’ll be making a few for friends/family as well… it’s so easy to sew and fit that it’s a perfect gift! 


My mind is blank of topical sewing questions to ask you, dear readers, so instead: Is it unseasonably hot where you live? What’s your perfect summer outfit?