Wednesday, November 28, 2012

Craftsy Class Review: Pattern Fitting for Plus Sizes

Hello! It’s be a rough week here at Casa Crafty… my husband ended up in hospital for 4 days with a serious bout of an intestinal virus. Thank goodness for free public healthcare! He got home last night, and I”m *so* grateful to have him home and healthy. 


In the mean time, here’s a Craftsy pattern review I typed up on the weekend before things went nuts!


I’ve been curious about the new Craftsy Plus-Size Pattern Fitting course, so when it went on sale this weekend for $20, I finally bought it! I was fighting off a cold, so I curled up in bed and watched the whole course straight through in less than 24 hours. 


Her teacher bio video is great, and full of insight! 


A couple moments of highlights: 


  • I need a seam allowance guide! She used it for everything - adding extra width to match body measurements, measuring the correct amount of width during slash-and-spread adjustments, etc. 

  • Get a weighted tape dispenser. I always have to fiddle with my cheap plastic dispenser, but her big heavy dispenser let her grab tape one-handed!

  • She really helped explain how to take the right measurements to calculate flat paper adjustments accurately though, and I’d like to give it a try. Somehow I never use actual math for my pattern adjustments… I just eyeball it! 

  • At the same time, her motto is, “It’s not rocket science - It’s just sewing.” I like the concept that you should take the time to adjust patterns as needed, but not get uptight about absolute precision! 


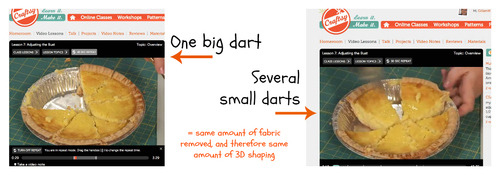
  • Darts as pie. She modelled how when we take a few pieces out of a pie, we can push the remaining pieces around in the pan in lots of different arrangements, without affecting the amount of pie. Same with darts - Move the dart anywhere, or split it into several smaller darts, and it’ll do the same job! I knew this in theory, but the pie really helped make it clear!

  • FBAs. I think I finally get it. She also showed how to use the same technique to accomodate for humped shoulders and other areas! (I don’t need to do either adjustment, but it’s cool to finally understand the mechanics!)

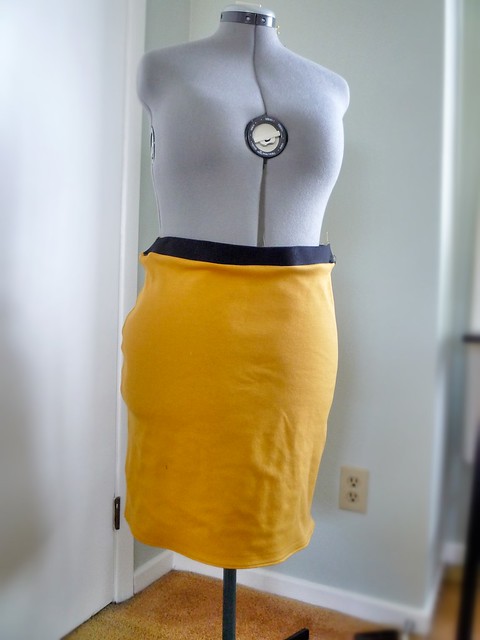
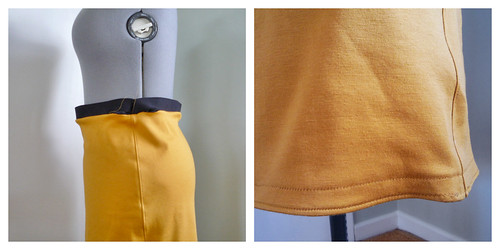
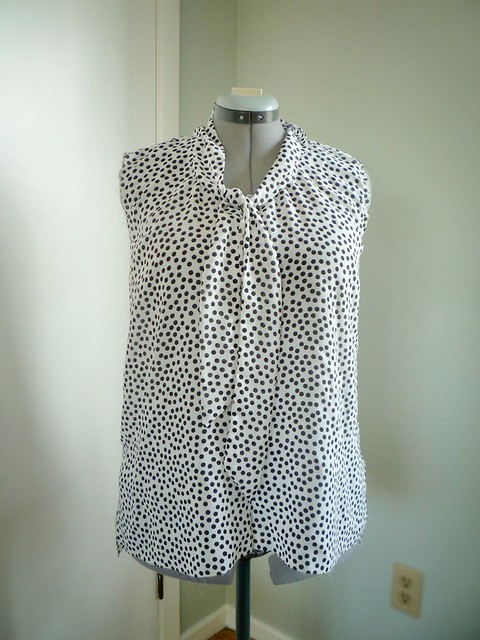
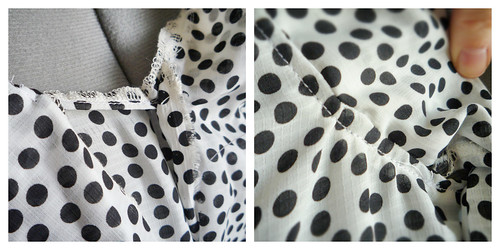
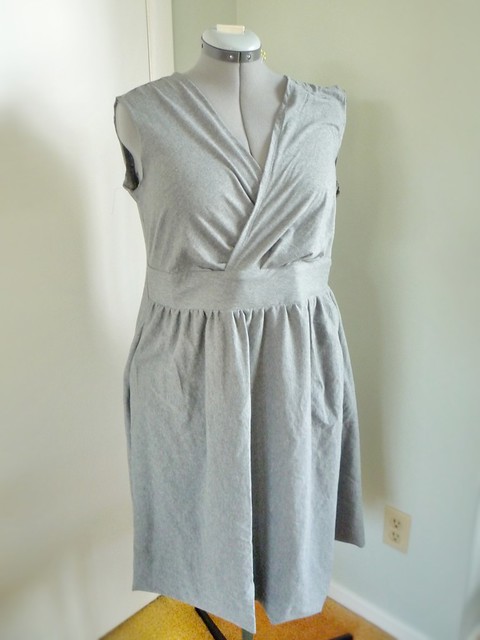
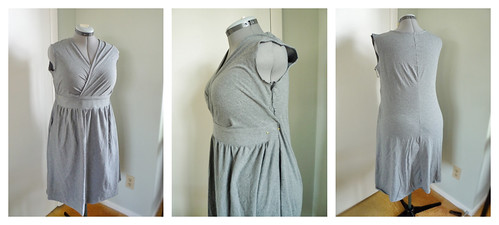
  • Pattern adaptations. Using the Vogue Peplum top that is so popular right now, she made a normal shirt, a suit jacket, a coat, and a dressy, girly top! I thought I was pretty creative in how I modified patterns, but she came up with amazingly different variations. It was cool to see all the careful flat-pattern adjustments pay off in the finished garments though - I tend to adjust as I sew, which makes it hard to replicate the same fit the next time through!

  • Zen Dressmaking. You are worth the time to do it properly! She argues the the difference between homesewers and professional custom dressmakers is that a dressmaker does a basted fitting so that the garment turns out *right* in the end every time. I’ve never done a basted fitting for a whole garment, but I can see that it would help avoid some of my recent disasters! (On the up side, she figures that muslins aren’t necessary unless you are drafting something yourself - do flat pattern adjustments first, then baste the fashion fabric for a fitting instead!)

  • Better Basting. Drop the tension to a lower setting when you are basting, and then you can just pull the thread out easily when you are done! 

Overall, I really enjoyed watching the course. I know I’ll refer back to it next time I have a tricky adjustment to make! There were, not too surprisingly, also some dull moments… Watching someone shorten and lengthen a tissue pattern in about 10 different ways can’t be exciting forever! I really did learn some useful things though, and I’d recommend the class for anyone interested in getting a more precise fit without endless muslining. 


As for the plus-size part of it… According to my BMI, I’m technically “obese”, (Thanks, Science!) but I don’t really fall into the plus-size category the course is discussing. I can buy RTW clothes in almost any shop, but yes, occasionally I’m too big! I really liked the matter-of-fact way that size was discussed in the course - how it affects the amount of ease needed, the fabric chosen, the way to effectively take measurements etc, but also practical stuff like chaffing or sagging that isn’t often discussed! ;) Her final message was that any woman can wear any style, when it fits properly. That’s a good message for women of all sizes! 


Here’s an example of her teaching style and helpful tips. I wouldn’t have thought of this myself, but it makes perfect sense!


Have you taken any Craftsy courses lately? I see the sale is still running - Only $20 for more courses! They’ve also really beefed up the free mini-courses… I particularly loved the one of making jewellry with mini blowtorches! I had no idea how that was done, and it looks really fun! While the sale was on, I bought myself two gift certificates so that I can redeem them for new classes as they come out. I wonder what courses are in the works?


**ps. Craftsy isn’t paying me or giving me free courses - I just wanted to share my experience!**

Saturday, November 17, 2012

Clunkers, Stinkers, and Complete Failures

You know the scene in cartoons when peaceful, pastoral music is playing while the camera pans of green fields… then suddenly there’s the grinding sound of a needle stopping on a record, and it all comes to a screeching halt? I’ve been having those moments in sewing a lot lately. Everything is fun and easy, until I sew one last seam and try it on again … and it’s immediately clear that my project is a complete and utter disaster, which cannot be rescued by any amount of alterations.


Here’s the odd thing though - I don’t mind it. These days I’m sewing for sanity, for stress-release and a sense of control. All I really want or need is the purr of the machine and the mindlessness of doing each little step one at a time. I really don’t need the clothes I’m making… I just want to MAKE! (I figure that at $3-5/m, I can afford to ruin some jersey - It’s cheaper than drinking, shopping, or eating my way through the stress!)


With that in mind, here are three of the complete failures that’s I’ve made lately. 


#1: Yellow Double Knit Skirt. 


I love this colour, and I want to love double knits… but this self-drafted knock-off of a RTW skirt went horrible wrong. 


Clunkers, Stinkers, and Complete Failures...


How can one garment be both too tight (it shows every bump over hy hips and butt) AND too loose? I mean, look what happened when I tried to make an elastic waistband!!!


Clunkers, Stinkers, and Complete Failures...


Um, yeah. I don’t even have anything to say here… it’s just unwearable. And since the whole thing is too tight, it’s also unfixable. I love the colour though, so i’ll see if I can work it into some other project down the line!


#2: Lightweight Scout Bow Blouse


I love the Grainline Scout Woven Tee pattern, and I love bow blouses… why not mix the two? 


Clunkers, Stinkers, and Complete Failures...


Oh. Nothing wrong with the concept, I think, but my decision to make the bow out of the straight-on-the-grain piece I had left was a mistake. A big mistake! Look at this: 


Clunkers, Stinkers, and Complete Failures...


Eeek! Because the bow collar is on-grain, it caused all sorts of awful puckering when I attached it to the neckline. And because I’ve never made or read a real pattern for attaching this kind of collar, I can’t figure out how to finish the front part where it knots! Which resulted in this horrible tangle of serger and topstitching threads, which is unfortunately visible even when the bow is tied. Yuck. This top *might* be fixable if I took of the bow and just made a normal neckline… but I don’t know if I’ll ever find the optimism to try!


#3: The “Perfect Fit” Jersey Dress


I finally made one of the McCalls Jersey dress patterns I bought a while ago… and this was the result! 


Clunkers, Stinkers, and Complete Failures...


It’s a bit hard to tell, but thanks to stiff interfacing, the waistband is tenting out a good 10cm from the underbust… and because the waistband doesn’t go all the way around the back, there is no way to pull it snug! The unstructured back of the dress just can’t fight the combined power of boobs and interfacing in the front! 


And the pleats, oh the pleats… I HATE sewing pleats. Hate marking them on fabric, hate ironing them, hate how I never ever get them right. Consequently, the bust is all kinds of wrong, and even though I tried it on and pinned it in place before sewing the overlap, it is a truly awful fit. I don’t understand what happened, honestly! 


Here’s what it looks like when I pin the front tighter, and pull back on the neckline…


Clunkers, Stinkers, and Complete Failures...


Better, but not good! You can see how the back is unstructured (the dress is hanging loose in the rear view picture, btw, not pinned tight)… If I sewed the bodice as tight as it needs to be, I think the back would pull in awful ways over my behind. 


This dress started out as a wearable muslin… then I thought maybe it could be pyjamas… but by the end, it was clearly unwearable in it’s current form. Someday I’ll cut it up and use some of the fabric for other things… until then, it joins my other disasters in a ball on the floor!


There we have it: 3 completely unwearable projects in only two weeks! A part of me wonders if these would have turned out better if I’d been in a better headspace - relaxed and ready to fix problems as the arose, instead of barreling through. In the meantime, I have sewn some good things… and all in all, I’m a little disappointed, but not heartbroken.As I said, the sewing was the fun part! 


Do you use sewing as therapy?  How does stress affect your sewing, and how does sewing affect your stress? I’d love to know!

Tuesday, November 6, 2012

Renfrew: The pattern that keeps on giving

Folks, can you believe that a year ago the Renfrew hasn’t even been realeased? I checked - It came out in January 2012. That means that in the 10 months that it’s been out, I’ve a) started making clothes, b) started sewing knits, thanks to this pattern, and c) made more than 10 Renfrews of different descriptions? Now that’s a $20 pattern that’s worth buying! 


Which brings me to my latest incarnation: The Renfrew Dress!


Renfrew Dress!


Inspired by the the lovely Andrea’s tank dress, of course, but more winter-appropriate! The black and white fabric of the main body is a scrap of double-knit that I got in the remnant bin for $3.60, and the sleeves and neck-binging are from a little piece of bamboo knit that has been in my stash for years. I thought the light-weight sleeves would fit better under a cardigan… plus, I thought a dress entirely out of a graphic print might be a bit much! 


It’s a total sack without a belt, so I’m wearing one of my reversible elastic+fabric belts, like I made for sale here. It made for a super comfortable outfit - easy to move in, never needed tugging into place, and the skirt is long enough that I’m decent when I sit on the floor with students! Next time I wear it, I’m looking forward to trying a colourful belt and bright cardigan. 


As you can tell, I ended up taking pictures in front of the garage again… that’s because when my husband and I leave for work in the morning, it’s still dark inside the house… and when we get home, it’s dark everywhere! I’m so grateful to my husband for being ready and willing to snap pics as we are heading out - So how could I complain when EVERY SINGLE PICTURE came out blurry, except one? We’re realists here though, so here they are in their early-morning, crap-it’s-snowing glory…


Renfrew Dress!


Yup! His goal as photograph is always to make me relax and laugh, which this morning meant growling out all kinds of barking noises… which was very effective. Even now these pics make me grin! 


As for the boring details… Here are the pics I shot in car! 


Renfrew Dress!


Ruched sleeves: Used clear elastic. I’ve never tried this before, but it’s a RTW detail that i like!


Hem: Steam-a-seamed this sucker, and stitched on top with tricot stich. Easy peasy, and it hasn’t stretched out. 


Neckband: Ummm… yup, it’s there! The bamboo knit has a LOT of stretch, so I had to cut it much shorter than in the pattern. 


Skirt: I just drew it out in an a-line from where it flares at the hips. 


And that’s that! There will be more of these dresses in my future, so myself and for my Mom, who admired mine. 


Last thoughts: We talked before about what we hoped Colette would release (and were partly right, I think), but what do you hope Tasia will create next? I think her genius comes in creating RTW-type classics that are perfectly drafted. I’d love a cardigan pattern, or a knit blazer… How about you? 

Sunday, November 4, 2012

Go Anywhere: The Winter Version!

Snow is falling, carols are playing… and I made a dress! 


Go Anywhere dress in sweatshirt stripes


It’s my first ever project with sweatshirt fleece, wich makes for a very cosy and comfy winter dress. It’s sleeveless, worn over a never-blogged Renfrew cowl… As a kid I would have called this a “jumper”… but I haven’t heard anyone say that in years! (Maybe because they aren’t as popular now as in the 80’s?) I know a “jumper” is a “sweater” elsewhere… so what would you call this? 


Go Anywhere dress in sweatshirt stripes


The pattern is the Go Anywhere dress by Sewn Square One, which I sewed up in bright cotton this summer:


Go Anywhere Summer and Winter


This time I wanted to play with the direction of the stripes to make it more fun. I’ll be honest - It was pure magical fluke that the stripes met so perfectly in a right angle at the hips! I wouldn’t really even know how to go about planning that! Here’s how the pattern alignment works on my tush…


Go Anywhere dress in sweatshirt stripes


I started making this more than a month ago, and really enjoyed trying out some new techniques, like top stitching along each seam. I ended up using knit seam stabiliser along each of the princess seams, because otherwise the fabric stretched out in the direction I was sewing and the horizontal stripes ended up crooked! I made a facing for the neckline, but over-enthusastically cut the neckline a little lower than I should have, which makes for a drafty neck! Luckily this cowl Renfrew solves that.I did think about making sleeves as well, but I was worried that would be either too bulky or wouldn’t have enough range of movement. I hate when poorly designed sleeves make the whole dress lift up every time you raise your arms! Sleeveless also meant that I could finish this up quickly and take it off the dress form where it had been taunting me for weeks!


Go Anywhere dress in sweatshirt stripes


I’ve been wearing it all day today - It’s my ideal weekend dress. Feels like PJs, but looks decent if I meet students at the grocery store! In fact, I was so excited to have a new cosy dress that as soon as I finished it I whipped up a Renfrew dress to add to the collection! Photos soon, I promise! (Though probably inside - It was about 3 degrees when we took these on our way to do errands!) 


Another side effect of the cold weather is that I’m starting to think of making Christmas ornaments and gifts. There is something about Christmas that makes me feel connected to Laura Ingalls and Anne Shirley and all my favourite heroines of yore… The dream of sitting cosily by a fire, hand-sewing and looking forward to giving handmade gifts! 


One thing I notice already is the the hem stretched out a bit as I wear it… Any tips and tricks for stabilising knit hems? 

Thursday, November 1, 2012

Fitting Advice Video!

I just watched this Craftsy video on fitting, and I found it so useful that I wanted to share! It’s a promo for the new plus-size fitting class, but all the advice on what different puckers mean applies equally to people of all sizes!


Nothing earth-shattering, I know, but somehow it makes more sense to me in video form than in pictures! I’m right on the cusp of “plus-size”, so I definitely recognize some of those challenging areas from RTS and me-made clothes!