
First of all, thank you for the awesome support after my last post. I’m still working on replying to your comments because I want to give quality replies, but please know the advice and love is very much appreciated!
Now, let’s talk basics. My very first knit sewing project was a Sewaholic Renfrew. It was a total revelation to figure out how quickly and easily I could make a wardrobe staple!
The beauty of the Renfrew is that the neck, sleeves and waist are all finished with a folded band of fabric, instead of a turn-and-stitch hem. That means all the edges are neatly finished, and means all your sewing is hidden on the inside, so you can zig zag or serge without it showing!
Recently, a few non-sewist friends were curious how a basic tee is constructed. I thought a picture was the easiest way to explain and I thought you might like to see it too!
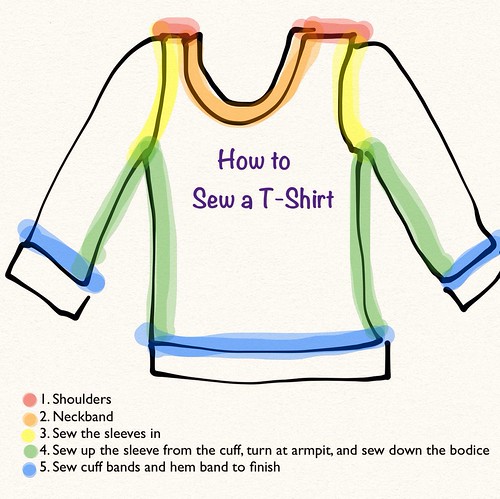
To-Da! That’s all! Isn’t it easy?
Of course, there are different ways to sew it.. some people like to do the cuffs before the side seams, which works too. I like to do that when I’m sewing a…
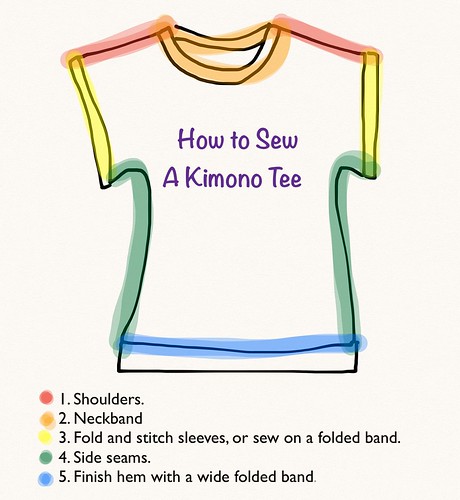
I’m a creature of habit, so I like to finished everything with finished bands. It’s easy, it’s fast, and it works every time! (I’ll have a tip soon for how I figure out how long to make the band - that took some experimenting!) Sometimes I use knit stay tape and a lightening bolt stitch do a fold-and-stitch finished on the sleeves. I’ve tried a few methods for hemming, but I’ve ended up with wobbly hems and other issues. I like a nice sturdy band best.
Wait, is that really a tip? Sew a t-shirt this way! Maybe. Not too sure, but I hope it useful for someone!
What’s your favourite method for making a t-shirt? Got any good tips for hemming a tee?
No comments:
Post a Comment