Sunday, September 29, 2013

Three's Company!

Have you seen Heather and Leila’s awesome Hemlock tees? A few weeks ago, the three of us decided to try out Grainline’s free Hemlock Tee pattern, which is a cute boxy modern top. I love loose tops and I’ve been eyeing drop-shoulder tees on people around town lately, so I couldn’t wait to give it a go! 


It calls for lightweight or tissue knits, so I dug out a newly-purchased striped knit. It has permanent creases in it, and is the same line as this spotted Kimono tee that I love! Untitled


The Hemlock pattern was quick and easy to put together, and even faster to sew! I added in an extra few inches of ease, since I’m many sizes bigger than Jen from Grainline… and, well, here’s the result! 


Untitled


Uhhh…. yeah. I can’t look at these pics without puckering up my face in a look of uncertainty. It’s not AWFUL, nor is it flattering! The stripes really highlight my rounded shoulders, I think, and draw much more attention to the dropped shoulder than Heather or Leila’s more abstract prints. The neck is way too high, and the fabric isn’t draping nicely at all. Boo, I say. Boo-urns! 


So when the fabrics wrong for a pattern, what’s a girl to do? Recut the dang thing as something new, of course! 


May I present my Hemlock, recut as a Kirsten Kimono Tee?


Untitled


This pattern was an obvious choice, since I already like the one I made in similar fabric. With a bit more skin showing at arms and neck, and more shaping in the body, I think it’s much more wearable. 


And yet… I think my fundamental problem comes down to the colour! Technically navy and mid-blue are part of my “palette” colours, but these are the most boring of blues!


MMM new colour palette


The only bottoms I feel like it goes with are classic blue jeans, which… well… make me feel like a wallflower! Give me red jeans, pink jeans, turquoise jeans, but don’t make me wear blue on blue on blue! (Seriously - look at my bedroom! Red and yellow walls, rainbow bunting, kimono fabric, bold jewelery… I NEED colour!) 


Here’s how I’m wearing it today…


Untitled


Totally fine, kinda matches my palette, but yeesh, I feel like the most dull version of myself. It’s a good lesson for me - Just because I have neutral colours on my palette doesn’t mean I feel happy wearing ONLY neutrals!


With that in mind, I’m looking forward to finding a bright print on a rayon knit, and trying the Hemlock again! 


Come on, make me feel better: Tell me about a time you paired the wrong fabric and pattern together!

Wednesday, September 25, 2013

Kitchener Waterloo Knitters Fair!

Untitled


Two weeks ago I had the amazing honour of co-presenting at the Waterloo Knitter’s Fair with my sister! It was all Anne’s brainchild, sparked by a series about colour that she posted on her knitting blog over the spring. I’d written a guest post for her about colour palettes, and made one for her, so naturally enough, she roped me into the presentation! 


The KW Knitter’s Fair is the biggest knitter’s event in Canada, with 70 vendors filling up a hockey arena. They hit capacity at 600 people in the first 15 minutes!!! Madness. Those knitters are dedicated! 


ColourRIOT talk


Even though I teach in front of a room of students daily, the thought of talking to adults made me nervous! Especially as a sewist in a room of knitters… What if my thoughts on clothing and building a wardrobe didn’t interest them?


Luckily, our audience was great, and very kindly laughed at our silly jokes! We had about 60ish people, which I was very pleased with! 


ColourRIOT talk


Can you tell we like colour? Anne brought heaps of beautiful bright shawls and handknit blankets, and I brought a small selection of my me-made clothing in palette colours, all folded up in a basket. (Honest truth? I got really jittery the night before and packed those clothes as a sort of security blanket/calling card! I figured if nothing else I’d have some clothes to pull out and discuss, and people could see that I really do sew! :P)


Untitled


By time the presentation started though, I wasn’t feeling shy - How could I when our slideshow included the palettes of so many of my sewing friends? Thank you everyone who let us use your images! 


ColourRIOT talk


So what does one wear to talk about colour? ALL THE COLOURZ!!!! I knew I’d succeeded when I mentioned that I was wearing black even thought it wasn’t a palette colour, and someone shouted out, “Where’s the black?!?” Hidden under the rainbow, my friend!


The dress is an unblogged Mission Maxi that actually has a silver thread running through it. Thrift store score! My Cake Pavlova top is perfect with maxi dresses, and luckily matches two of my mission Maxis!Anne wore head-to-toe me-mades too: a Maria Denmark Kimono tee, a McCalls drape cardi, and a Cake Hummingbird skirt.  


ColourRIOT talk


Can I take a minute to brag about my sister, Anne? I was so proud of her! In her teens and early twenties in particular, she struggled with social anxiety in a big way… and now here she is, charming a room full of people with her wit and insight into knitting! (Best moment: People actually gasped when she explained a concept! Revelations happened, people!) On top of that, that shawl she is wearing is a pattern she designed and published! And she won an award for most inspiring knitter from her guild the week before. I’m so lucky and proud to have such a talented sister!


So what did we actually talk about? Well, we started off with some basic colour theory, illustrated with yarn, of course! Next, I talked about colour palettes: how to find the colours you love to wear and narrow down the focus of your wardrobe. Then Anne took over and dug into how to choose the right kind of project for colour varigated yarn. (For examples, hand-painted yarn with subtle variations will work great for lacework, but yarn with short colour variations in bright colours could totally hide all your details and look like clown vomit!) 


ColourRIOT talk


At the end, we invited people to come up and make their own colour palette from paint chips. It was really cool to hear people talking about colour, and asking each other for input! Strangest of all was having people hover beside me and then realising they were waiting to talk to ME! 


(Bonus: See the red-haired girl in the awesome striped knit skirt? She lives in the city I’m moving to in 2 weeks, and she told me that a social sewing night has just started! I’m in heaven, people!) 


ColourRIOT talk


I’d like to say a BIG thank you to the KW Knitter’s Guild for having Anne and I to speak, and a huge thanks to all the knitters for being so lovely! It was a really cool experience, and I’d do it again in a heartbeat. 


As for sewing and sewcialists, I’ve been loving seeing colour palettes popping up on blogs and twitter after my recent how-to blog post!


Untitled


Inge realised that since sewing she’s been wearing brighter colours…


Pretty Grievances made her palette with PicMonkey and has a palette that’s perfect for fall…


Freya came up with a neat palette that mixed cool pastels with bold tomato red, white and black! 


Bobbins and Whimsy put together beautiful bright colours, and if you haven’t been reading her series on Sewing a Wardrobe, you should!


Huff Makes Stuff has also been playing around with colour and capsule wardrobe stuff, but hasn’t blogged it (yet?) 


In an unrelated coincidence, the lovely Thewallinna just happened to post about colour this past week too! 


Did I miss anybody? If I did, let me know and I’ll change it! ;) 


In summary: I love colours. I love knitters, and I love you, Sewcialists! 


Thursday, September 19, 2013

Lazy Tips for Sewing Knits: Choosing the right length for a knit neckband

Untitled


Time for another lazy tip! Last time I talk about how to sew a basic tee, which almost always involves a folded band stretched and sewn around the neck.


Being supremely lazy, I never bother with the pattern piece for the bands. It’s not just laziness, either… Ever knit has such different stretch and recovery that one pattern piece can never be accurate for all jerseys! I’ve heard different methods for measureing the neckline then subtracting a percentage to get the right length… but come on, math? Not me!


Here’s my lazy method for figuring out how long a neckband piece should be to get the right amount of stretch.


Untitled


I use this method all the time, and it’s pretty reliable!


Here’s an example:


Untitled


See how the knit band is pinned at three points? As I sew, I know that the band *must* fit between those two points, so I hold tight and stretch the band to fit. No guess work that way, and a nice even stretch all the way around.


(On this particular example, the back neck has quite a pronounced curve. I knew this knit was very stretchy and could handle that extra distance, but on a more stable knit I might pin a fourth point at centre back to add some extra length.)


How do you figure out the length of knit bands? And does anyone have a tip for guesstimating the length of elastic needed on lingerie projects? Mine always comes out too tight or too loose!


p.s. I’ve started gathering all of my Lazy Tips for Sewing Knits together. Click on the link just below my header to find the other tips!

Friday, September 13, 2013

Create your own personal colour palette!

I talk a lot here on my blog about my own personal colour palette, and how it helps guide my fabric stashing and sewing. It’s really changed the way I shop and dress - suddenly I know exactly what’s worth buying, and what will never get worn! 


Well, it’s finally time: A how-to guide to make your own personal colour palette! 


Untitled


Now, fair warning: There’s no science to this. It’s got nothing to do with skin tone or season or that stuff… it’s just a way to reflect on what colours you already wear and look good in! 


Ok? Ok. Let’s do this!


Making a Colour Palette


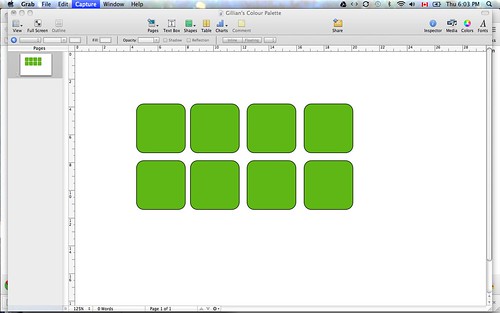
1. Open up a word processing document. (I’m using Pages because I have a Mac.) Choose a shape you like, either circles, squares, or rounded squares like me, and paste in a bunch of identical shapes. These will form the basic structure of your palette. Don’t worry about the fill colour yet!


Making a Colour Palette


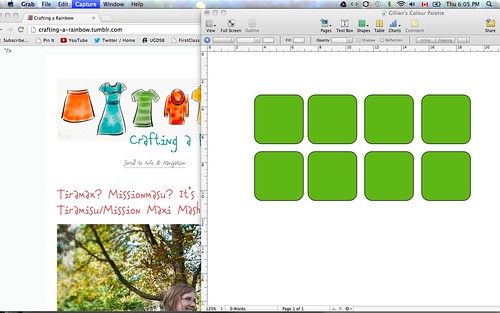
2. Open up your blog so that you can see both windows at once. If you don’t have a blog with lots of clothing pictures, you could take photos of your favourite clothes, or use your Pinterest inspiration boards!


Making a Colour Palette


3. Click on just one of your shapes, and go to your option to change the fill colour.


Making a Colour Palette


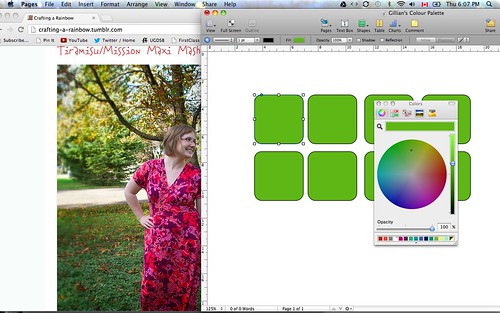
4. Hopefully your program will give you the option of a colour selector wheel like this. There are other ways to pick colours, but I like this view because it allows for easy tweaking of saturation, tint and shade to get just the right colour! 


Making a Colour Palette


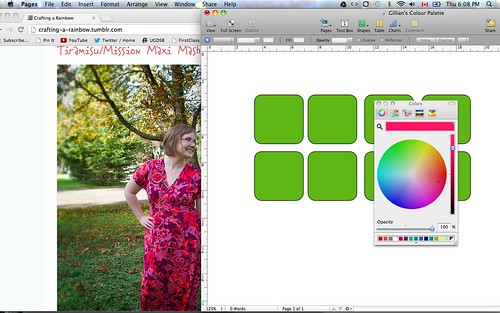
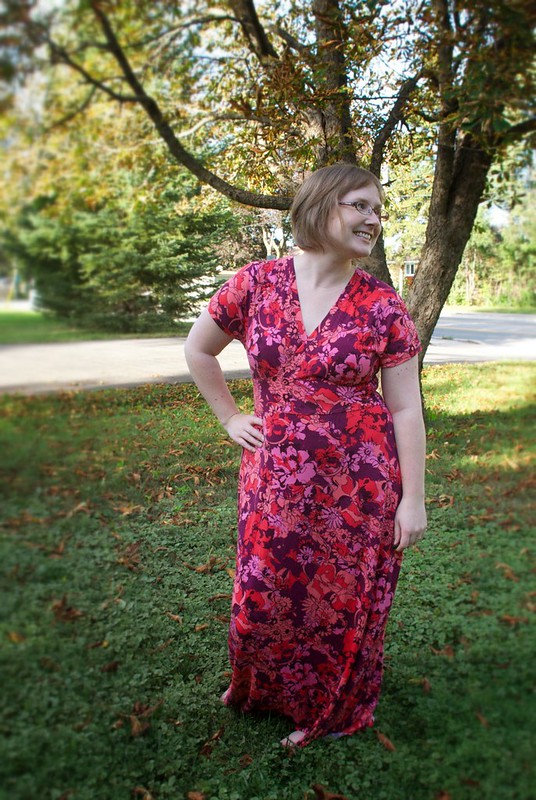
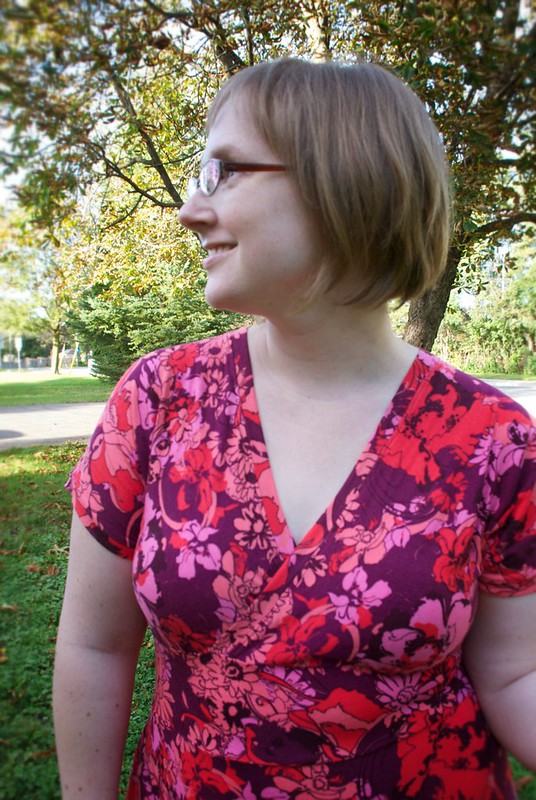
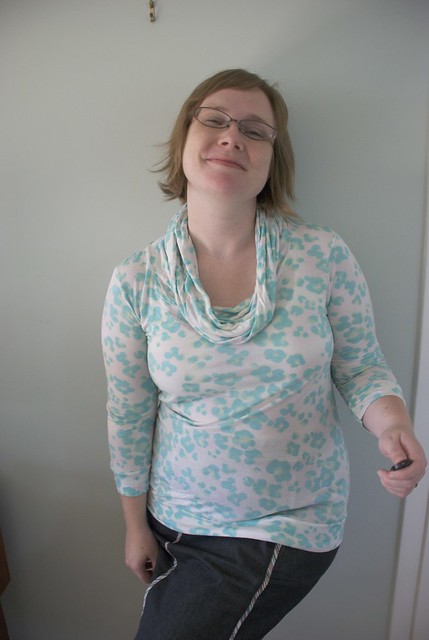
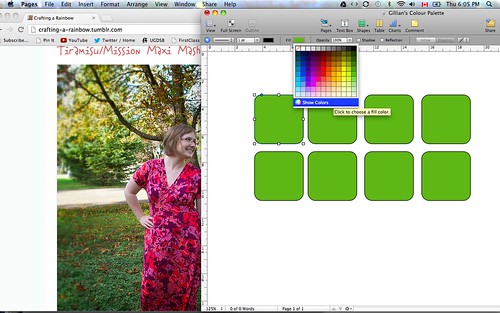
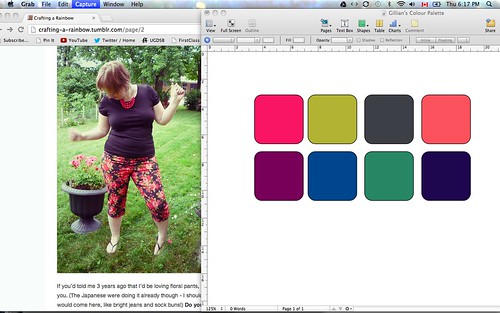
5. Click on the colour selector tool. It’s the magnifying-glass shaped icon about the rainbow colour wheel. Use the colour-selector tool to pick a colour from your picture. For example, I know I wear a lot of bright pink, so I selected a colour from one of the flowers on my dress. Can you see the magnifying glass icon selecting the colour from my shoulder? 


Making a Colour Palette


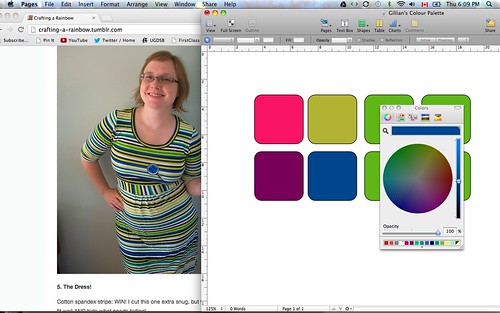
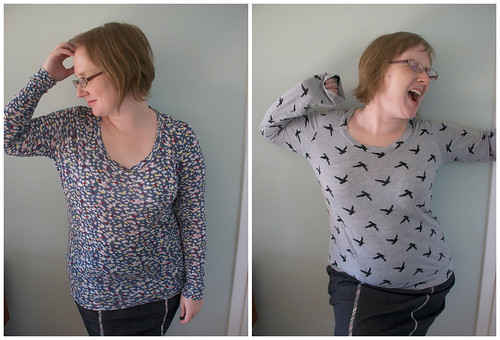
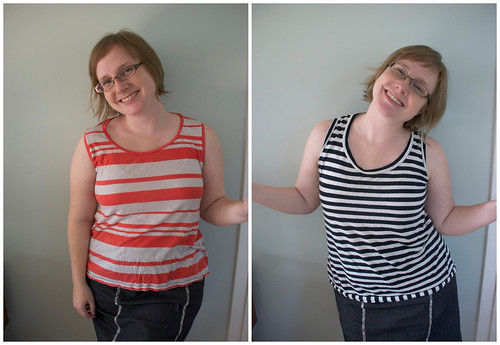
6. Keep looking through your pictures and selecting colour that you see appearing repeatedly. If you like prints, you can often get more than one colour from a picture! In this case, I pulled both the blue and lime green from this one dress, and the hot pink and purple from the first maxi. Bonus: It’s proof that you like to wear those colours together!


Making a Colour Palette


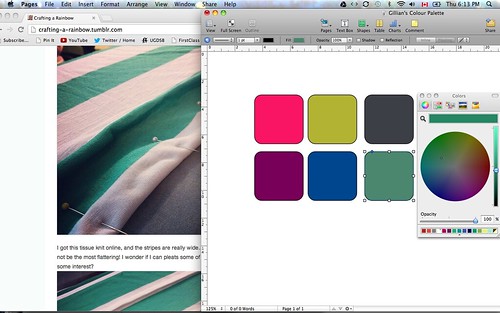
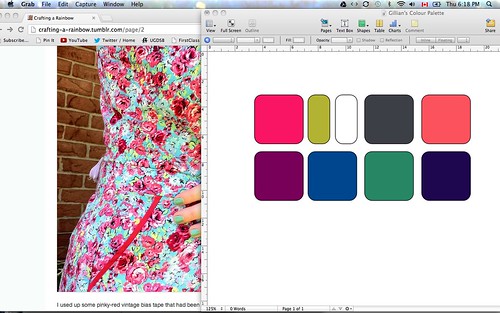
7. Sometime you need to tweak the colour. For example, when I selected this emerald, it came out greyer than I wanted. It actually looks kinder nice in the palette to tone down the other brights, but I know that I feel prettier in brighter turquoises…


Making a Colour Palette


8. Instead, I’m going to change the colour I selected to this more vibrant colour. I can think of at least 3 or 4 things I have in that colour, and I always like wearing it. 


Making a Colour Palette


9. Keep going until you palette is full! Look for colours you wear often, and well as colours that you wish you wore more. Of course, you can have as few or an many colours in your palette as you choose!


Making a Colour Palette


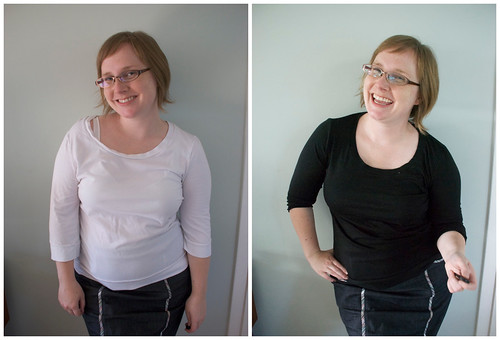
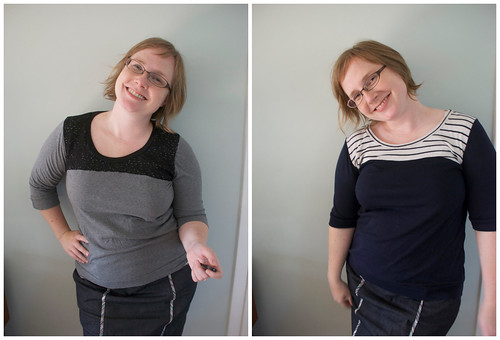
10. Change accent colours to smaller swatches, or include several versions of your favourite colours. I know that I like this light green or white in small doses, but not on their own, so I’ll make those shapes smaller. At this point, step back and check that you’ve got some basic neutrals that will coordinate with your other colours. I prefer navy and dark grey to black or khaki, but it’s up to you! 


Making a Colour Palette


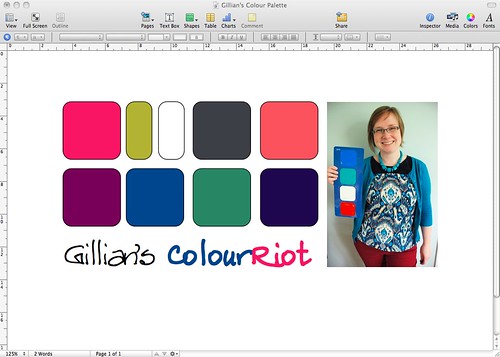
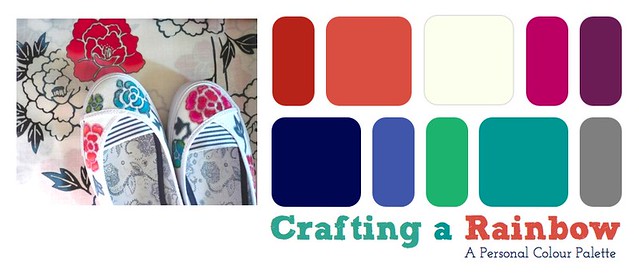
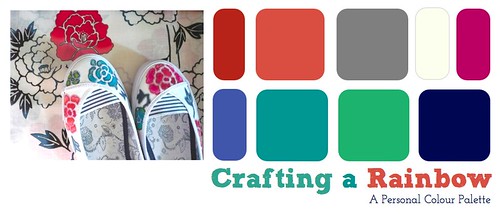
11. Add text and a picture! I like to put a name or blog name on a palette as well as a picture that captures at least some of the palette colours in action. 


Making a Colour Palette


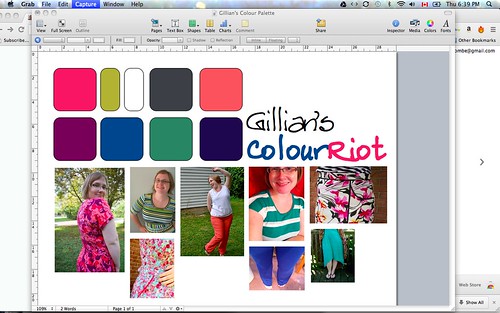
12. Or go wild and add a whole lot of pictures! In this case, these are all pictures of things I’ve made over the summer, which helps me visualize how this palette reflects my summer wardrobe. When I made my sister’s palette, I used inspiration pics for her Pinterest board. Whatever works for you!


Making a Colour Palette


13. Last step! Take a screen capture of your palette, or export it as a pdf. Now you’ve got a snapshot of your favourite colours to wear and create with! 


Now what? Well, here’s a few ideas…


  • If you see fabric (or yarn, for knitters) in “your” colours, buy it! If it’s not your colours, think about whether it will really fit into your wardrobe. (I’m on a budget, and this is a great way for me to walk away from impulse buys!)

  • Look for colours in the palette that you wish you wore more, and buy, thrift or make things to fill that hole. 

  • Go a little crazy, and try out new combinations of colours from your palette! (Hot pink and emerald together, that’s my new fashion goal from this palette!)

  • Talk loudly and often enough about your palette colours, and the people who love you just might keep the colours in mind when they buy you gifts! (It worked for me! ;)

That said…You made the rules, you can break them! 


  • add or change colours anytime

  • try out trendy new colours 

  • make palettes for different seasons

  • wear brighter, lighter or darker versions of your colours

  • WEAR OTHER COLOURS! Wear anything you want. Wear one of your palette colours, wear all of them together, wear none of them when the mood strikes you! 

There is no right and wrong. 


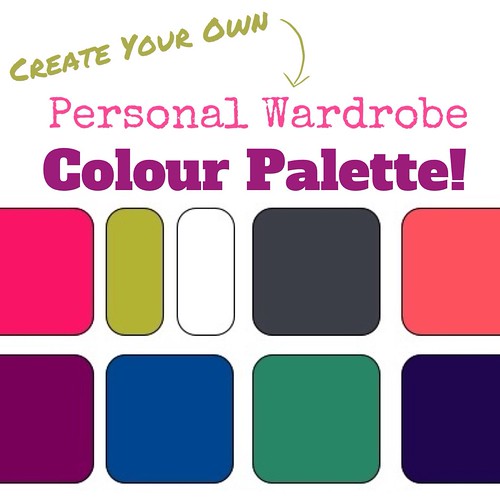
Here’s the palette I just made from recent photos…


Making a Colour Palette


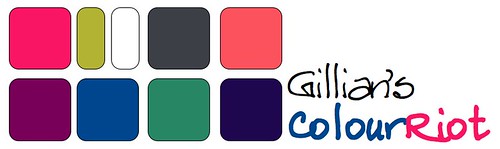
and here’s the palette I’ve been following for the last year


Colour Palette for MMM '13Similar? Yes. Different? Definitely! Neither is wrong though.. they just reflect a summer vs. winter wardrobe, and my shifting tastes over time. My point is, you aren’t going to get your colours “wrong”… It’s just an evolution in taste, style and preferences. So experiment, and have fun. 


Have you ever consciously planed the colours in your wardrobe or stash? Do you make strategic projects to fill a gap, or make whatever the heck you want?


ps. Boy, if you read through all of that, CONGRATULATIONS! I hope it was helpful, at least even vaguely interesting! 


Tuesday, September 10, 2013

Tiramax? Missionmasu? It's a Tiramisu/Mission Maxi Mash Up!

Tiramisu Maxi


Two favourite patterns unite! My trusty Tiramisu bodice (sewn more times than I can count), with my new favourite, the Mission Maxi. (Seriously, this is my 4th maxi with the pattern, plus 4 tanks, plus another hybrid dress! That’s value for money!) 


Tiramisu Maxi


The beauty of the Mission Maxi skirt is that the front and back are cut side by side on the fabric, meaning that it makes use of the full 60” at the hem and has plenty of ease to go over my hips without eating up much fabric. In fact, I’d say this version used about 2m of fabric, just like a standard knee-length Tiramisu!


Tiramisu MaxiThe Mission Maxi pattern has quite a defined hip curve (Seriously, the pattern is pretty hilarious looking) so it’s not an a-line skirt. Instead, it fits closely at the waist, curves right out over the hips, and skims down flaring out very gently to the floor. It’s a great shape for pears like me. A-line knit skirts tend not to have enough ease where I need it! 


Tiramisu Maxi


To add some stability and definition, I added stretched clear elastic at the top and bottom of the back midriff panel. It really helps to snug things into the small of my back! I applied it as an afterthought to the existing serged seams. Easy peasy!


Tiramisu Maxi


The front does seem likely to gape a bit… This is the same line of lovely stretchy, drapey cotton blend knit that I used for my first Tira version, and it gapes too. Guess I should make my neckband even tighter next time? (The bonus of this fabric is that it doesn’t roll at all, which makes it lovely to sew with and means I don’t need to hem!) 


One issue I notice with lots of my Tiras is that the underbust seam doesn’t really snug in under, well, my bust as much as I’d like! FOr this version I did the gathering a little more aggressively, and it seems to be sitting better!


Tiramisu Maxi


Do you ever go back and refit your TNT patterns? I’ve recently had to admit that I’ve gained an inch or two here and there, and probably need to rethink the fit on a few of my favourite patterns. (Maybe that’s part of why I’ve gone so gung ho on knits this year?! The wovens weren’t fitting right!) In the mean time, knit dresses are always going to be my friend! 

Saturday, September 7, 2013

Renfrew Madness!

As I mentioned in a recently post, the Sewaholic Renfrew was the first project I ever sewed in knits. Since then, I’ve made at least 15 versions. Love that pattern!


One of the great things about sewing a pattern many times is seeing how it fits and feels in different fabrics. Just for fun, I thought I’d go back and look at what fabrics worked best for this pattern!


Renfrew Madness


1. The Boring Basics


Stable white cotton knit: WIN! This was my first Renfrew, and despite a few flaws it still gets worn. 


Cheap thin black knit: FAIL. This is that horrible kind of jersey that sticks to itself and pills immediately. Worn only under sweaters!


Renfrew Madness


2. Contrast Yokes


Grey cotton stable knit: WIN! THis fabric is like a classic mens tee, and it holds up really well and doesn’t cling!


Navy double knit: WIN! This interlock is really soft and works perfectly! The contrast yoke fabric was too thin, so I underlined with with tissue knit and it’s help up well. I spray-basted them with quilting spray during sewing to keep the two layers in place. 


Renfrew Madness


3. Pyjama Time!


Thin drapey rayon: FAIL (but PJs, so a WIN!) This shirt is so thin that you can see my bra underneath. The fabric drapes and stretches so much that it’s seriously long with baggy underarms. Best worn around the house!


Girl Charlee Bird Fabric: MEH? Look, lot of people love Girl Charlee, but a lot of what I’ve got from them is this thin knit with heavy ink and poor stretch recovery. This is great as a pyjama top, and my sister gets a lot of wear from her kimono tee in the same fabric, but overall, I’m not a fan of this kind of knit!


Renfrew Madness


4. The Cowls


Oh wait! I had so many Renfrews to photograph that I forgot one of my favourites! Oh well. Let’s pretend it’s there! ;)


Turquoise Rayon Knit: FAIL! This top is a disappointment. The rayon sags, and it’s so thin that everything shows through. Plus, it clings like nobody’s business! I almost never wear this one.


Solid navy stable cotton knit: WIN! It’s plain and basic, but I wear it a lot! The classic t-shirt style fabric gives the cowl some body, and is cosy to wear. 


Renfrew Madness


4. Loose Tanks


Both of these tanks have a loose, a-line shape flaring out below the bust. Technically, I guess this recent #SewcialBee make would also belong in this category!


Thin orange stripe cotton knit: WIN! I love this top in summer! Sadly, the bottom band is a bit thin, and folds up in the laundry… but that’s not the fabric’s fault!


Navy stripe cotton knit: WIN! This is my most worn version! It’s all piled and sad now - I should definitely remake it! The fabric is nice and stable, but also drapes. Since it has a loose hem, I cut the bottom band along the grain. It’s not stretched, so it lets the top hang down loosely. 


Renfrew Madness


5. The Dress!


Cotton spandex stripe: WIN! I cut this one extra snug, but the spandex helps it fit well AND hide what needs hiding! 


(Oh, and I forgot about this dress too!)


So what fabrics work best?


In my opinion, a nice stable soft knit is the best choice! Not something as chunky as a ponte, but something a bit substantial. Rayon knits are a bit too drapey for this pattern - I prefer them for a kimono tee instead. Thin knits sometimes work, but they have to be stable enough to support all the seams… and say “No!” to cheap knits you’ll never want to have next to your skin!  I’m curious to try more versions in cotton spandex. 


What kind of fabric do you prefer for t-shirts (either RTW or homesewn)? Have you made a Renfrew, and how did it turn out? 

Tuesday, September 3, 2013

Lazy Tips for Sewing Knits: Basic Steps for Sewing a T-Shirt

First of all, thank you for the awesome support after my last post. I’m still  working on replying to your comments because I want to give quality replies, but please know the advice and love is very much appreciated! 


Untitled


Now, let’s talk basics. My very first knit sewing project was a Sewaholic Renfrew. It was a total revelation to figure out how quickly and easily I could make a wardrobe staple!


The beauty of the Renfrew is that the neck, sleeves and waist are all finished with a folded band of fabric, instead of a turn-and-stitch hem. That means all the edges are neatly finished, and means all your sewing is hidden on the inside, so you can zig zag or serge without it showing!


Recently, a few non-sewist friends were curious how a basic tee is constructed. I thought a picture was the easiest way to explain  and I thought you might like to see it too! 


Untitled


To-Da! That’s all! Isn’t it easy?


Of course, there are different ways to sew it.. some people like to do the cuffs before the side seams, which works too. I like to do that when I’m sewing a… 


Untitled


I’m a creature of habit, so I like to finished everything with finished bands. It’s easy, it’s fast, and it works every time! (I’ll have a tip soon for how I figure out how long to make the band - that took some experimenting!) Sometimes I use knit stay tape and a lightening bolt stitch do a fold-and-stitch finished on the sleeves. I’ve tried a few methods for hemming, but I’ve ended up with wobbly hems and other issues. I like a nice sturdy band best. 


Wait, is that really a tip? Sew a t-shirt this way! Maybe. Not too sure, but I hope it useful for someone! 


What’s your favourite method for making a t-shirt? Got any good tips for hemming a tee? 

Sunday, September 1, 2013

Dealing With Stress - Not very well, frankly, but I'm trying!

I’ve always has trouble with anxiety - I love being organised and making plans, and then all of a sudden, BAM! I’m overwhelmed and panicking.


I want to control EVERYTHING (except when I’m sewing - which is why I sew!) and I end up with awful stress-related headaches several times a week or more. I’m coming to terms with the idea that probably my next step is to talk to my doctor again I’ve got an appointment with the doctor in a few weeks, but in the mean time, I’m trying to retrain my brain to be more positive. (Thanks to Twitter sewcialists for giving me the motivation to book that appointment!) 


In the depths of wedding-planning/moving-from-Japan-to Canada/quitting-our-jobs-and-looking-for-new-ones madness two years ago, I found it really helped to repeat this mantra: 


Untitled


I like this one because it’s just a bit aggressive and subversive. It’s not about waiting for things to be fun, or hoping they will be one day… it’s about making your own fun in whatever you are doing! 


Which ties to this phrase that I’ve had going through my head ever since the Lady Skater promo shots of Katie_Kid_MD in her badass dress


Untitled


Whatever I’m doing, it helps put a swing in my step to think of this phrase! It conjours up an agressive, take-no-prisoners swagger for me, plus makes me grin wolfishly at the thought of all you amazing Sewcialists watching my back! Like a boss, baby. Work it like a boss!


On the flip side, a good friend was encouraging me yesterday to just focus on one thing I can control: breathing. She’s a veteran of plenty of cognitive behavioural therapy herself (besides all-round awesome), and her go-to response to stress is breathing until she feel centred. She says she practiced so much that it’s become an unconscious reflex now whenever she starts to get worried. That’s what I need - to retrain my brain and body so that it doesn’t freak out so much! I’m going to give it a try myself: 


Untitled


Tied into that, I’ve got another reminder for myself: 


Untitled


My headaches come partly from stress, and partly from the horrible slouching that also gave my RSI wrist injuries. (Remember my physio exercises here? Well, when I do them enough, they also help with my headaches…) When I remember to straighten up, I feel stronger and more confident. I guess my brain is easily fooled by my body! ;)


I’ve been talking a lot to friends and family about stress and anxiety lately, including crying in front of the bloggers at the most recent Toronto Sewing Meetup! It was one of those lovely sewcialists who told me that having positive affirmations really helped her with her own stress levels. She’s really the one who inspired me to try to take control of this anxiety, instead of accepting it as normal. Thanks, secret person! (I think over time I’ve really let myself accept a crappier standard of mental health, and it’s time for that to stop!) 


Which leaves me with one last thought:


Untitled


Again, it’s all about fooling my brain into believing my body. If my face smiles, my brain follows suit and my muscles start to unclench. It’s the quickest way I know to feel better, short of a bear hug from my husband!


Thanks for letting my dump all this out there… it’s cheap therapy! I’ve always found it immensely helpful to hear about other people’s issues and how they stay positive. Mental health is still a touchy subject though, and I don’t want to “out” people who aren’t comfortable talking about it in public!


Still, if you’ve got any advice for me about how to retrain my brain, I’d really love to hear it! 


p.s. I made my slogan-images with the Beautiful Mess app on the iphone, which is a quick and easy way to make your pics hipster-chic! It also works well for making quick text-based images like these.


p.p.s. I drafted this about a week ago, and I’m feeling a lot more in control this week… but I think it’s important for me to be honest with myself about building coping strategies anyway. Better not to leave the learning process for when I’m down and out!