Saturday, May 24, 2014

More Sewing Indie projects, and a Me-Made May Weekly Roundup!

I’ve made a couple other things that fit the Sewing Indie criteria, but aren’t exciting enough to blog about on their own… so I’m just going to mention them here!


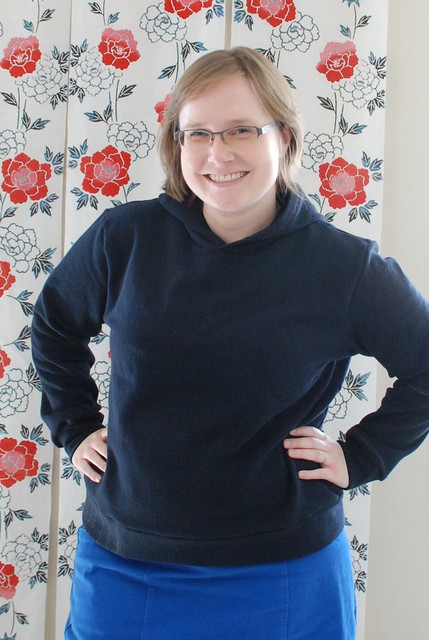
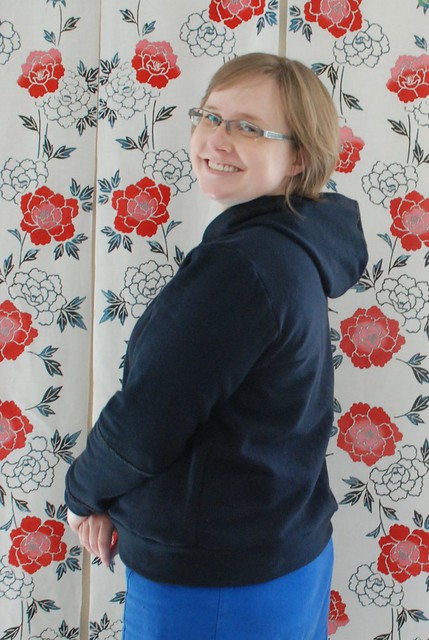
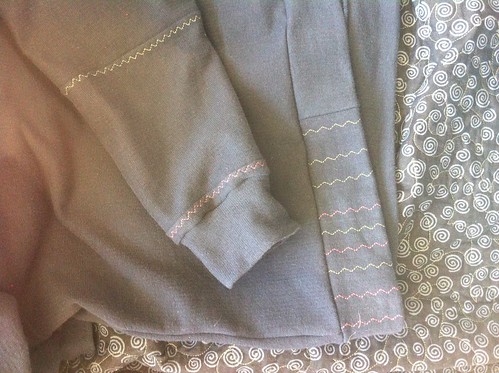
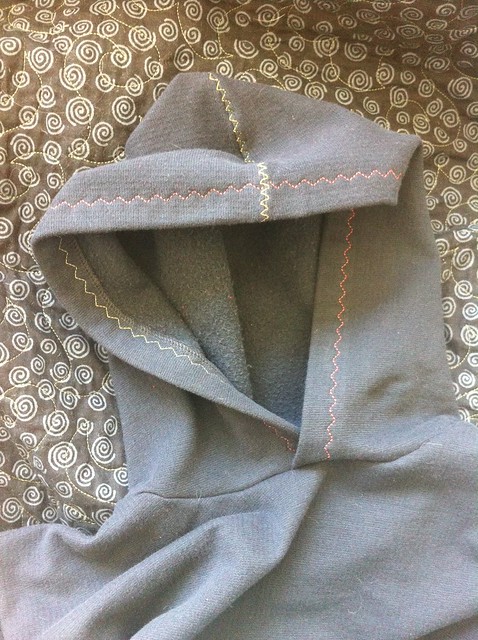
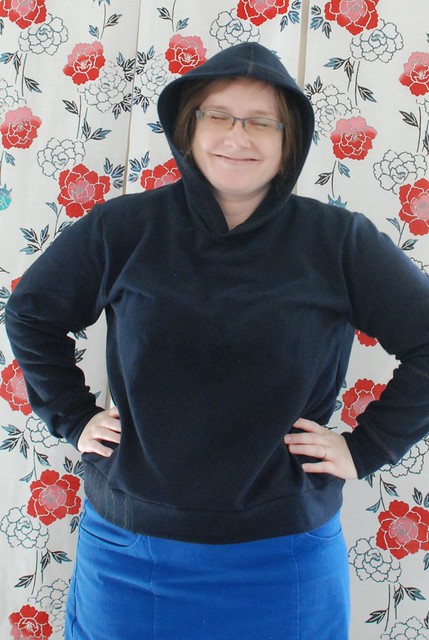
First, another Jalie 3355 hoodie (I’ll have a million of these soon!) and a pair of pj shorts. 


hoodie and shorts Collage.jpg


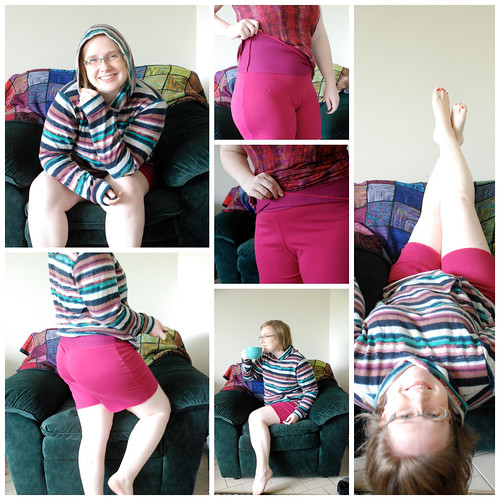
The shorts are a modified version of Maria of Denmark’s Laura Lounge pants, which is a pattern I wear a lot and always recommend to other people. I like to make mine with a foldover yoga-style waistband. I manages to squeeze this pair out of a failed muslin and leftover scrap of fabric, so they feel like a bonus project. (On the down side, I wish I had remembered that this pink ponte bleeds like the dickens before I washed the shorts! Arg.) 


Olivia Collage.jpg


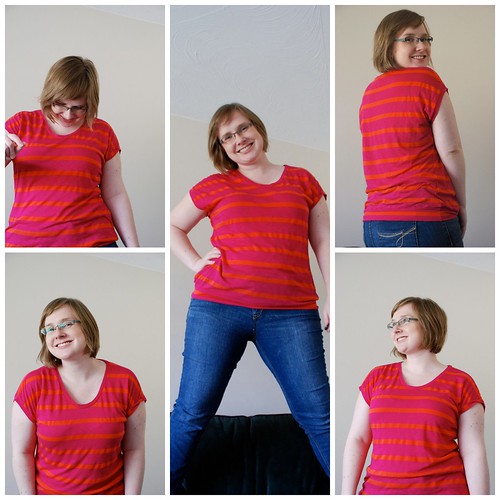
Secondly, another Maria of Denmark pattern: The Olivia Oversized tee. I had less than 1m of this jersey, so I had to cut carefully! (Even so, I had to bind on of the sleeves with the crossgrain, and one of the sleeves with an on-grain strip… but really, who cares? Even I will never notice.) This fabric is THE DEVIL to photograph - hot pink and orange together is not a combo my camera likes! 


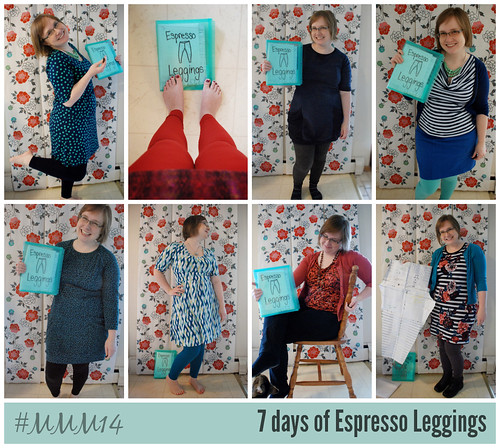
As for Me-Made May… well, I got my wisdom teeth removed on Tuesday and I’ve been wearing me-made pyjamas ever since! Not exactly photo-worthy, and certainly not in keeping with my one-week one-pattern goal. Oh well! 


MMM Style Arc Elle Pants.jpg


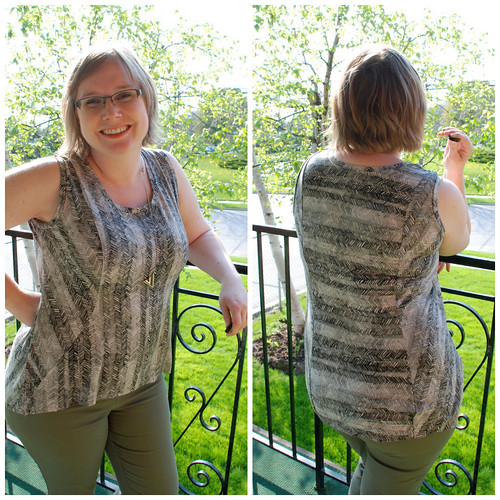
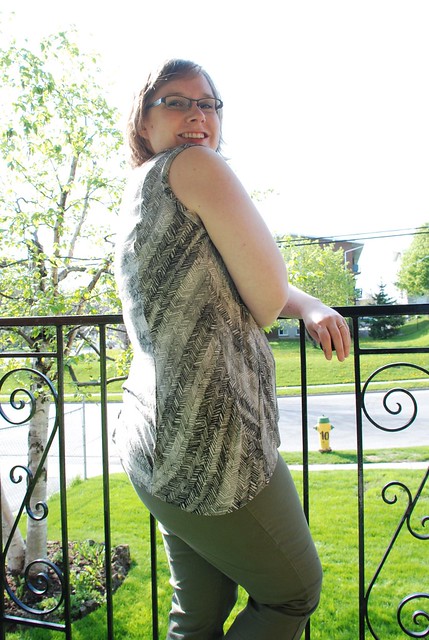
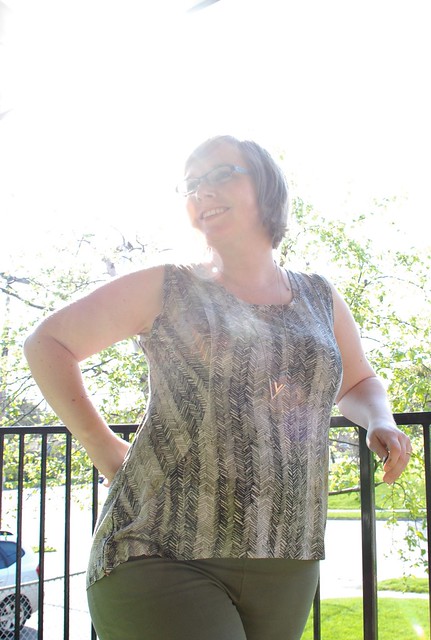
This week I’ll be wearing Mission Maxis every day - including several tank top versions which will let some of my other Elle pants come out to play. I think I’m *almost* ready to try another trouser pattern… maybe. Someday. I guess. 


In other news: 


Remember how I’ve been debating how to spend my money lately? Well, I ordered online from fabric.com, and paid the painful shipping… and it arrived from fabric.com in TWO DAYS! Whaaaaa? It’s always taken weeks before! I don’t mind paying the shipping if it’s going to arrive that fast. 


About half the fabric is what I expected, and half is not… but I’ve figured out a plan for all of it!


  1. I got some Briar Rose strawberry jersey, and it’s go so little stretch it might as well be a woven… but I’m going to make a Scout woven tee which should be fine with the fabric.

  2. The greens (1, 2) I ordered are on the garish side of emerald, not the turquoise side that I like… I actually tried dying them but it didn’t work! However, I started making a hoodie anyway with one green terry, and when I mixed it with navy and white stripes, it suddenly became a new favourite!

  3. Another french terrys was $3/m, and turned out to be super stretchy (good) but also have massive terry loops, bigger than on a towel (bad). I’m debating making a cocoon cardigan with it, but in the mean time, it’s a perfect blanket on my side of the bed! (Anyone else always cold when their husband is boiling hot?) 

  4. All the rest was good! 

What is most surprising me to me is that I’ve felt the predictable urges to go check out the fabric shop… but since I know I’ve spent my whole budget for the month, it’s been easier to tamp down those wants by thinking about my stash. I don’t get the feeling of “enough” with my stash very often, but right now, i feel like “Yup, I’ve got enough to sew for a couple weeks without running dry.” It’s a nice feeling! 

Friday, May 23, 2014

Sewing Indie Month!

Go Anywhere Tank


What’s this? Could it be? A pattern I HAVEN’T made a million times before? Why, yes! 


And no. This humble tank is one of my entries for Sewing Indie month challenge. It’s the Sewn Square One “Go Anywhere” pattern, which is designed to be a woven dress. I wan’t planning on making anything to enter, but Mari and all the other designers have worked so hard to organize it all that I just *had* to jump in! (Plus, awesome prizes!) 


Sewing Indie Month

As it happens, I have made this pattern before… just not in a long time! Here are my summer and winter versions below:


Go Anywhere Summer and Winter


The cool princess seam style lines are the obvious attraction to this pattern, so I chose a kinda stripy fabric and played with direction: 


PicMonkey Collage.jpg


I have trouble predicting what will be a pleasing or flattering arrangement of stripes, so I just cut and hoped for the best. Same with sewing… I serged the princess seams without any pins, because, well, that’s who I am. It all turned out surprisingly well! 


Go Anywhere Tank


That said, there were quite a few alterations to make the tunic/dress bodice fit as a knit tank: 


  • lowered neckline several inches, and could have gone lower…

  • narrowed shoulders (and again, could have gone narrower!)

  • created a high-low hem

  • used bands to finish the neck and arms, pulling quite tight on the arms to bring up the low armscye

  • straightened some of the princess seams slightly, since the jersey would drape and stretch

  • add ease when cutting to make it a looser swingy top… then took out extra ease later on, so who knows it I came out with a net increase or decrease!

Go Anywhere Tank


I had fun taking the photos with my tripod and timer. I’ve been working this week on focusing more carefully (I have to focus it before I jump in frame, and then when I do get in frame the focus is set for the background so I tend to be blurry. Instead, for these pictures I focused on the railings, then moved the camera back slightly so that when I’m in front of the railing to focal length is right for me. Does that make any sense?) I was also inspired by the photo tips from the always-gorgeous Creating In The Gap , who mentions that she likes to stand with the sun diagonally behind her. It was fun to play with a different kind of lighting! 


I’ve really been enjoying the cross-posting between the different pattern companies this month as part of Indie Sewing Month. Along with the Perfect Pattern Parcels and other projects, it seems like the indie world is really joining together. I’m curious to see where that ends up! 

Wednesday, May 21, 2014

Money Matters: Your advice, summerized!

money matters


Hey everyone! I got so much helpful feedback from my recent posts about budgeting for sewing. I’ve been having a bit of trouble thinking how to reply to all the comments without starting to feel defensive, overwhelmed, or saying more than I care to about my finances on the internet… but rest assured I appreciate the input. I thought instead I’d do a round-up of the ideas that came up over and over, so that we can all benefit from the great advice!


Debt and Savings: 


  • Plan for how long you want to take to pay it off, and stick to the plan!

  • Pay your bills and savings first, then live off whatever is left.

Budgeting in General: 


  • Be honest with yourself about what you spend, even when you don’t want to!

  • Try using software to track your expenses. (I found it really useful to track every penny for a month… now I just have to check in to make sure we are more or less on course!) 

  • You can live just fine on less than you might think! (To a point, obviously. This is a good one for me to remember, as we head into 2 months of both of us having no income!) 

Sewing Budget: 


  • Give yourself (and your partner, if you have one) a budget for fun. No guilt about how you spend it, and no justifications needed!

  • Develop criteria for what supplies are worth buying. (For me it’s quality jersey in the right colours for my palette, but maybe for you it’s fabric for a pattern you have in mind or a deal that’s too good to ignore!)

  • If you sew for money, keep those finances totally separate from your personal spending. (Sounds obvious, but I didn’t do this!) 

  • Make room for sewing in your budget, even if it means giving up take-out coffee or other little luxuries. 


budget types.jpg


In my second post, I was also wondering about giving myself a monthly budget instead of a week one, and possibly spending that bigger chunk online instead of being restricted by what I could get locally. You had some great advice on this as well! 


Lots of people suggested I shop in Toronto, which certainly is an option… but when I do go to the fabric district, i find the jersey selection overpriced, dusty, and unappealing! Plus, it’s still an hour and a half each way to get there, plus $7 parking… so in the end, no cheaper than driving to Buffalo. 


The big issue with ordering online is the unreliable quality… but I think I’m ok with that. If I do go the ordering online route, I’d really like to start ordering from higher-quality places like Mood, Emma One Sock or Marcy Tilton, so quality is likely to be less of an issue.


Errors are another issue… but this past fall I had to have Fabric.com reship me some fabric that they sent in error, and they did it without complaint. Even though I’d had the fabric delivered to an American friend over a month earlier, they reshipped the fabric to Canada with no problem.


The last question then, really, if do I pay for shipping or get a post box across the border? Realistically, I think a bit of both! I put in an order this past weekend to be shipped to Canada… but since I know we’ll be in Buffalo in both early July and August, I’ll probably test out a post box then. 


I’ve really enjoyed hearing from all of you about your budgeting strategies! It’s given me a few ideas, and reassured me that we’re already in line with most of you. Thank you! 


Which just leaves me with one question I’ve always wanted to know: For you, is “stashbusting” code for “saving money”? Or would you honestly be happy with less fabric? I’ve been wondering about this for months! 


(In my books more is better. I sew such fast projects that i can never have too much fabric!)

Monday, May 19, 2014

Review: Craftsy "Basics of Digital Photography" Course

Short version: I loved it!


Long version: I loved it, and my pics are already better!


logo


I bought and watched this course, and then rewatched parts of it, all in one day. It’s a $60 course, which is pretty steep… but for once, I’d actually say it might be worth it! I didn’t pay full price though - I buy myself  ”gift certificates” when they are on sale, then cash them in when there is a course I want. (Even now, the gift courses are only $31, and you can redeem it for any class!) 


computer


This is the sort of class you want to watch with your camera in hand. My DSLR is actually on loan from my dad, and I’ve basically just been using it as a point-and-shoot camera that happens to have a remote! Before this class, I didn’t know what half the button on the camera meant, and had no idea how to adjust the manual settings. 


The course is taught by a photography teacher, who clearly is used to explaining what he’s doing and why. The course starts with a section showing you where things are on your camera, then goes through lessons about playing with aperture, ISO, light, and exposure. For each lesson, he takes pictures of a still life or model, and shows how different settings give a different effect. It makes it all seem really practical and achievable. 


As I watched the course I took a bunch of pictures, trying out the different effects… and then later, when I was supposed to be cleaning, I took a lot more! A couple things really made sense to me, and helped improve my pics right away. Here’s a bit more about that!


exposure collage


All month, my MMM pics have been turning out really dark, like the one on the far left. I’ve been brightening them up with Snapseed (my photo-editing program of choice), but I can only do so much before they look grainy or strange. What I learned in the Craftsy course is that the light meter averages out all the dark and light it sees to choose the exposure. Because I’ve got so much white in my backdrop, the camera is choosing a darker exposure  then I’d prefer. The solution is simple: on the top of the camera there is a button with a +/- symbol on it. Push that, and rotate the dial on the back of the camera, and I can force the camera to choose a lighter or darker exposure than it wants too! Yesterday I set it to +1 (lighter), and look how brighter my pic is on the far right! In fact, I think I went a bit TOO bright - but that’s easy to ix now that I know how. 


cat collage


Next up: Almost all my cat pics have been coming out blurry! (And dark, which is the same fix as above!) The course showed me how to set a faster shutter speed on the “S” (shutter priority, or time value on a Canon) setting. That setting lets me chose the shutter speed, and the camera will figure out the aperture and exposure that will give a good shot at that shutter speed. I never know I could do that! Behold, a much better cat pic on the right! 


Here’s a sample of the course that’s up on Craftsy’s Youtube channel: 


I know there are heaps of ways to learn how to use a camera (playing around, reading the manual, online resources, etc) but this course really worked for me. There’s a lot of information that isn’t intuitive yet, so I like that i can easily go back and rewatch a part of the course. If you are a beginner like me, then I highly recommend this course!


(And no, Craftsy isn’t paying me to say this - Wish they were!) 


How confident are you with your camera? Do you have any simple tips that really improve your pics? 


Ps. I drafted this about a week and a half ago, and since then, my fellow Canadian blogger Creating in the Gap posted some great tips about taking pics, which you can read here


Pps. I’m getting 2 wisdom teeth out today! AGGGGGHHHHH! I’ve been avoid this for years. I’m still going to be wearing me-mades (‘cause that’s most of my lounge wear) but I somehow doubt I’ll be looking photogenic! ;) Wish me luck! (And no horror stories, please!) 

Thursday, May 15, 2014

Me-Made May Week 2: Bring on the Jalie Raglan tops!

**First of all, WOW! So many great and helpful comments on my last two posts about budgeting for sewing. Thank you! It’s taking me some time to think through everyone’s advice, and then I’ll get replying and blogging about it again!**


Last week I wore 8 days of Espresso leggings… and this week I wore 7 raglan tops! I bought this Jalie pattern over the winter, and I’ve really enjoyed sewing up different versions. There’s something so fun about sewing raglan sleeves! 


7 days of Jalie Raglan tops!


My hands down favourites are the two sweater knit versions (pinky brown in the top row, and black and white with pink piping in the bottom row). Sweatshirts are mysteriously fashionable this year, and after wearing cardigans ALL the time for years, it’s surprisingly fun to just throw on a cosy shirt and be done! (Unfortunately I forgot how sweater knit shrinks up when it gets stretched with wear, so the sleeves and hem on both aren’t *quite* long enough. Nothing a long tank underneath ca’t fix though!)


I also really like wearing the striped-with-green-sleeves version in the top row. It’s a combo of stash fabric, leftovers from another project, and a chopped-up dollar store t-shirt. You can *also* see that at the sides of the shirt there are contrast strips of the same navy polkadot that I used for the neck. This was inspired by a RTW top I saw online, and makes for a fun detail. (I also tried to ruche the sides, but that didn’t really end up showing at all!) This top has good drape and is super comfy to wear. 


Less successful are the turquoise blue version (too drapey and shows every lump and bump) and the much-altered Cake Carmine that I ended up splicing onto a Jalie Raglan bodice! It’s much better than when I first blogged about it, but I think I’ll be giving this one away!


Looking at the outfits makes me wonder where my “ideal” hemline is - I’ve tried a lot of variations with this pattern!


  • The navy tee, for example, is quite long but has a snug hemband that makes the shirt blouse over;

  • The two sweater versions have a slightly high-low hemband;

  • The two striped versions have a slight baseball hem;

  • And the turquoise on is longer and has a more dramatic baseball hem.

What’s your vote: Straight, curved, or very curved hems for t-shirts? Which do you like on me, and which do you like on yourself? 


PS. Total keeners can read more about each outfit on Flickr


PPS. Tomorrow Elle pants week starts! Woot!

Tuesday, May 13, 2014

Money Matters: How, when and where should I spend my sewing budget?

budget types.jpg


Recently I’ve been thinking a lot about how I spend my fabric budget. How can I get the wardrobe and the most fun from my limited funds?


Right now I have a weekly budget, and I spend it almost exclusively at the local chain store. Fabricland has great sales (I usually buy at 40% or 50% off) and occasional gems. Recently though, I’ve been disappointed more often then not. I go in with money to spend, and can’t find any fabric worth buying! It’s demoralizing and makes me cranky, and my stash is running dangerously low. 


So what are my other options? There are other fabric stores in surrounding cities, but the selection and prices aren’t what I want. I could buy online, but the shipping is awful! 


To show you what I mean, here are two sample order from Fabric.com (left) and Girl Charlee (right). Both orders are for about the same amount… but just look at the shipping they charge!


shipping costs


Over $20 to ship less than $40 of fabric? That’s a 50% increase in the price of each metre I buy! Plus, you never know when customs will slap an extra $20 charge on a package. There aren’t any comparable online fabric stores in Canada, so there is no way around the international shipping if I buy online. 


Or is there????


It recently occurred to me that I’m only 2 hours from the American border, and I could have things shipped to a post box in Buffalo. My brother-in-law goes cross-border shopping at least once a month, and he’s an awesomely kind guy who would pick things up for me. My husband loves driving, and even with extra time added in for a border crossing it could definitely be a day trip! COuld this be my way to avoid shipping costs but not be limited to the fabrics I can buy locally? 


Here are the pros and cons, as I see them: 


weekly monthly


If I could make the Buffalo PO box work, then it seems like a solid option! Maybe not every month, but once a season? Of course you can only bring so much back with you after a short trip over the border, but my budget is small enough that I don’t think that will be a problem. I just need to make sure that I can get a cheap/free post box (which I’m reliably assured I can) and that my stuff would be help there for a few weeks until someone can pick it up. 


Of course, the down side of ordering online is that some of what you get is crap. I’d say that the handful of times I’ve ordered online (and paid the awful shipping) I’ve had at least 10-20% of it be unusably thin knit material. I’m ok with that though as long as the rest is good! Maybe with more experience with different stores I’ll get better at reading between the lines on the descriptions to really know what I’m getting. 


The beauty of pooling my weekly budget into a monthly budget is that I could buy lots at once, and really stock on impossible-to-get-locally stuff. Even if I decide to suck it up and pay for shipping instead, I think that doing a single big order in a month might end up giving me more fabric I really love, instead of buying “good enough” bits and pieces every week. 


Obviously my cross-border method won’t work for many other sewists - it’s all about location! So how, when and where do you spend your sewing budget? Do you shop locally, or order online? Buy small amounts regularly, or save up for binge purchases? SO much depends on what’s available locally to you, and what shipping is like in your country. I’m really curious to hear how you make it work!

Sunday, May 11, 2014

Money Matters: How do you budget for sewing?

Look, I know money is a taboo subject… but it’s also a BIG part of our hobby! And I think it’s time we talk about it. 


money matters


No matter how you look at it, sewing costs money. Whether your sewing budget is big or small, I bet it’s never quite enough, is it? We’re all balancing our hobby with other costs of living or saving for the future. 


I view the money I spend on sewing as an investment in my happiness and mental health. That fabric I buy provides me hours of entertainment, a wearable wardrobe, and a sense of pride and fulfillment. On the other hand, times are tight and there are a lot of other ways I could be spending that money, so I have to get maximum benefit from the small amount I have to spend! 


Over the past 5 years, I’ve tried different kids of budgeting… When I lived in Japan, I pretty much spent as much as I wanted with no regrets. (Oh how I miss those days!) Then I had to majorly cut back, but still didn’t track my spending: If I really wanted it, and the price was reasonable, then I would buy it. For the last year or so I’ve been giving myself a weekly budget (the same amount my husband gets for for spending on his hobbies).  If I don’t spend my budget one week, I roll it over to the next week for a big fabric sale or ordering patterns. I don’t track it meticulously, but I do keep the budget in mind. Lately I’ve been wondering if it would make more sense to have a monthly budget - more on that in my next post! 


budget types.jpg


In truth, I’m not confident in financial literacy. I’m taking a teacher-training course right now about how to effectively teach math, and it’s all about real-life problem solving… Such a shame then, that absolutely NOTHING in school every taught me to manage my money!


We do just fine, but I always feel like our money *should* go further. I’ve tried various programs for household budgeting, like You Need A Budget (YNAB) and Mint.com… both of which are excellent! The problem is, trying to control money tightly makes me panic be no fun to live with. (Jamie is not interested in budgeting either, so if I don’t do it, no one does!) Instead, I try to check in with our overall spending every paycheck, but not obsess over money in the meantime. 


So, ‘fess up: How do you budget for sewing? Weekly, monthly, or not at all? How does your sewing budget tie into your household budget? Do you like to have a plan and control everything, or do you just make reasonable choices and hope for the best? 


Thursday, May 8, 2014

Me-Made May Roundup: Espresso Week!

Untitled


A week of leggings - what bliss!


It was so easy getting dressed this week. I picked out a dress for each pair of leggings and hung them together on a hanger… then all I had to do each morning was pick which outfit to wear first! 


I wear leggings a LOT anyway… probably at least 3 times a week. Teaching little kids is really active, so there is no way I’d wear a dress or skirt without my trusty leggings! 


I do find that fabric REALLY matters for leggings. I don’t like my poly or ITY leggings as much as cotton/rayon ones - the poly has an odd sheen, and feels a little airless. On the flip side, my leggings with only 2-way stretch feel tight over my knees and slide down over the day because of the lack of vertical stretch. My favourite pairs (that in a real week I would have worn more than once!) are cotton with lots of spandex for 4-way stretch, or drapey rayon, again with 4-way stretch. All other fabrics need not apply!


The first leggings I made were a Style Arc pattern, which was certainly very functional. What I really like about the Espresso pattern is that it’s specifically drafted for my short, round shape, with the right high rise that I like. I could definitely achieve the same results with another pattern, but Espresso just makes it easy!


(On a side note, have you seen that Style Arc has released a second pattern inspired by clothes worn by Princess Kate on her NZ/AUZ tour? The first one was one a day or so after she wore the dress! I’m rather in awe of how quickly Style Arc drafts up new patterns, and yet the drafting seems to be quite reliable!) 


Anyhow, here’s what I wore this week:


MMM Espresso Collage.jpg


(For detail of what patterns I wore each day, go to my Flickr set!)


Remember how I bought turquoise wallpaper to use as a backdrop? TOTAL FAIL! It kept falling down, and getting wrinkled and ripped… now there are 6’ lengths of wrapping paper strewn around the living room that I haven’t bothered to pick up. The cat loves playing in the piles, so that’s my excuse to #sewdon’tclean!


As for my outfits… well, even though I’m not strictly following my colour palette like I did last May, it’s pretty clear that those colours dominate my wardrobe! For reference, here’s my palette again:


Colour Palette for MMM '13


So far the only colour I haven’t worn is hot pink! I do have hot pink leggings, but they are capris, and the weather isn’t warm enough here yet. 


I think I’m going to start a week of Jalie Raglan tees tomorrow… I’m tempted to start Elle pants right away, but I think I’d better wear my sweatshirt raglans before it (hopefully) gets warmer!


How is your Me-Made May going? Are you sick of reading roundups yet? There is a lot more action on Instagram this year, as well as the flickr group, which I’m finding is making it easier to keep up with all the action. How about you?

Sunday, May 4, 2014

New Jalie Hoodie!

Woohoo, I made a hoodie! I’ve been dreaming of warm hoodies all winter, and even went out shopping for one (gasp!) but to no avail. Thankfully, Jalie’s newest round of patterns has a great simple pull-over hoodie, and now it’s mine, all mine! 


Jalie 3355 Hoodie


Since it’s a brand new pattern, I thought I’d talk a little more than usual about the fit, just in case anyone is planning their own version. 


  • As you can see, it’s got lots of ease! I traced exactly my size according to the package, but for my next version I plan to bring the shoulders in for a more RTW fit. 

  • I’m short, but with a normal-length torso… so I was surprised that I ended up taking 5” off the length. It was LOOOONG! I may almost have made it s smidge too short, but for a baggy top I like it to end before the widest part of my hips. 

  • I also took about 2” off the length of the sleeves…

  • I did all of my bands in sweatshirt fleece, which worked just fine… but the pieces for both the hips and cuffs were clearly designed for ribbing with a lot of stretch! Lesson learned: Add extra length if you aren’t using a super stretchy fabric.

Jalie 3355 Hoodie


I didn’t have quite enough fabric, so I had to patch one sleeve together out of three pieces… and once I’d done that, I figured I might as well make it a feature by topstitching in bright neon thread! I used a three-part zigzag. It’s not very tidy, but it is a nice bit of fun on such a dark colour. Because of the lack of stretch in the sweatshirt fleece, I also had to add an extra bit of fabric to the hem and… so I added bright zigzags to that too!


Untitled


And then of course, I had to add topstitcing to the hood, too…


Untitled


The hood itself is a nice size, and was easy to attach. It’s unlined, but that would be simple to change. 


Here’s how it look when the hood is up:


Jalie 3355 Hoodie


Hoods: So fun that they give me froggie face! 


And that’s it! I’ll definitely be making more (with kangaroo pockets next time, when I have more fabric.) I like how simple the pattern is. There are some other great hoodie patterns out there, but I didn’t want to deal with lots of seams or a zip. This is gong to be perfect for lazing around the house, and I can’t wait to wear it on a chilly evening at a cottage this summer! 


What’s the most recent pattern you’ve purchased? Have you sewn it up yet?