Tuesday, July 30, 2013

Lazy Tips for Sewing Knits: Cutting Tools

Untitled


Today’s tip is: USE A ROTARY BLADE!!!! Just do it, m’kay? I will confess that I have never tried cutting knits without a cutting mat and rotary blade, so I’m totally biased - I just can’t see how it could be done with any accuracy! 


One of the things that baffled me while watching The Great British Sewing Bee was watching everyone meticulously pin their pattern to the fabric, then cut with shears. That method is so slow, and as you cut, the scissors lift and distort the fabric. A rotary blade and mat lets you cut smoothly and quickly without pinning. 


Untitled


(Look, Ma! No scissors, pins, or even weights!) 


I have a large self-healing mat, which I put on the floor so that the jersey doesn’t stretch or distort by hanging off a table. I also have a smaller cutting mat that I move around if part of the pattern piece doesn’t fit the big mat. (For example, the Tiramisu skirt piece is wider than my mat, so I slide the little mat under one corner.) That lets me cut big pattern pieces without distorting the jersey by shifting it around on the mat! 


cutting tools large rotary


This is the most common size of rotary blade that I’ve seen. It has a 45mm diameter, which is about 2”, maybe? It’s great for straights and gentle curves. Keep your blade sharp, especially for thin tissue knits or cheap jersey - those can be the devil to cut, and leave messy fluff stuck in the cutting mat! 


cutting small rotary blade


This little guy is my secret weapon for tight curves. I’m not sure of the exact size, but I think it’s less than 2cm or 1”. I also use this blade for cutting notches into woven fabrics… I’m much less likely to cut too far than with the big blade! 


Here they are together, for size comparison: 


cutting tools


Do you use a rotary blade to cut fabric? If you use scissors, what do you like about that method? And has anyone had good luck with rotary blade sharpeners? I have one but I can’t get my blades very sharp! 

Monday, July 29, 2013

Pants. Flower pants!

Floral Pants


Pants! More pants! 


Floral Pants


Stretchy, stretchy flower pants! The fabric is a really thin polyester faux-denim, which is definitely not hefty enough to be real denim. Super comfy though - especially because I slashed and spread the whole pants pattern 1” wider in front and back than my previous pants! (Not that you’d know it to look at these - they still don’t leave much to the imagination!)


I only bought 1.5m, thinking that was plenty for capris… You know where this is going, right? I cut out the waistband first, so I wouldn’t run short and be waistbandless… then I cut out the back, with enough height to cover my aformentionedly big behind… and then wouldn’t you know, didn’t have enough for the front piece!?!?


And thus, this is born: 


Floral Pants


I cut up the floral waistband and attached it as the bottom few inches of the front legs! And cut out a waistband from some leftovers denim. Luckily I don’t this the patched part is too obvious - Jamie didn’t notice the seam until I asked him to photograph it up close. Hurray for the power of prints!!!!! They disguise anything!


Floral Pants


In other pants-related news, when I went down to Buffalo (which I will blog about eventually!) there was a fitting expert/teacher at the Sewing Meetup I attended. I asked about the wrinkles I always get under my butt, and she assured me that I need that extra room to sit, and that if I fitted out all that ease they’d be really uncomfortable. I’ve decided to embrace that idea, and not stress about refining the pattern any more. Whether is true or not, it makes me feel better! 


Floral Pants


If you’d told me 3 years ago that I’d be loving floral pants, I’d have laughed at you. (The Japanese were doing it already though - I should have known it would come here, like bright jeans and sock buns!) Do you wear any styles now that you would have scoffed at until recently?

Sunday, July 28, 2013

Hummingbird V3, and a fitting hypothesis!

Yoohoo! Hi! Hello! Down here!


Hummingbird Denim Skirt


Oh hai! 


Hummingbird Denim Skirt


That’s more like it! And what’s that, ANOTHER repeat of a Cake pattern??? What a shock! :P 


Hummingbird Denim Skirt


This one is black stretch denim, with a stretchy waistband and linen piping. I chose the striped linen thinking that it would make it easy to match any colour of tee-shirt, but now that I’m done, and I can’t think what to wear with this skirt! 


Hummingbird Denim Skirt


But now onto the interesting stuff: My big butt! You see, after my first two Hummingbirds, some people were a bit surprised that I thought it was too short for work. The this is, the length was fine for standing, but got awfully short when I sat. Why was this apparently more of a problem for me than for other people? I came up with a hypothesis: The bigger the butt, the more a skirt will hike up in the back when sitting!


Here’s my reasoning: When a pear-shape person like me sits, the fabric has a much longer butt circumference to cover. That means that my skirt would get shorter than someone’s with a flat or skinny tush of the same height! 


Untitled


With that in mind, I made a few changed to the pattern. I lengthened the whole thing by 2”, AND slashed and spread the back centre seam to add an extra 1” on length. That means there is an extra 3” of tush coverage compared to the original pattern. 


Hummingbird Denim Skirt


And here’s the result! See how much the skirt hikes up in the back? I know this is happening to everyone of any size, but I think my booty might make it more extreme. See where the skirt hem sits, about 1” from the chair seat? Imagine the skirt 3” shorter… that’s basically my lady bits barely covered! Fine when I’m sitting daintily at a party, but not ideal getting up and down all day while working with wee kids. This skirt, on the other hand, gets the thumbs up for work! 


What do you think? Do big butts make skirts ride up more, or am I imagining things? How do you deal with the dilemma of skirts getting short when you sit?

Thursday, July 25, 2013

Lazy Tips for Sewing Knits: Finding the Grainline

Untitled


Oh knits, how do I love thee? Let me count the ways: 


  • comfy

  • cheap

  • easy to fit

  • endless prints and fibres

  • fast and easy to sew! 

I’ve blogged about countless knit tees, tanks, dresses, leggings and skirts, so I thought it might be more interested to start talking about my process. Watching other sewists on TV or in person always reminds me just how differently we handle the business end of sewing, from cutting to pinning to sewing to following instructions! 


So here’s my second lazy tip for sewing knits: Finding the Grainline!


grainline


On knits, the grainline is easy to see. The little v stitches on the right side make columns, just like on a knitted sweater. 


grainline straight


To fold my fabric on the grainline, I never match the selvedge edges. As I talk about last time, the selvedges can go wonky, and they aren’t reliably straight or parallel. Instead, I pinch roughly where I want to fold the fabric with both hands, and check the grainline. If the lines go straight down the fold, like above, then I’ve got the grainline. 


grainline crooked


If the lines go diagonally off the fold, like this, then I need to shift the fold  until they are straight. grainline ready to cut


Once I’ve got the grainline, I lay it down on the table and fold the rest of the fabric length. 


Seriously, maybe that’s too obvious to even be a tip? I’m pretty relaxed about finding the grainline before cutting of folding the fabric… As long as you are close, I really don’t find that it affects the finished garment much. Getting it roughly lined up is good enough, unless you have stripes or a symmetrical pattern to deal with! 


(Don’t go cutting things cross grain though - the direction of stretch matters! Ask me how I know…)


How do you find the grainline for knits? 

Tuesday, July 23, 2013

Lazy Tips for Sewing Knits: Trimming the Selvedge

Untitled


I love sewing knits. Sure, I was intimidated by them at first, but once you get the feel for working with them, knits are so forgiving and fast to sew!


There all kinds of great tutorials out there on how to sew knits, but I thought I’d share some of the quick and lazy ways that I choose, cut, and handle with knits! Nothing couture, nothing fancy… just the tricks that I’ve learned along the way. In return, I’m really hoping you’ll share your own tricks in the comments! 


First up: Trimming the selvedge! 


selvedge curl


Knit fabrics and woven both have selvedge edges. But have you ever noticed that when you prewash some knits, the selvedge shrinks smaller than the rest of the fabric?


selvedge doesn't line up


See how the stripes match up near the scissors? But just 10” along the fabric, by the pattern weight, the stripes are already mismatched? If you are trying to match up prints, that can be a big problem! 


selvedge trimThe easy solution is to slice off at least an inch of fabric along the selvedge. (See how the trimmed piece is shorter than the main fabric? If you are dealing with a few metres of fabric, that difference in length can really add up!)  Once your trimmed off the selvedge on both sides, you are ready to cut and sew! 


That’s my tip for now! Next time, I’ll show you my lazy way to find the grainline! 


If you haven’t sewn much with knits, are there any fears I can help you with? If you do sew knits, how did you learn? By trial and error, or by reading or taking a course? 

Tuesday, July 16, 2013

Sewcial Bee!

Oh, the things that happen on Twitter! One minute you are applying to a  certain online sewing match, the next you are planning your own all-fun, all-inclusive sewing challenge! No winner, no loser, no judges… just a challenge, a time frame, and some inspiring sewists from around the world! 


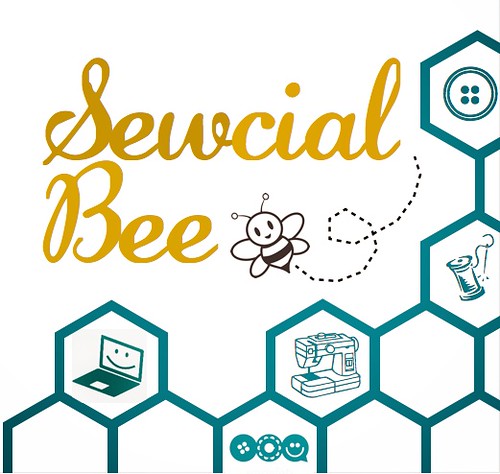
Allow me to present: the SEWCIAL BEE!


Sewcial Bee Logo


Here’s the deal: 


  • At a set time, my dear sister Anne indulged us with a challenge: This time, to sew a top to wear with a favourite scarf! (Anne is a knitter, not a sewer, and even released her own triangle shawl pattern this spring!)

  • We all had 24 hours to sew something and post pics to our Flickr group. (SInce eating and sleeping and caring for kids *may* be important to some sewists, we all limited ourself to just 4 hours of sewing within that 24 period!) 

  • Wait and see what awesome things were made! (Wanna see how each one of us answered the challenge? Click over to our Flickr group!

And that’s it! It sounds dull when I type it out, but wow, it was fun! Adrenaline was pumping, tweets were flying back and forth, design choices were being made with advice from Instagram… it truly felt like a collaborative challenge! We all sewed from our stash, and it was the perfect motivation to make something a little new, a little different. I loved it! 


Here’s how it all went down! 


3pm: Read the challenge. Reread it, wake up my husband and read it to him. Pull out my massive collection of scarves and shawls. (It’s cold in Canada, what can I say?)  Eeek! Which to choose? 


Untitled


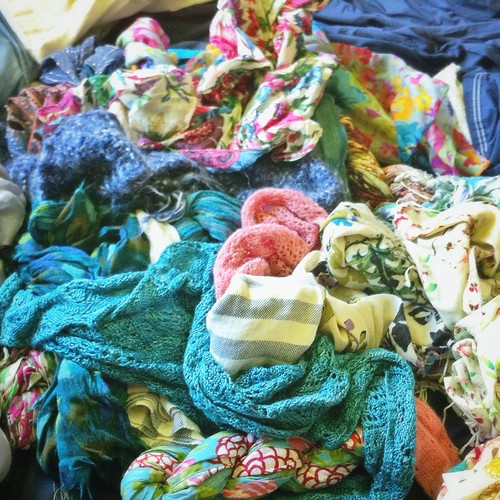
3:15: Ok, I’ve narrowed it down to 4 scarf choices… Too bad I already made and blogged a top designed specifically to go with my favourite shawl! 


Untitled


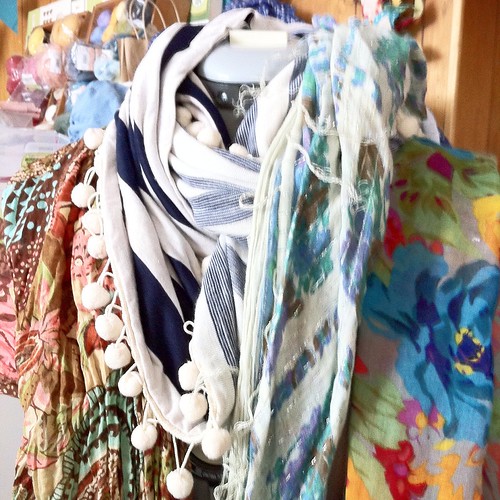
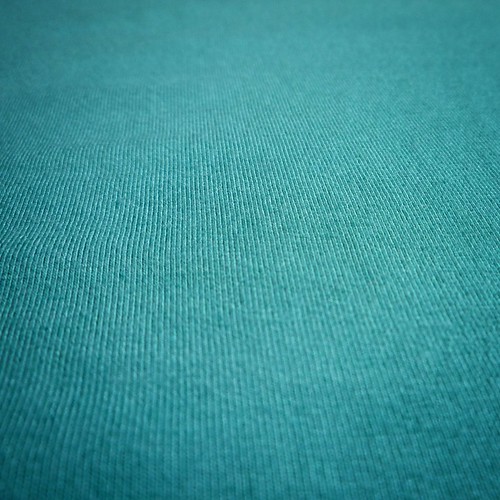
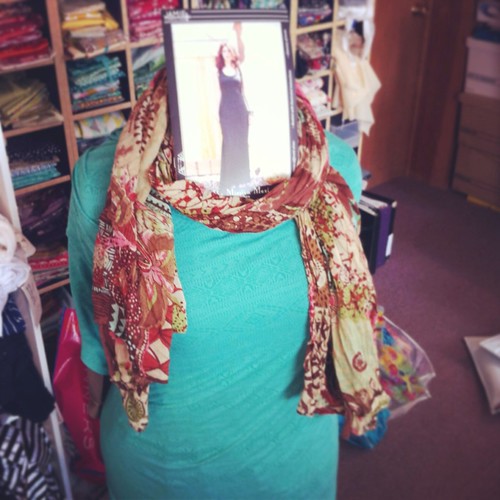
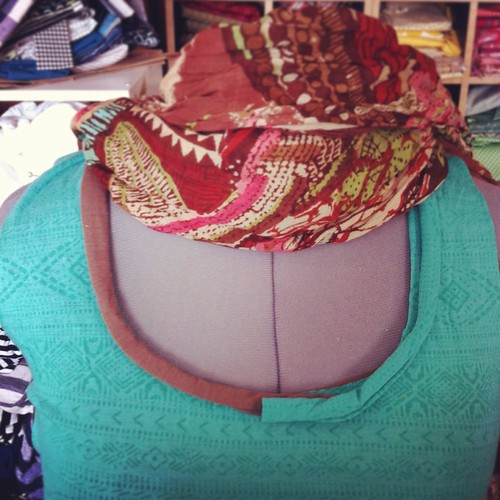
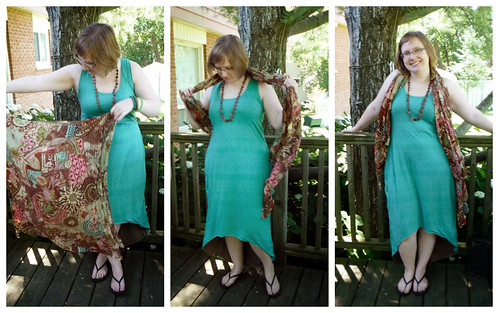
3:25: Ok, picked a scarf! I bought this one in japan at a folk festival on a remote island, so I want to make something to pick up on that hippie vibe… The print is pretty crazy, so I pull out monocromatic knits. Coral or teal? Ask Instagram!


Untitled


3:45: Look through my patterns, poke through Pinterest… Eeek! Why is it taking so long to decide what to make? (Ok, it’s partly because I came home from the gym just minutes before the challenge started, and I’m still eating and trying to stop my hands from shaking! :P)


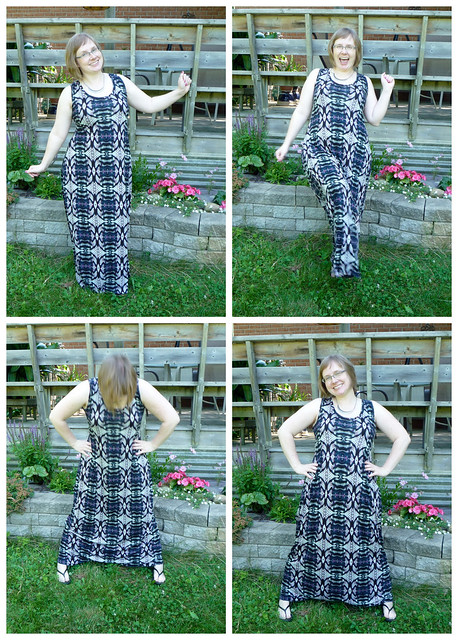
OK, finally decided: It’s going to be a Mission Maxi! I just made one the day before, so I should be able to knock this out in no time… (famous last words!) 


Untitled


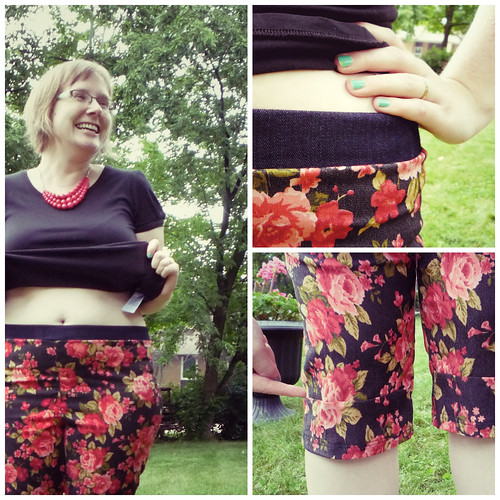
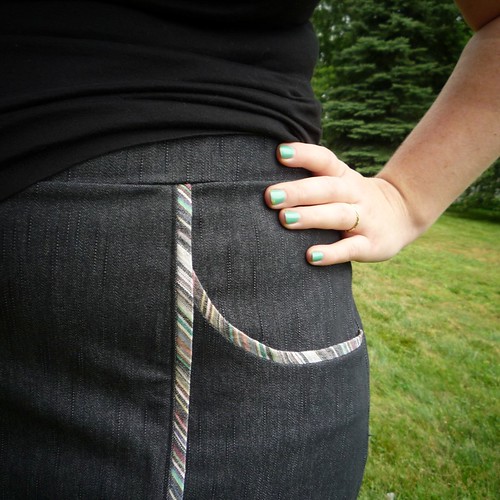
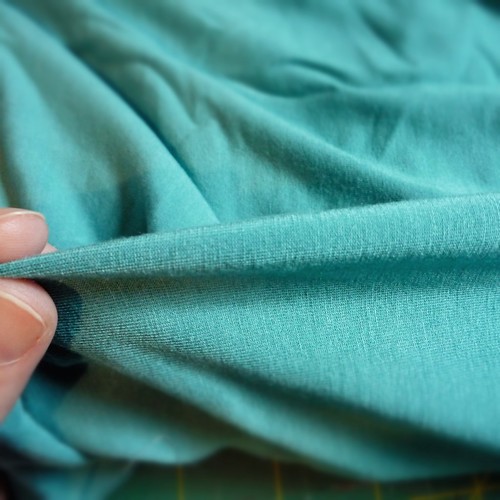
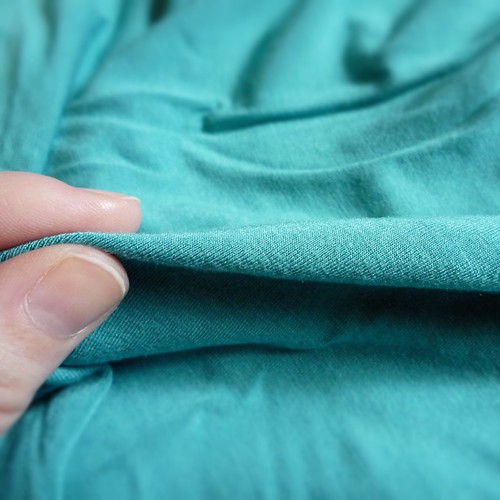
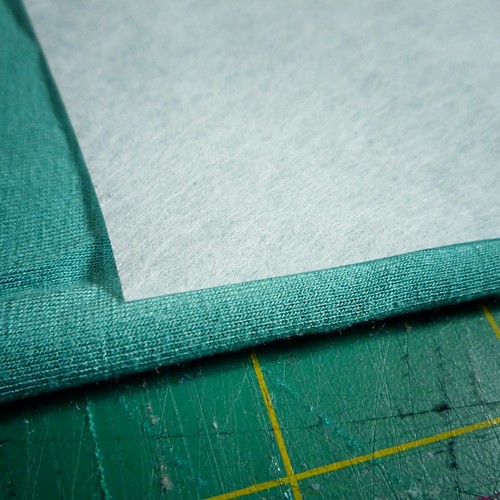
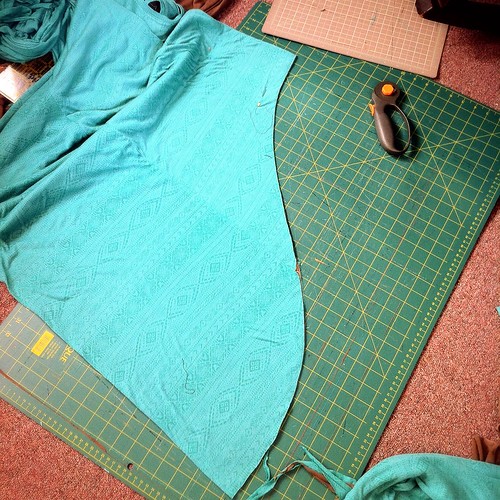
4:00: One hour in, and I’m just starting to cut? Yikes! My arms are totally wobbly post-gym, and cutting this cheep jersey is a nightmare! It’s a tissue-weight burnout print, so I’m lining it with a coffee-brown knit to a) make it opaque and b) bring out the contrast in the burnout areas! Both fabrics stick to themselves and each other like velcro though… this is gong to take a while!


4:30: All cut out. Use spray glue (for quilting) to glue the upper bodice of the teal and brown layers together. Check in on everyone else’s program on Twitter! Start sewing! 


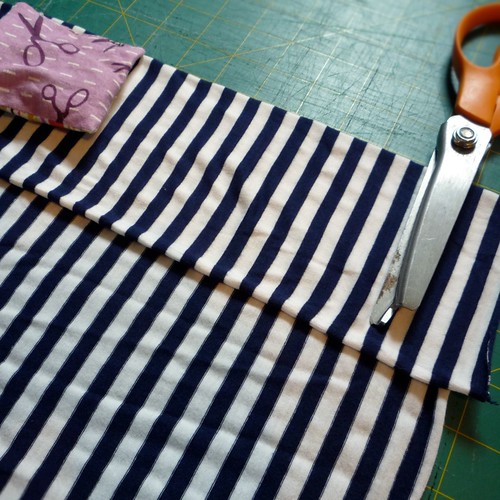
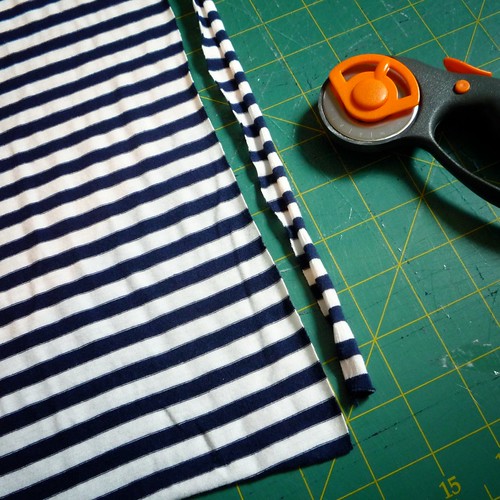
5:00: Ask Instagram - contrast or matching binding? Cut out contrast binding, fight to iron a fold… decide to use matching binding instead! 


Untitled


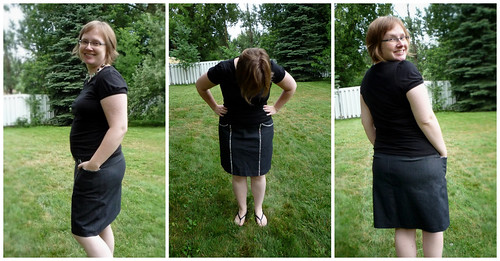
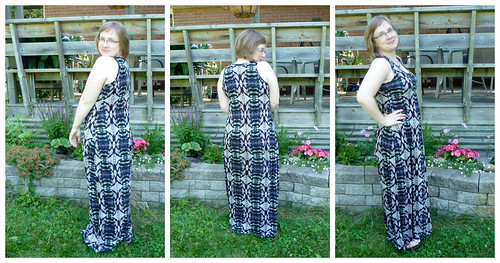
6:30: Time to live on the edge! It’s high-low hem time! (‘cause there’s nothing like taking a finished item and free-hand cutting a new hem!)


Untitled


6:55: 5 minutes left and I’m DONE! Remember when I thought this was going to be a quick make? The way the jersey clung to itself really slowed things down! 3h55m! 


Untitled


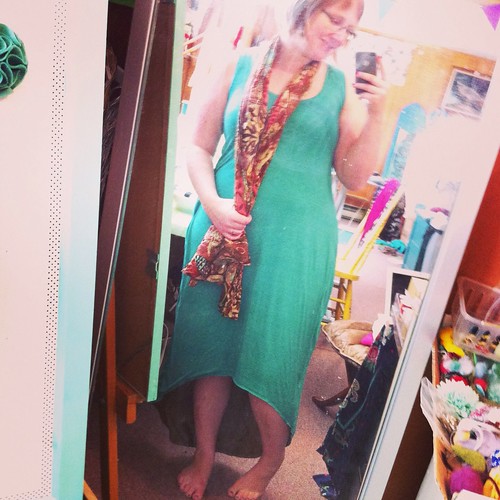
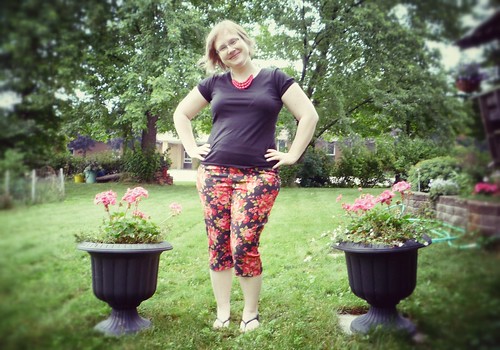
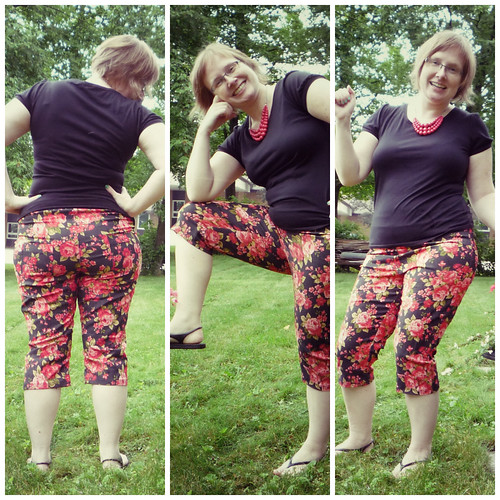
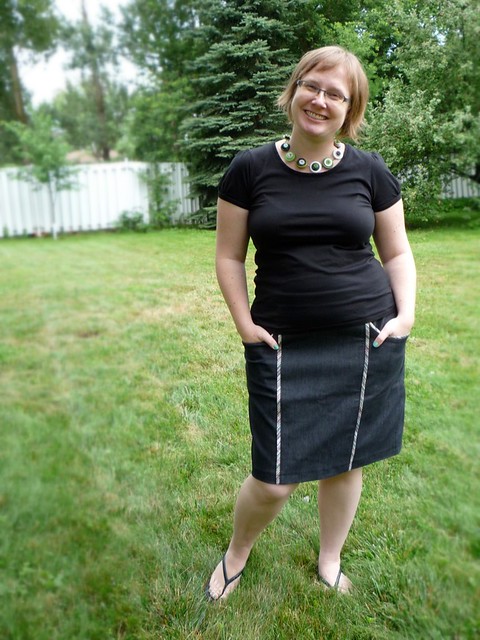
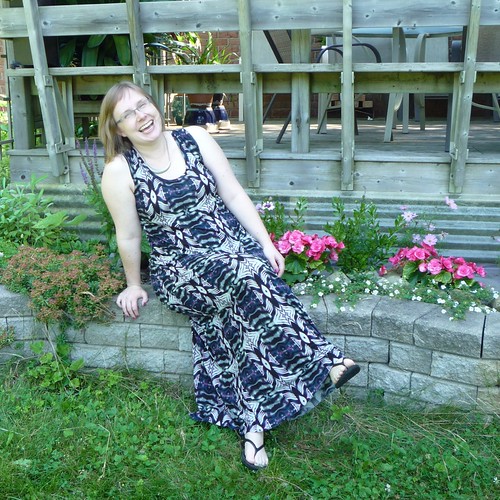
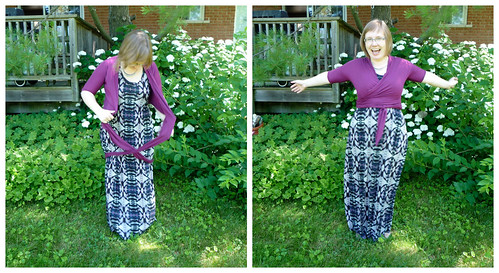
Voila! My Sewcial Bee dress, completed! It’s exactly what I would want to wear to a music festival in the summer, and works well with my shawl, as per the challenge


Sewcial Bee Mission Maxi


So, would you like to join the Sewcial Bee next time? We did this round with just a handful of people who happened to be on Twitter as we discussed it, but we had so much fun that we’d like to do it again. Maybe August 10th? There’ll be a new challenge and a time frame that’s hopefully flexible enough to work for everyone. (And if it doesn’t work for you, you could always choose your own day and sew it later!) We’ll post more info in August! 

Monday, July 15, 2013

Mission Accomplished!

If you are around the blogosphere much,  you know awful puns about “missions” can only mean one thing…Mission Maxi!


… someone made a Mission Maxi


There isn’t much new to say about this pattern - it’s well known, well drafted, and simple to sew. It is also my ideal summer dress. Cool, comfy, and fun to wear! I made a few tanks from this pattern last month (like the striped one here) so it’s already earned it’s keep!


Mission Maxi!


Impressively, this dress can be made with less than 2m of fabric! I made a size 16 on top, and 18 from the waist down, and I could still cut the front and back side-by-side across the width of the fabric. Win!


One of the other lovely things about this pattern is that it’s drafted to be snug at the bust then curve out quite dramatically over the hip. This means that the top fits snuggly, but the waist and hips skim nicely! A definitely win for pear-shaped women like me! 


Mission Maxi! 


One modification i’ve made to all my versions is to widen the straps and use my own binding pieces. I want the dress to comfortably cover bra straps, so I added about 1cm to each side of the straps. This reduces the racerback shape, which is too bad, but does make it a lot more practical to wear! 


Mission Maxi!


The fabric I used is a nice drapey knit from the ends table at Fabricland… I think it was about $5/m? (As you may have noticed, there were some, uh, issues with pattern placement, but that’s nothing new!) I top-stitched the bindings to add some stability, even thought that’s a stepI usually skip with t-shirts etc. Didn’t hem it though - why bother?Mission Maxi!In other happy news, this dress is perfect with my Pavlova wrap top


And that’s that!


I made this dress 2 days ago… and I’ve already made another since. I think I’ll be making a few for friends/family as well… it’s so easy to sew and fit that it’s a perfect gift! 


My mind is blank of topical sewing questions to ask you, dear readers, so instead: Is it unseasonably hot where you live? What’s your perfect summer outfit? 

Friday, July 12, 2013

Toronto Sewcialist Facebook Group!

Toronto Sewcialists Logo


Hailing all local sewists! (Sorry, those of you elsewhere!) I started a Toronto Sewcialist group on Facebook, and you can join it hereI’ve been really impressed with how active and useful the Buffalo Modern Sewing Facebook group is, so I thought, “Why not have our own?!” 


Now, I know Facebook is not for everyone… in fact, most of the time I avoid it! If anyone has a better idea or a suggestion, I’m open to it! (likewise, let me know if you have any trouble finding or joining the group! This is all new to me…)


Header


There is talk of at least one or two meetups in T.O. this year, which might be easiest to organise with a FB group. Adrienne and I organised out winter meet-up via email, and it got rather tricky to keep track of everyone! If you live in or near Toronto, or are going to be passing through, please join the group chat about your current projects or questions, and we’ll plan those meet-ups!


**What is a “Sewcialist”? Someone who sews and participates in the online community through social media like blogs, twitter, facebook etc!


Sunday, July 7, 2013

Buffalo Bound!

buffalo


I’m going to ‘MERICA!  An epic journey… a whole 3 hours from home, all the way to Buffalo! (Perhaps not the most glamourous of American cities… I don’t really know what to expect! All I can think of is this amazing Cleveland tourism video - “At least we’re not Detroit!”) 


My husband is going to a 3-day Harsh Noise music festival for a second year running, and this time I’m tagging along for the trip. (What is Harsh Noise Wall, or HNW? It’s the sounds of mic feedback, static, and environmental noise mixed together with no melody, beat, song structure or lyrics… like this. It’s not for the faint at heart!) 


I won’t be going to the festival though - not my scene! Instead, I’m really looking forward to tracking down local sewists and fabric shops! I’ve already signed up to go to a Buffalo Modern Sewing group meetup, and I’ll definitely be checking out this independent fabric shop. I’m even hoping for a meet-up with Rochelle from Lucky Lucille 


logo collage


Beyond that, I’m fascinated to actually visit American chain fabric stores! Sure, these big chains seem to have a bad reputation… but the siren call of cheap fabric is too hard to resist! 


  • American bloggers are ALWAYS talking about their Joann’s coupons… Is Joann the biggest chain of sewing stores?

  • Mary keeps mentioning fabric  from Walmart? (My Walmart used to have a big fabric section, but now they just have horrible quality pre-cuts.) What’s the deal?

  • We have Micheals in Canada, too, but they don’t carry fabric - Is it true that they do in the States?

  • And what about Hobby Lobby and Hancocks? What do they sell?

Gah! My head is spinning - American sewists, please help me out! What’s the difference between all of these options, and where am I most likely to find fabric worth buying? 


Thanks for your help!