Monday, November 28, 2011


T-Shirt Necklace


I made this a while ago, as part of a goal to turn more of my Pinterest inspiration into reality. I tried a few designs, and I’d like to make more… but there are still some design details to fix. Somehow, when I join the ends at the back and wrap them in jersey to hide the mess, I end up with a bulky “handle” at the back of my neck! I wonder how other people avoid that. 


Stretch Pencil Skirt!


This skirt was my first time ever sewing with jersey! I don’t have a serger, so I used a narrow zigzag for the seams. I copied the shape from a skirt I love, and cut it out with a rotary cutter (also a first!) I love the idea of sewing clothing, but I usually get to intimidated. This was the perfect easy project!

Monday, November 21, 2011

Felted Ball Ornaments Tutorial - Felting with a Sweater

Felt seems like the perfect material for Christmas ornaments to me - It’s warm, cozy, and imperfections just add to the handmade quality. Last year I made felt ball garlands, so this year I was looking for something new to try. 


Materials: 


  • styrofoam balls (Mine were $2 for 10 at the second hand store. They were wrapped in ugly fabric, which I either peeled off for needle-felting, or just left on when felting with sweaters)

  • a pure wool sweater ready to be given new life! 

  • hot water and liquid dish detergent

Here’s How: 


  1. Cut the sleeve: The sleeves of a sweater are perfect for this. Cut a tube of sleeve that just a bit longer than the diameter of your styrofoam ball. 

  2. Sew one end closed and insert the ball: Use a running stitch to cinch one end of the tube tightly shut. Insert the ball into the tube, and push it tightly down to the end you just sewed up. 

  3. Sew the other end closed around the ball:  Pull the tube snugly up around the felt ball, and sew the other end closed.Sew the other end shut.

  1. Wet felt: I like to wear rubber gloves for this part, but it’s up to you. Run your tap water as hot as you can. Get the ball wet, and add a tiny drop of dish soap. Roll the ball around in your palms, adding more pressure as the wool tightens up. Every 30 seconds or so, run the ball quickly under the hot water to help the felting process. I find it usually takes just a minute or two to felt. The ends where you gathered the tube shut are a bit bulkier, so really add pressure to those sections. When the whole ball is tight and smooth, you are done!

  2. Embellish: Once the ball is is dry, I like to use embroidery floss to add detail. It’s surprisingly easy to sew on the round ball! If you want to use your ball as a tree ornament, then don’t forget to add a loop to hang it with.    

  3. felted ball and finished ball.

The ornaments are really cheap, quick and easy to make! I hope you enjoy the process as much as I do!

Sunday, November 13, 2011


(Attempting a ) Manly Christmas Ornament!


Using a second-hand styrofoam ball as the base, I needle-felted some charcoal wool. It was quick and easy, and the wool held in place when I wet-felted it. I wanted to glue on shapes cut out of grey-green felt, but I couldn’t get it to stick well with either white glue or hot glue. Darn. Embroidery was much easier - but I’m not sure that spirals really meet my goal of making some more masculine Xmas ornaments. Still, I enjoyed the process, and I’m looking forward to trying more!

Friday, November 11, 2011


Cashmere Cowl


I’d like to pretend that it’s the artificial light making this photo so orange… But no, that’s pretty much the real colour! I bought this sweater to felt, but it didn’t tighten up the way I wanted… So I cut off the torso and made this cowl! I couldn’t figure out what matches orange, so I used some Noro wool to embellish it. (I’ve never loved the colour of this wool - is it a bad sign that it matches the sweater perfectly?)

Thursday, November 10, 2011


Accomplishment #1: (Not that kind of) Remembrence Day Wreath


This started off as something completely different… I was going to use all 10 colours of felt that I recently ordered from Prairie Point Junction online, but I liked the combo of gold, red, and grey so much that I stopped there! I threw in a wee bit of green for good measure at the end… and used a large white felted sweater floer that I’d made before by needle-felting sparkly fluff over cream wool. All of that glued onto a 29 cent wreath from the Sally Anne, and I was done!

Goals

Lately I’ve been thinking a lot about consuming vs. creating. I love looking at craft and sewing blogs, and saving ideas to Pinterest… but I think all that online activity stops me from spending time actually MAKING things. Do you find the same thing? How do you balance inspiration with creation?


So here’s my goal: As often as possible (that’s the lazy woman’s version of “every day”), take a Pinterest inspiration and turn it into reality. Make it! Sew it! Glue it! Get it done. Doesn’t have to be perfect… doesn’t have to be well planned… just craft for the joy of it. I’m a perfectionist in other areas of my life, but craft is my one escape: I love the process more than the product. By setting a goal to make more and view less, I’m hoping to keep sane by keeping crafty. 


Of course, I’m not sure how the blog plays into this.. here I am writing about crafting instead of actually making anything! I’m hoping that the reflection and motivation to post drives me to create.


(And now: To make something with these lovely felt balls!)


One of the joys of setting up the craft room has been decorating it! Here’s a closeup of one project - A felt aplique pillow based on Betz White’s design in Whip-Up Mini Quilts. It was really fun to sew… less fun to cut away all the little sections of felt between the stitches! I’m hoping to make another one soon. Perhaps it will become my first tutorial?


My newest acquisition!  4 IKEA cd shelves which are perfect for storing and displaying fabric! Now I can sit in my armchair and enjoy all the beautiful colours!

A love letter to my craft room (and my husband!)

I’m so thrilled to finally be making myself a craft room that I just had to share! I’ve wondered about it for a while - I love getting inspiration online, but I feel like it’s time for me to give something back to the community. No matter how small or insignificant, I’d like to at least contribute a new idea or two in return for all the jo of seeing other people’s work every day!


After moving home from Japan (along with my precious Japanese crafting supplies!), I tried sewing and crafting in our bedroom for a few months… but that left me stumbling over half-finished project on the way to the closet each morning! 


To my eternal gratitude, J decided that I needed a craft room of my own. One night, he bravely shifted boxed, furniture, keepsakes and piles of junk to make a basement nest for me! About half the room is still piled high with stuff, but the other half is ready for sewing, felting, hot glueing, and whatever else strikes me! Truly, I’m so grateful to have a husband who understand the value and importance of a well-curated collection of things one loves, in a place of one’s own! Thank you, my dear!


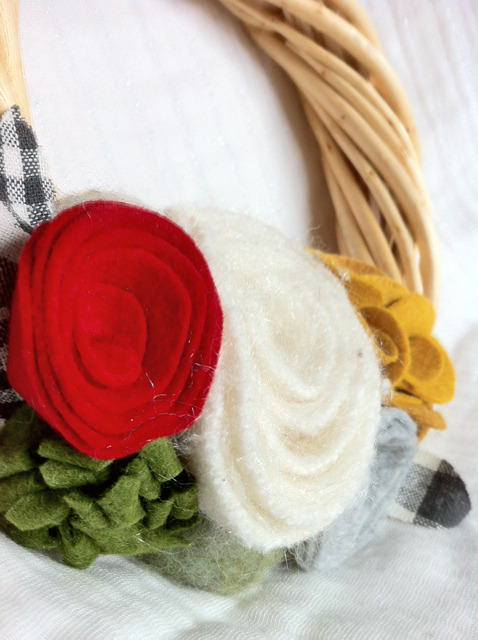
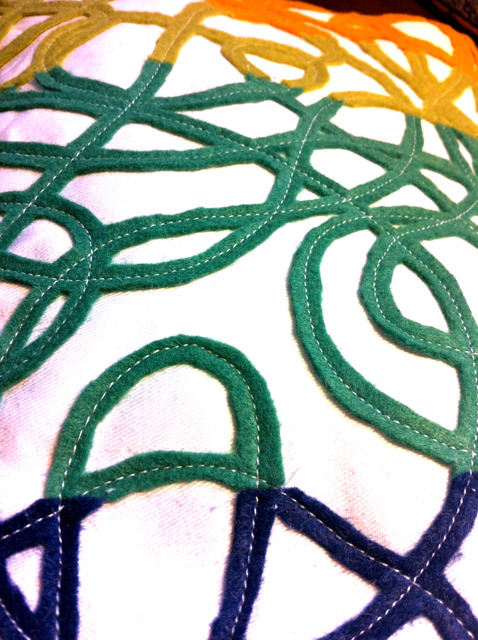
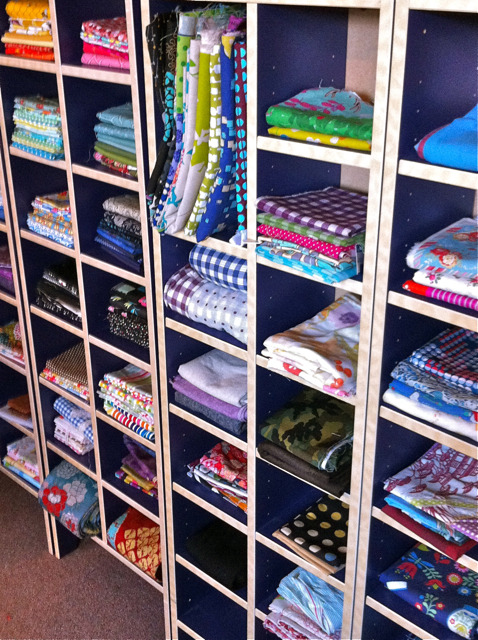
More to follow later… Sewing, stamping on fabric, needlefelting, and lovely stacks of fabric to come!