Monday, October 29, 2012

Quick Project, Quick Post!

Grainline Scout Woven Tee


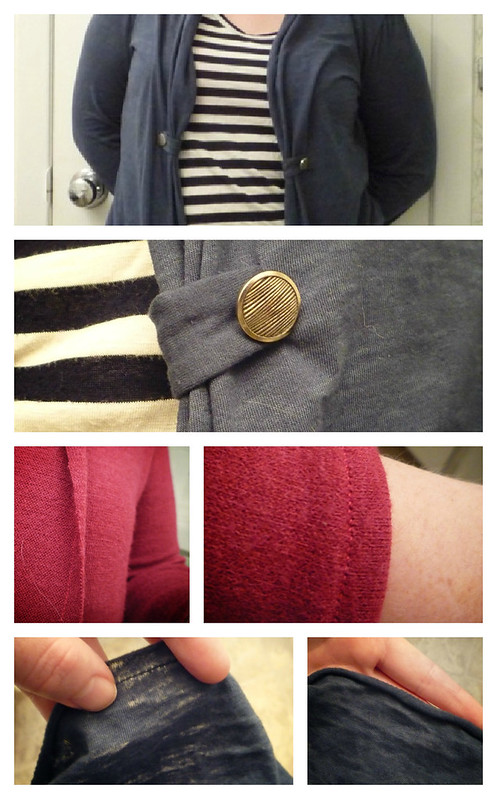
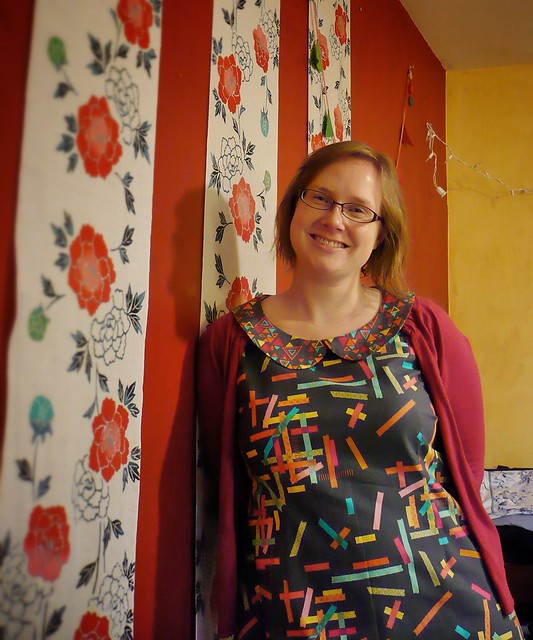
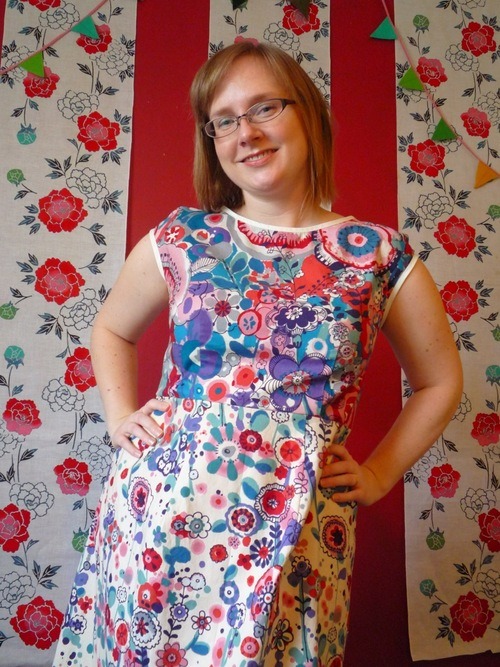
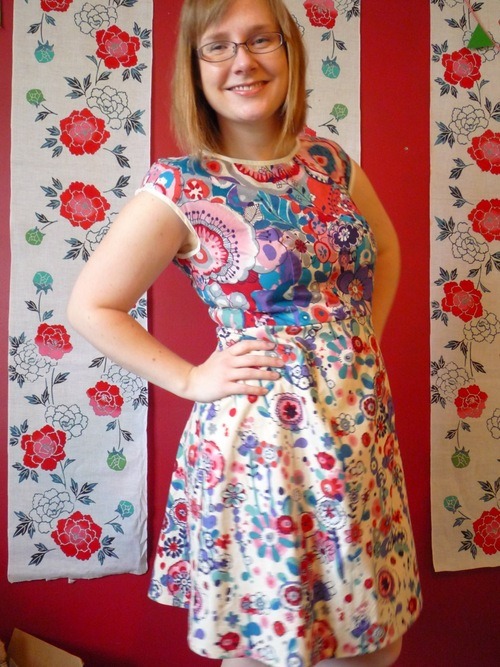
I made a Grainline Scout Woven Tee! And the pattern is just as great as everyone says.


Grainline Scout Woven Tee


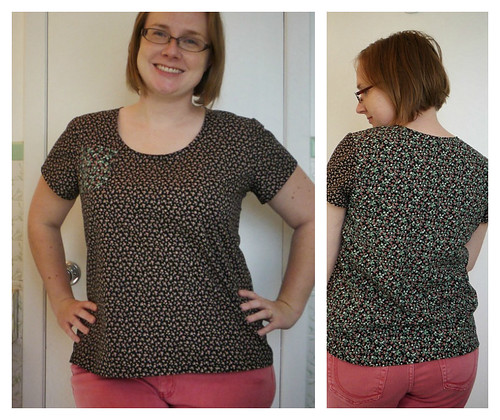
Even though is has no darts, it fits better than any of my Sorbettos. There is a perfect amount of ease across the back shoulders, and the sleeves aren’t restricting. Of course, loose shirt are never the most figure-flattering… but I’m loving them this year anyway! The neckline is a nice size… open, but not anywhere close to revealing! 


Grainline Scout Woven Tee


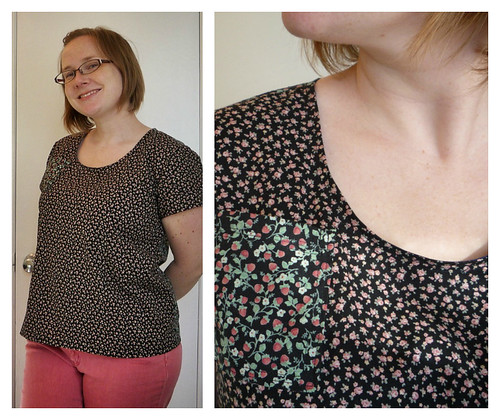
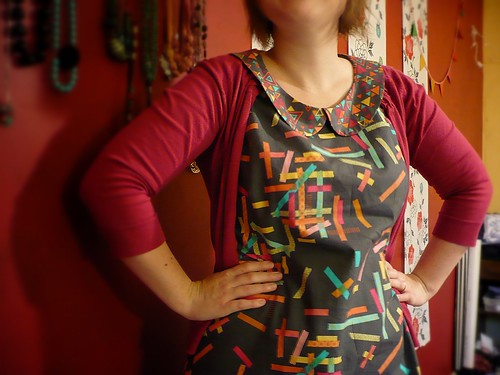
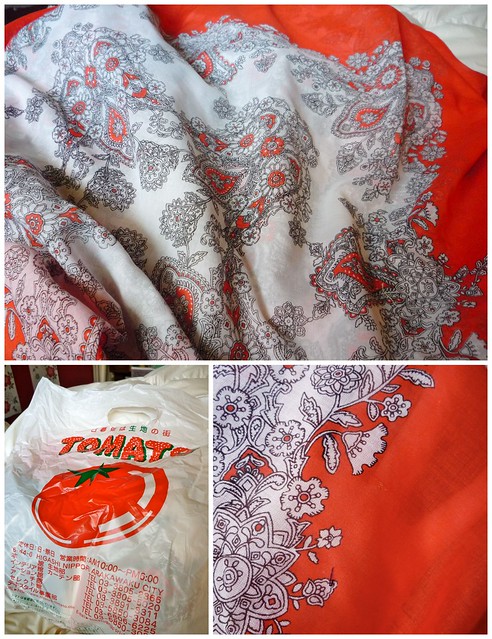
It only took about 2 hours to whip this up, including taping together the pattern. I used two 1m cuts of Japanese quilting cotton that I bought on Etsy. The front is little roses, and the back in mini strawberries! A little more twee than I usually choose, but it does make for a fun outfit with my pink jeans. 


Speaking of which, remember when I posted last spring about how I wear and love pull on “mom” jeans? Basically, my favourite pants are all stretchy pull-ons with a wide band at the top that sits at the true waist and keeps everything neat and tidy. (Let’s be honest: Like maternity pants for the non-pregnant!) Well, I bought these cheap coloured jeans at Walmart for $12, but they were WAY to low-cut and created the inevitable muffin-top look! Time for a quick mod into my favourite matronly style!


Modified jeans - From low-rise to pull-on!


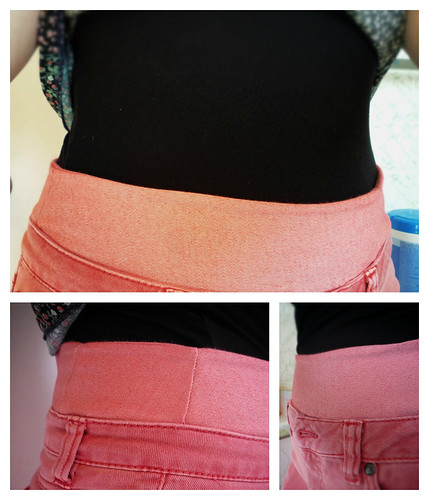
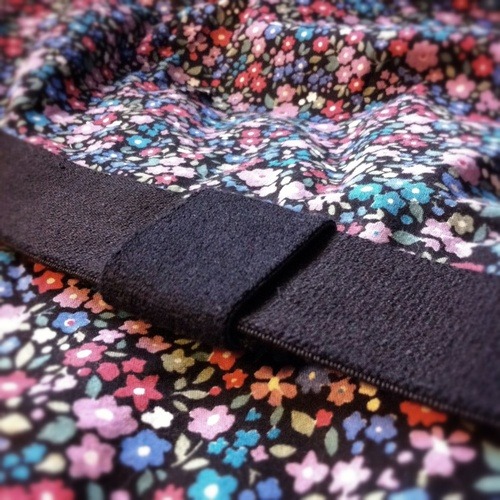
I ripped out the button (makes a bump through shirts), and sewed them closed… then added on a shaped wide waistband above the original. It’s two layers: Outer waistband and facing, both made of the same stretch denim which just happened to match! As you can see, they now sit much higher, which means I’m safe from wardrobe malfunctions. They sit smoothly all the way up and stay in place, so no more muffin-top where they slip down and cut into my ample tummy. It’s not exactly fashion-forward, I know, nor something I’d wear if I were single and going on a first date… but it makes them much more practical for my body shape and my lifestyle! (These pink pants are also going to be part of my Hallowe’en costume this year!)


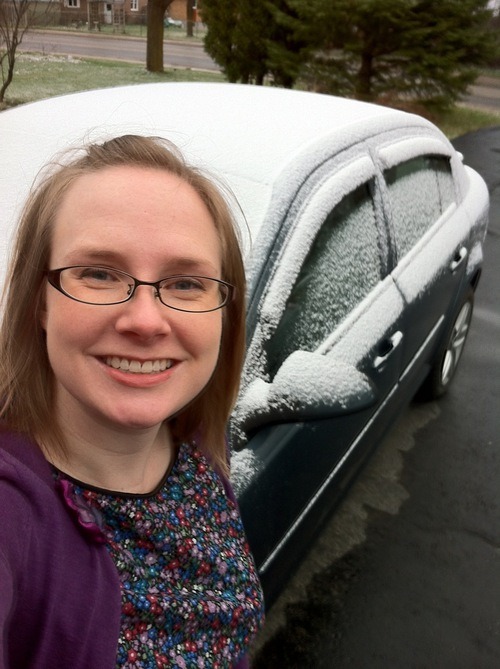
Now that I’ve made my first Woven Tee, I’d love to make more out of some drapey challis… but it started snowing today, so that might just have to wait for next summer!

Saturday, October 27, 2012

Sewing for School

My favourite part of teaching young children is how completely they dive into play. Last week I set up a little “house” centre for the in the classroom - nothing fancy, just a few dishes, a saucepan, some tablecloths, plastic dishes, and a 2-d kitchen sink and stove made of paper and taped to two desks. They LOVE it though, and it is just wonderful to see them diligently “washing” dishes and inviting the neighbours for some imaginary mac and cheese! Heartwarming and adorable. 


One thing our “house” is lacking is some dolls. There’s something about a baby doll that brings out the best in children: nurturing, caring, and taking responsibility. I asked the class for donation, but didn’t get any… so instead, I made some!


Sewing for School


Voila! I love sewing with felt. It’s so quick and easy! I usually use wool blend felt, but I was lucky to find a stash of cheap craft felt left in the basement from my Mom’s teaching days! Even better, there was a great range of skin and hair colour options - which is lucky, because my own felt stash is all rainbow colours and no basics at all. I painted their faces on with acrylic paint… complete with rosy cheeks to make them extra kawaii (cute)!


Sewing for School


I tried a couple of different consturction methods, so each on is, um, unique. I had fun trying to make them as gender-neutral as possible (except perhaps for the blond with long hair and a floral shirt!) Better to let the kids decide what fits their play best. I looked at all kinds of beautiful softy patterns on Etsy and Pinterest before I started making them, but decided just to draft my own. They are nothing fancy - Each only took about 30 min from start to finish. I think that sometimes simple toys allow kids to use more imagination… and on top of that, I’m lazy! 5 year olds aren’t exactly gentle with their toys, so these little guys need to be ready for a rough and tumble life. If I was sewing a special gift for someone in particular, I’d probably be more careful!


Sewing with felt was so fun, though, that I just couldn’t stop…

Sewing for School


I made puppets! Too tiny for my hands, but hopefully right for little ones. Elephant and Piggie are my favourite children’s book characters (hilariously written by Mo Willems). We’ve already read 7 or 8 of the books in class, so I thought some puppets would help with retelling stories and creating new ones! 


What books and games did you love as a kid? (I remember loving my child-sized art/writing table in the living room - So much fun with markers and paper!) Do you have any go-to sewing gifts for kids? I always think I’ll be inspired to make something for infants, but I think I’m more motivated to make things for slightly older tots!

Tuesday, October 23, 2012

So bad at blogging.

Lately I’ve been completely unmotivated to actually sit down and write a post. I’ve been sewing a bit, and I’ve even got photos for a few projects edited and ready to go… but I just never have the energy to write anything creative! But then the stress of not posting eventually outweighs the stress of writing, and voila! A post is born. 


OK, remember when I posted about buying a whole bunch of new knitwear patterns to try? Well, I tried one of them… and again… and again! Here are a couple of the finished versions of McCalls M5890.


Sewn Cardigans with McCalls 5890


The blue is made in a lightweight t-shirt jersey, and the pink is my first project with seater knit. The great thing about this pattern is that it only takes just ver 1m of fabric, and it’s quick to cut and sew together. The bad news is that figuring out how to finish all the edges with different fabrics is a b*@#&!


Sewn Cardigans with McCalls 5890


The cuffs were easy to do with iron-on knit staytape, and a fold over hem, but the front drape and bottom hem were a real pain. It need to drape nicely, so it can’t be stiff… and the sweater knit has terrible stretch recovery, so once a hem is stretched, it warped and rumpled instead of returning to a flat edge. In the end, I just did a lightening stitch zigzag about 1cm away from the edge, and called it a day - but not before I made an emergency trip to the fabric store just before closing to seriously consider buying $12 of serger thread just to finish my cardigan made with $5 fabric! 


Sewn Cardigans with McCalls 5890


My only problem with the pattern is that I don’t really like how the front part drapes. It is a continuation of the front bodice piece, which is supposed to fold over into a collar. On me though, it doesn’t really fold back. Instead, all the extra fabric creates a loose tent all the way to the armpits. In my dreams, somehow this sweater would be a little more form-fitting at the side seams to give a bit of shape. I added the tabs on the blue on to give it a bit of shape. (Though in the pictures it’s all to obvious that I was stretching the sweater closed to hide the fact that my bright pink bra is showing through my shirt! Must be more careful when throwing on random clothes at the end of the day for a quick photo shoot! :P)


On the other hand, these are perfectly practical, comfy clothes, which fit well into what I WANT to wear this fall. (All my cotton Colette dresses are hanging unloved and unironed in my closet, and I can’t say I miss them!) Comfy is winning over cute this year.  


With that in mind, I’ve decided not to sew a Peony for the Sew-Along… I realised after my couple of posts about the Peony that I’ve actually made it FOUR times, and that is quite enough! 


I’d definitely recommend this pattern, though - It’s quick and satisfying, and everyone needs more cardigans, right?! 


FInally, I just want to say thanks to all of you people that I’ve never net for being so encouraging and supportive through the blogosphere. It’s be a really tough fall for me, but sewing blogs always help to distract and relax in the evenings! I think a lot of us sometimes feel like we aren’t posting enough - but what I’d really like to say is, thanks for reading and being supportive when I do!


How is your fall going? Do you feel guilty if you don’t post often? Why do you think we feel that way? Let’s think of a more healthy way to frame that thought! :) 

Saturday, October 13, 2012

Photorealism

There’s been some chatter online lately about project photos, and whether they realistically show our handsewn creations. (Read more here or here!) Well, folks, it doesn’t get any more real than this: 


Sewaholic Alma dress in Washi fabric


No make-up, wet hair, getting dressed on a dark morning on the way to work. (Oh yeah, and as a bonus: Out of focus! :P)


I wish I could do better, but the truth is that these are the only pics I’ve managed to take of this dress, and that’s ok. I’m busy - We all are, right? So for now, I figure that it’s enough that I made a dress (even though it took a month to finish!), and it was a pleasure to wear! 


Sewaholic Alma dress in Washi fabric


(Look! As always, I was too lazy to iron out the centre crease!)


This is actually a lined, knee-length version of the Sewaholic Alma blouse, which I made here and here. I love this pattern, but I did have some problems making it as a dress. First of all, the sleeves are just gigantic! I made up some cute sleeves with a scalloped edge (like the Macaron), but when I attached them, they were far too huge in circumference. I ditched them in the end and made it sleeveless - which actually makes it more comfortable to wear with cardigans. As a dress, it really needed a swayback adjustment… but of course, I found that out the hard way. That’s part of the reason I abandoned it for so long unfinished. Eventually, I just sewed a horizontal tuck in the back, and decided that a cardigan would hide the problem! Cardigans: a lazy sewist’s saviour!


Sewaholic Alma dress in Washi fabric


I skipped the zip again, and the result is a loose-fitting shift. I made a belt, but I actually really liked wearing it loose! After all, when fabric is this cute, who really cares if you have a defined waist? This is my first Peter Pan collar, which was a fun excuse to use a contrast fabric from the same line. I loved this Washi tape print so much when I got it that I ordered some of the grey floral straightaway. I can’t wait for Rashida’s next line, Tsuru, to come out this winter! 


There we have it: a realistic post from a busy blogger. (Except that of course, I tweeked these photos. I mean, I’ll give you honest photos, but they don’t have to be completely dark, dim and boring, right?) I’ve got a few more projects finished or in progress, with hopefully more complete photos coming up in the next week or two! 


Tell me the honest truth: Have you ever put a completely unedited photo on your blog? If so, please teach me your photography tricks, because you must be taking better photos in camera than I do! 

Thursday, October 11, 2012

Blog Makeover!

Q: What’s a sewist to do when a cold keeps her away from the sewing machine?


A: Reformat the blog from the comfort of bed!  


Those of you who visit my blog in person (instead of on a blog reader) might have noticed that I tinkered around recently to update the look.


I started this blog last November, and went with Tumblr because I like the simplicity of the interface. Here’s what it looks like when I write a post: 


Isn’t that nice and simple? When I tested out Blogger and Wordpress, I really didn’t like the cluttered dashboard. Somehow it just threw off my creative process! (But maybe there is a way to simplify the interface?) Anyway, I ended up with Tumblr, and chose a free template. 


The problem with free though, is that you don’t get much control. Seeing as blogging has now become a big part of my sewing life, I figured I was due for an upgrade! Time to pony up and pay for something better! 


I went with a Tumblr template called Atlantic Noir (Click here to see some different blog versions of the same template on Pinterest). Here were my criteria: 


  • single column for content

  • allowed for different fonts

  • connects to flickr and social media

  • shows the real date of posts (I have an irrational hatred for templates that only say “two weeks ago”!)

I also wanted to update my header to make it less twee and more modern, and reflect the fact that most of my sewing these days is clothing.


So, I went from this, which I’d made using a word processor: 


To this, drawn on an iPad!


Have you ever used the Paper app? It was my first time, but man oh man, does it make chicken scratchings look good! There is a pretty narrow range of colours, so I did tweek things a bit in a photo editor… but it really only took 30 min to sketch! I wanted something more organic and clean, but still with the bright colours that I love. Some of the garments are real things I’ve made… other are imaginary adaptations. Can you name any of the patterns? 


I’ve been noticing a shift in my personal style lately: away from the pale coral and teal of the Colette blog aesthetic, and toward for graphic, bold lines. (“But, GIllian!” you say, “You still have teal headers and coral highlights!” Yes, yes, baby steps, ok?!) I have a tendency to want as much colour as possible on everything, and preferable lots of colours contrasting with each other for maximum rainbowy goodness. To that end, the blog very nearly looked like this: 


or this: 


…which, let’s be honest, I still kind of love! But cluttered blogs drive me crazy, and anyway, isn’t the point for our sewing to look fabulous? I went through my blog roll and opened up 20+ blogs that I thought had good design, and looked for elements I liked. Overall, I was always drawn towards simple white backgrounds that let the content shine:


There you have it: A very long-winded explanation of my blog makeover process! Forgive me, please, for rambling on.


What I’d really like to know is how YOU go through the blog design process! How often have you updated your look? What do you want in a template or header/logo? Are you influenced by other blogger’s aesthetics? How does your blog design reflect who you are and what you sew?

Sunday, October 7, 2012

Presto, Change-o, Peony!

The Colette Peony is a great basic dress, but I think it’s far better with a few easy mods! I thought it might be helpful for other sewists to review some of the most common changes that I’ve noticed people making to the pattern.


1. The Neckline. 


Folks, the boat neck is HIGH! And so wide that bra straps are doomed to show. On my first version, pictured above, I brought in the width about 2cm, and cut the neckline 15cm lower… and you’d never know it, would you? My straps still show, and it’s still pretty high! I can’t imagine making it according to the original specifications! For my other versions, I brought the neckline even further in on the sides, and it’s much more comfortable to wear. 


2. The Facings.


Facings are so annoying to wear! Every time I put on my first Peony (the silvery blue dress), the facings flips out.. and they tend to make the wide neckline buckle and puff up when I, you know, move! On the black floral version I used black piping at the neck instead, and on the floral one above I used a simple narrow bias binding. 


3. The Skirt Gathers. 


The Peony calls for a little section of gathering at the top of the skirt, just underneath each bust dart on the bodice. (Can you see the gathering in the picture above, just under the belt?)  I found the gathering was a cute detail in some fabric, but rather pregnifying in heavier cottons. I prefer to do a dart instead. Faster, less fussy to sew, and puts less focus on my gut! :P


4. Lining. 


If you want to wear your Peony in winter, you definitely want to add a skirt lining so that you can wear it with tights or leggings. I just cut the regular skirt pattern out of lining material, and attach both the outer skirt and inner lining to the bodice at the same time. 


5. No Zipper. 


This one really depends on your body type… but I like to skip the zip whenever I can! Instead I wear a belt, like the me-made elastic one above, to cinch in the waist a bit. I did put a zipper in my third version, and I admit the fit is much better… but then i spend my day wondering if I’ll split the zip if I dance too hard with my grade 1’s! (Seriously, there is an amazing amount of jumping, twisting, and bending that comes with teaching little kids, even outside of gym class!) Making the dress loose enough to pull on without a zipper leaves more room for movement during the day.


6. Bubble Back. 


With all these Peonies, would you believe this is the closest thing I have to a picture of the back? By some fluke of drafting or design, a lot of people seem to find that the upper back bodice of the Peony is cartoonishly large. I had to taper more than 10cm off EACH SIDE of the upper back bodice seam to narrow it down! 


There we have it! The most common Peony adaptations that I’ve noticed among bloggers of all shapes and sizes: neckline, facings, skirt gathers, lining, zipper, and bubble-back! For myself, I also shorten the waist and lower the bust darts. Looking at these pictures, I’m realizing that the pattern must also be quite short - it’s above the knee on me, and I’m only 5’2” (164cm). Anyone taller than lil’ old me might want to lengthen it! 


I’m looking forward to seeing what changes people end up making to their Peonies in the Sew-Along! Can you think of any common changes that I missed? It’s a neat chance to see how one pattern can be adapted to so many figures and tastes. 


Happy sewing!


Colette Peony: The pattern that made me a sewist!

It’s Peony time for the Colette Sewalong, and I’m pleased that I actually have the real pattern for this one! Aside from one Sorbetto that I never wear, the Peony was actually the first real pattern that I made when I got into sewing garments last winter. It’s a great, simple pattern… before starting my first muslin, I was terrified of patterns. By the time I’d finished, I felt confident! Pretty soon I was cranking out a garment every week. Thank you, Peony!


Here’s my very first Peony:


Colette Peony #1


At the time I thought of this as a wearable muslin… but since I still wear it, I’m upgrading it to an official Finished Garment! It is made from a length of second-hand polyester, which helped me get over the fear of using actual fabric!


Looking back, it is interesting for me to read my original blog post about the dress. I was still figuring out how my body shape affected the way clothes fit, and develop my own me-made style. I made a few basic alterations to the pattern, but it’s still pretty close to the original design. 


Newbie-blogger that I was, my husband and I were both still tryingto figure out the mechanics of taking decent pictures! 


Look! I forgot to wear shoes! Out of focus, grainy, dark… but with bonus dog! :) 


Then it was time for round two:


 This version shows a lot more sewing confidence: lined skirt, experimenting with different finishes, and made in treasured (but cheap) fabric brought home from Japan. Plus, I’m wearing it with a me-made brooch and a me-made belt. My handmade style is definitely progressing!


Around this time, Tilly at Tilly and the Buttons proposed One Week, One Pattern. At the time, Peony was the only pattern I’d made more than once, so I picked it for the challenge. One week wearing only two dresses? Not a good look, professionally, so I quickly set out to make Version #3…


… which I think it the best of them all! I still love the fabric, the fit is better because I finally put a zipper in it, and the colours are a perfect reflection of my me-made style. Here is my original post about it. 


Even my pictures are getting better! 


Peony #3


And there you have it: My evolution as a sewist over 2 months and 3 versions of the same dress. I really gained confidence through adjusting this pattern. It was simple enough that I could focus on fun details and improve the fit each time. At the same time, it’s neat to look back and see myself evolve as a blogger… and particularly lovely to notice familiar names in the comments. Thank you all for joining me on this sewing journey! :) 


After OWOP, I got distracted by my new serger, the Colette Handbook Sew-Along, and summer dresses. It’s chilly again though, and there are still lots of pattern mods I’d like to try! The longer sleeves, maybe recut the bodice in a smaller size and do an FBA… Or maybe just sew up a quick version as is, for the sake of enjoying a trusty old “friend”. 


What patterns began your sewing career? Have you ever revisited them to measure your progress or try again with new skills? 

Tuesday, October 2, 2012

What I love: Cracked.com Videos

Have you ever read Cracked.com? It’s a great time waster… You know, for eating lunch at your desk and need something to entertain you for a couple of minutes? Cracked is great for that! (For example: 6 things from history everyone pictures incorrectly, or 5 ridiculous movie sound effects


My favourite part of the website though is a video series called “After Hours” by some of the writers.


Check it out:


Clever, witty, AND geeky? Sign me up! 

Here are some other topics they’ve done: 


Also awesome? Katie Willert, the woman in the After Hours videos, also have her own series, featuring gems like this one 


I get really weird looks from people when I reference videos like this in real life… So I hope you enjoy them and don’t give me the “OMG, that’s really pathetically nerdy!” look!

Monday, October 1, 2012

Thewallina is Thewonderful!

I’m a lucky, lucky girl… because look what I got in the mail!


Swapping some sewing goodies!


A package of fabric from Inna at http://thewallinna.blogspot.jp/! All the way from Japan… very nostalgic! And look - she even put autumn leaf stickers on the envelope. Seasonal stationary is huge in Japan… ok, let’s be honest. Anything that ups the cute factor is big in Japan! ;) 


I first saw Inna’s blog when she offered to host the Pacific timezone Twitter chat for one of Tilly’s Sewing Social Twitter chats. I really admire her modern style - sometimes it’s nice to see something other than (really cute) retro-inspired sewing! Anyway, we started chatting a bit, and decided to do a little swap. I’ve got all of her things ready but haven’t mailed them yet… Mailing parcels is somehow a bit of a phobia with me, but dammit, I can’t be scared of the post-office, can I? 


Here’s what she sent me: 


Swapping some sewing goodies!


Check out the sheerness of the lawn! It’s so fine… I can’t wait to make a summer dress out of it! It’s a lovely tomato red bandana-style print. Appropriately enough, it comes from one of my favourite Japanese fabric stores, Tomato! They have about 4 or 5 different locations in the fabric district, each specializing in a different thing. There the home dec shop, the notions store, a 5-story narrow building with different types of fabric on each floor, and my favourite: the outlet store. (That’s where I got 10m of double gauze for $1/m before I even knew what double gauze was!) The Japanese use the word “natsukashii" a lot to describe things that are fondly nostalgic, and all the Japanese packaging is definitely natsukashii!


But wait! There’s more! PERVY POST-ITS! 


Swapping some sewing goodies!


Seriously, could you get more Japanese than these? Teeny cute post-its of a skirt… and when you peel the last one off you see her pink polka-dot panties! (literally, in the text says “cute pants”!) Clearly aimed at women who love all things cute… but with a hint of the Japanese sukebe (pervert) culture. Inna could probably translate better than me, but the text underneath seems to say that was you take off the skirts, you heart will race or pound! Thank you, Inna, for the perfect reminder of both why I love Japanese goods (so cute and unexpected!) and why I’m happy not to live there forever (hello, rampant sexism!) 


Thank you so much, Inna, for the lovely parcel! I’ll try to get yours in the mail soon!


In the mean time: How should I use my skirt post-its? Creative or silly ideas appreciated! :P