Saturday, June 29, 2013

The best friends I've never met!

How can I say enough wonderful things about the Sewcialist community? In the last year on Twitter I have met the most kind, funny, honest and encouraging women!  There’s endless talk of bewbs and poles jokes, fabric chats and stash enabling, and much, much more. Seriously, if you are a blogger but not yet on Twitter, you’ve got to try it out! You can find me as @GillianCrafts.


Beyond Twitter, there’s also the amazing community of bloggers. I appreciate your comments and support so much! I remember moving back to Japan a few years ago and feeling so lonely and isolated… If only I’d known about the blogging community back then! I’ve since moved back to the small town I grew up in, but with so many friends online I never ever feel lonely here! 


Why bring this up know? Well, I’ve been showered with amazing gifts by a few sewcialist friends this month, and it’s time to say “Thank you!” 


It all started when Heather (@knitNbee) and Leila (@lbreton) bought me a PDF of the Lady Skater pattern for my birthday. As my husband can attest, I was so thrilled!!!!!! I was giddy and dancing all over the house. So imagine my shock when a week or two later, this MASSIVE package arrived: 


wrapping


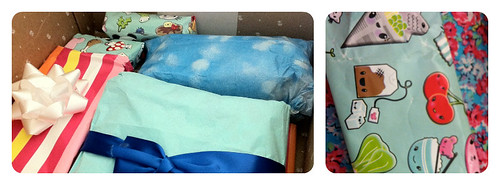
LOOK AT THAT THING!!!!! Heather is clearly the queen of gift wrapping. Right down to the kawaii wrapping paper! 


Snacks


Heather had the most amazing props in her photos during MMM - and now I can play along too with my sparkly tiara!  (She sent Leila a matching one too!) 


Amazingly, each little package was a reminder of a Twitter conversation. I mentioned once that Americans have different flavours of Fig Newtons than we have, and BAM! Fig Newtons appear!


nailpolish


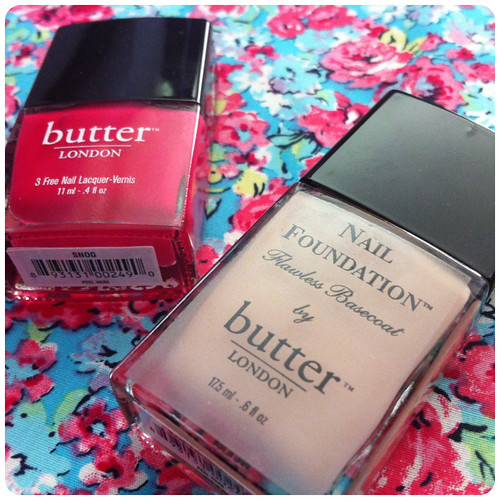
Likewise, I was asking for advice a while ago about good nail polishes, and Jen from Grainline suggested Butter London… Tada!!!! (And wow - this stuff is AMAZING! The base coat dries really quickly, and the pink goes on in just one coat! I’ve been wearing it on my fingers or toes ever since I got it! I think I might have to stick with high-end nail polish from now on! Heather, I really hope you got some for yourself, too! Thank you!)fabric and pattern


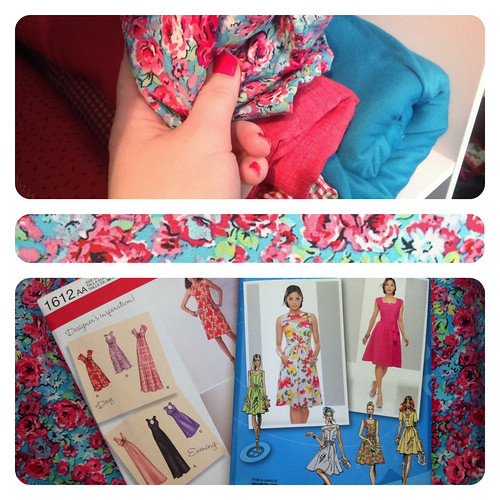
Heather (AKA. All The Patterns Heather) also chose two awesome patterns for me, and 3 yards of the most gorgeous stretch cotton from Gertie’s shop! Isn’t it beautiful??? It looks so at home in my stash. Thank you!


As I understand it, Leila and Heather masterminded this whole thing when Leila was visiting Heather. Heather then filled up the box with all these amazing extras… and to top it off, Leila is buying me the new Sewaholic pattern when it is released! Squeeeeee! 


Now presents are always nice - but what really left me speechless was getting so much love from two people I’ve never met. Sure, we tweet each other daily, but wow! I feel honoured and lucky as hell! (Now, whose birthday is up next? I’ve got some karma to pass on!)


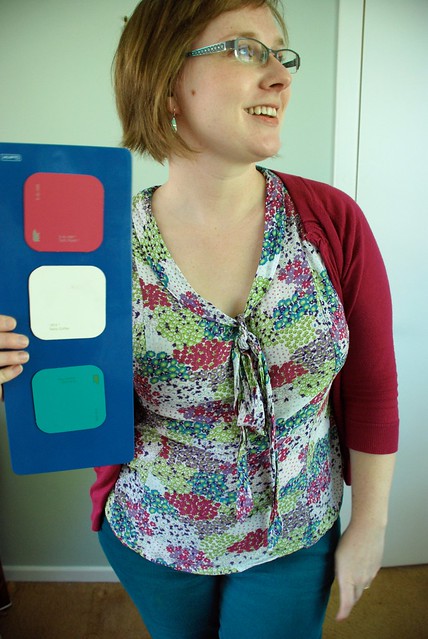
To top things off, I also got a lovely little package from Sally at the Quirky Peach!  


quirky peach
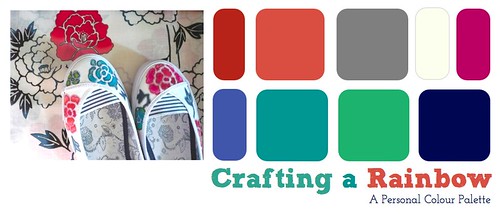
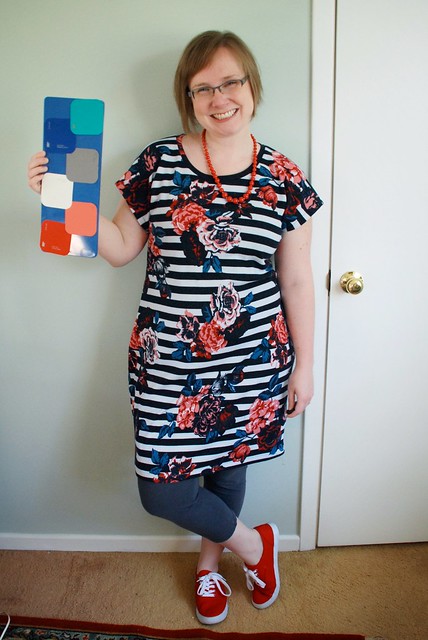
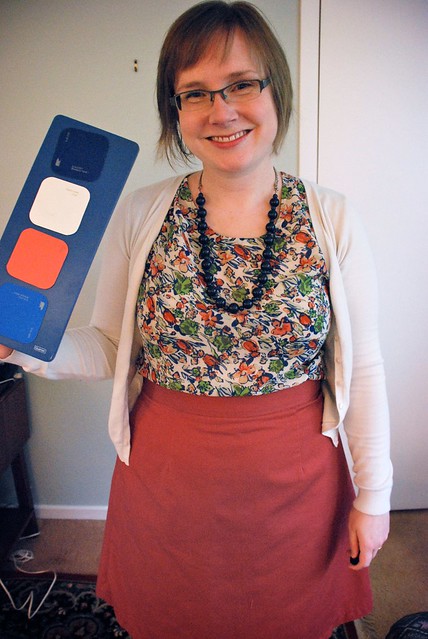
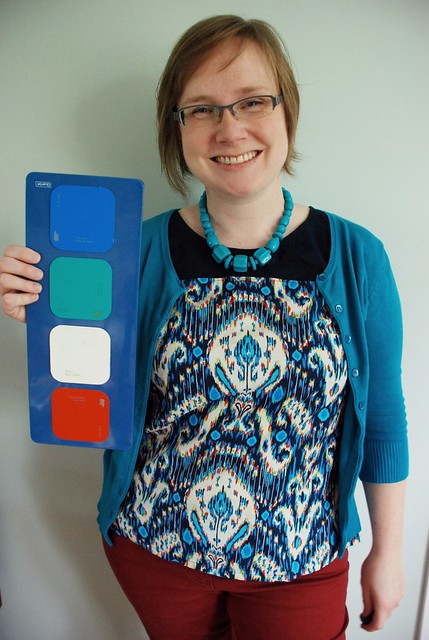
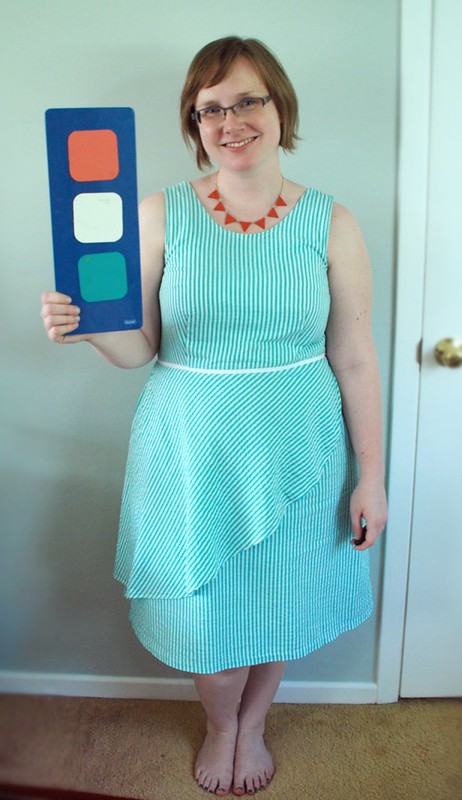
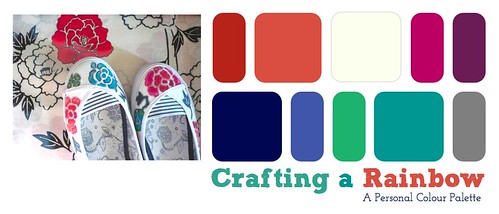
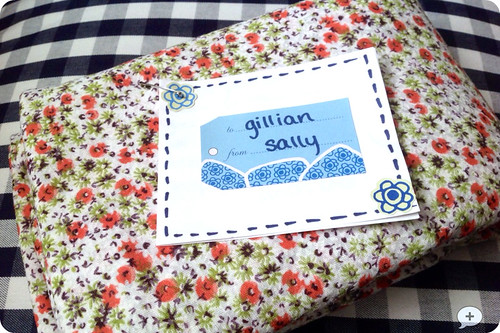
She thought this fabric might match my colour palette better than it matches her own style, so she sent it my way! How kind is that? I tell ya, sewcialists are the best!


I also got some wonderful sewing related presents from my family: a local fabric store membership from my parents, a gift certificate and fabric shopping trip from my husband, and a gift certificate to Gorgeous Fabrics from my sister (with advice from, guess who, Heather and Leila!) She ever arranged for a friend to pick up the fabric at her mother’s house in the States so that I could save on shipping to Canada! 


Suffice it to say, I’m lucky. Very, very, very lucky. I’m trying to keep that in mind as I head into a summer of no pay, and wait to see what September brings. I’ve got a wonderful husband though, a great family, and good friends, both in person and online! Thank you all for making my life happier, sillier, and more full of joyous sewing! 

Wednesday, June 26, 2013

How to insert a stretch waistband!

My love for stretchy waistbands is well documented, from my post about pull-on “mom jeans” last summer to my recently-made collection of pull-on jeans! I really don’t have any pants with a zip and fly anymore… I’m a sucker for comfort! 


With that in mind, here’s how I insert a stretch waistband. It’s really simple, but I thought a mini-tutorial might be helpful! For this example I’m making a pull-on version of the Sewing Cake Hummingbird skirt, but the idea is the same for any garment! The only things that matters is that your fabric has a decent amount of stretch. 


Inserting a stretch waistband


Step 1: Cut a rectangle for the waistband. In this case, I used the pattern pice for the Hummingbird skirt!  


Inserting a stretch waistband


Step 2: Fold the waistband lenghtwise, and iron. Sew the short ends together to make a loop about 2 inches shorter that your waist measurement. 


Inserting a stretch waistband


Step 3: For a longer lasting waistband, it helps to put in some elastic - but you don’t have too! (A simple folded fabric waistband works just fine if your fabric has good stretch recovery.) Cut the elastic to the same length as the fabric waistband. It’s job is to stop the fabric from stretching out, but it doesn’t need to pull tight or gather the fabric at all! 


I like to zigzag my elastic to the waistband so that it doesn’t roll or twist. Since the zigzagging is only on one side of the folded waistband, you can hide it on the inside of the finished garment and no one will be the wiser! 


Inserting a stretch waistbandStep 4: Pin the folded waistband to the skirt at the sides and centre front/back.


Now, remember how our waistband piece is a bit shorter than the skirt’s measurements? I like to pin the waistband smoothly across the front, and ease the back to fit the shorter waistband. That way it doesn’t pull on my big tummy, and it snugs in above my big butt! 


Inserting a stretch waistband


Step 5: Sew!!! I just serge it, but a purist would probably serge and sew with a stretch stitch. As you sew, gently stretch the skirt to fit the shorter waistband. It’s basically like sewing a folded band on a t-shirt!


Inserting a stretch waistbandStep 6: Iron, and you are done! That’s it! Like I said, it’s really simple.


You can do a wider or narrower waistband depending on the look you want. I’ve done this technique on denim, twill, stretch bengaline and jersey, and they all hold up well to wear. For reference, my waist is 10” smaller than my hips, and I can wiggle into waistbands like these with no problem! 


That’s it from me! There are heaps of other ways to insert a stretchy waistband, like Steph’s tutorial here, or a yoga-style waistband like I did on my lounge pants. On a skirt like this you could always insert a zipper and do a normal waistband… but why??? Avoiding zippers is so sweet, and the finished result is so comfortable! 


How are the waistbands done on your RTW stretch bottoms? Do you have a favourite way to sew stretch waistbands? 

Tuesday, June 25, 2013

A tale of two Hummingbirds

How many Hummingbirds can I sew? Well, a lot! Meet my second skirt and my second top, which through pure chance just happen to be out of almost identical prints! 


Hummingbird


Booyaa! The tee is a slub jersey I bought last week, and the skirt is a linen I bought last year. 


Let’s take a closer look, shall we? 


Hummingbird


I guess I really am consistent with what I like!!! I’ll never wear them together, but I’m tickled that the fabrics are so similar. 


Let’s talk shirt first: 


Hummingbird


I cut the same size as before, but took in the waist and took 2” off the length. I also made cap sleeves instead! Bonus: I cut it out of only 1m of fabric! :) 


Hummingbird


It’s such a drapy knit that it’s still a bit loosey-goosey… I’m going to take a page from Katie’s book and cut the shoulders and bust smaller next time!  I think I’ll make the neckline lower next time too… feels a bit covered up!  


Now for the skirt: 


HummingbirdI was so inspired by Susan’s beautiful piped skirt that I copied her before the day was out! I follwed her tutorial to use flat piping. Mine is just normal bias tape that I ironed to make it a single fold. It was surprisingly easy to use, and really didn’t add much time to the project! 


Oh, and guess what? Using piping was one of my own #Sewingdares!!!


Sewing Dares


I’ve still got a few more to go, but I’m pleased to knock one dare off the list! :) 


Hummingbird


Now, my first version of this pattern was stretch, but this one is not. I’d altered the pattern to reflect my adjustments, but I probably should have included a bit of extra ease for a plain woven! It’s not tight, but it’s snug!  Luckily the linen has some natural give in it (from pre-shrinking it in the wash, I think!) 


One of the pleasant surprises while making the skirt was that it was easy to match the large print across the centre panels because all the pieces are cut out next to each other. As a result, the print flows really nicely! 


What (not) to wear: 


While I was planning the skirt, I really wanted a striped shirt to wear with it. I pulled out my brand new Mission Maxi pattern, traced it, widened the straps, and boom, make a new tank top!


mission tank collage


I even trimmed it with leftovers from my first Hummingbird top! 


I love it as a stand alone, but I’m not convinced it’s right with the skirt. Check it out: 


what shirt to wear


I love the piping so much that it seems a shame to cover it… and the tank tucked in looks kinda boxy to me. The thing is, I’d love to wear this skirt to a family reunion this weekend - so I need to make a top to wear with it!


What should I make? 


1. a black tank (maybe with some ruffles at the neckline or something to make it a little more dressy?)


2. a black kimono tee


3. a Hummingbird of some variety?


4. a _____???


Thanks for your ideas!!!

Sunday, June 23, 2013

Another Hummingbird!

This weekend was sewing heaven. I ended up with SEVEN finished items! Woohoo! I’m back in the game, baby! 


Up first: My first crack at the Sewing Cake Hummingbird Skirt. 


Sewing Cake Hummingbird Skirt


I love it! I was a very satisfying make - more pieces than I’m used to, but   everything fit together nicely. 


Sewing Cake Hummingbird Skirt


I did have to fiddle a bit with the fit at the top, which of course is part of Steph’s expectation for the pattern. However, to get the side seam to go in a nice, straight vertical line, I had to remove more from the back than from the front. I also made the darts a little bigger, and took a wee triangle out of the centre back seam so that it fit my booty. 


Sewing Cake Hummingbird Skirt


Since I used a stretch twill, I skipped the zipper and just serged on a folded waistband. I can pull it on easily! (Yay stretchy clothes! Now that i’m used to being totally comfortable all the time, I have the hardest time wearing non-stretch clothing!)


Sewing Cake Hummingbird Skirt


May I present my first ever handstitched hem? I wasn’t sure how to hem it without losing the stretch, so I asked the Sewcialists on Twitter for advice. Katie suggested hand stitching, so I gave it a shot! I”m curious to see how it holds up!


Sewing Cake Hummingbird Skirt


The t-shirt is new, too! It’s a Maria Denmark Kimono tee, which is my new favourite pattern. Perfect for a quick and failproof make. 


Sewing Cake Hummingbird Skirt


And that’s it: A new outfit! 


The question is, will I wear the skirt? It’s too short to wear at school… and, well, I”ll be honest - like most women over size whatever, my thighs rub together in the summer and it drives me nuts! The Hummingbird is tight enough and short enough that it’s a little harder to hide bike shorts underneath! I did buy a shorter slip today that I can layer underneath…


Do you wear short skirts? What’s your favourite length for day-to-day dressing? 

Friday, June 21, 2013

Thank heavens, I finally sewed something!

Oh hai! Apparently MMM really knocked me on my ass, because I’ve taken a surprise 3 weeks break from blogging AND sewing! It’s report-card season for us teachers, plus the end of the year exhaustion and getting sick… blah blah blah! Enough of that. Bring on the sewing! 


Hummingbird Peplum TeeMy first Hummingbird! I’m a total Sewing Cake fangirl, so of course I’m joining in on the sewalong for the new skirt and top. 


Hummingbird Peplum Tee


I used a nice, drapey cotton or rayon knit for my wearable muslin, figuring that I could mess up the fit and the print would hide all my sewing sins! Added bonus - it’s the kind of knit that doesn’t need hemming! (Seriously, I have no intention of ever hemming a peplum like this! So much easier to choose a fabric that won’t roll or unravel!)


Hummingbird Peplum Tee


Speaking of fitting sins… I second-guessed my measurements, and ended up with a loose waistband. I’m going to wash it once to see if that affects anything, then I’ll probably take in the side seams. I just don’t want to mess with my peplum if I don’t have to! :) 


Hummingbird Peplum TeeAs is, it’s super comfy, but has none of the hourglassy properties that a peplum should offer! 


All in all, I’m quite pleased! Here are the alterations I made/will make next time: 


  • Used a 40 front and a 35 back.

  • Used the 30 peplum with about 1cm of length added.

  • Did Steph’s neckline binding strategy, where one shoulder if left open. I thought I’d hate it, but it worked nicely!

  • Used 18” length, but then had to take out 1” off. 

  • Added 1cm to the sleeves so I could do a simple fold-over and stitch… but I think they are a bit long, so I may make the next one into more of a cap sleeve.

  • Leila from Three Dresses Project has convinced me that I need a forward shoulder adjustment, so I’ll try that on my next version!

Hummingbird Peplum TeeThis weekend I’m hoping for lots of sewing time - including another Hummingbird top and a crack at the skirt! I’ve also got some rather amazing presents lately from Sewcialists, which I can’t wait to blog about now that I’m back in the game! 


Happy sewing, everyone! 


Wednesday, June 12, 2013

Geek Pride!

Link: Geek Pride!

I’ve been taking a blogging and sewing break since the end of MMM… so in the mean time, here’s a podcast that my husband, Jamie, recorded with local comic geeks! It’s something new for him, and I’m really proud that he’s out there sharing his nerdy passion. 


Beyond the gauntlet Episode 3: Talkin’ bout Superman


Have you ever recorded a podcast? Do you listen to any great podcasts, sewing or otherwise, that I should check out? 


Sunday, June 2, 2013

MMM26-31

MMM is over! It’s always a relief to be done wit the daily photos, but sad to lose the sense of community. 


So how did I do? As you probably are sick of hearing, my pledge was to wear me-mades every day, specifically wearing shades from this self-assigned palette of my favourite colours. 


Colour Palette for MMM '13


MMM26


MMM26


3/9 colours, MM Pendrell blouse and refashioned cardigan. 


This top is lovely to wear, but BRRRR! The challis lets every draft through! Definitely better for warmer days!


MMM27


MMM27


A new dress! 6/9 colours. Woot! Thanks to the input from the Flickr group, I’m going to shorten this a few inches to make it sassier.


MMM28


MMM28


Interview day! MM Truffle skirt and Pendrell blouse. I’ll find out by late June if the interview was successful!


MMM29


MMM29


4/9 colours, MM two-tone Sorbetto (heavily redrafted to be more like a Wicksten tank!) This top is a bit snug, but I like the concept… I should get cracking on a better-fitting version! 


MMM30


MMM30


2/9 colours, MM Truffle dress. Finally we had proper summer temperatures! I love this dress - it’s one of the last fitted, fully-lined woven dresses that I made last year before I started getting into knits! Now I’m so used to quick projects that a dress like this seems like a lot of work, so I’m grateful that past-me put in the effort! 


MMM31


MMM31


The end! 3/9 colours, and a fully-me made, Zoe-inspired outfit: Red capris, Maria of Denmark cowl, and Fimo necklace! 


And now it’s done! I really enjoyed the colour palette component of the challenge. It was just enough to make me really think about my outfits in the morning, but not so hard that it was a burden! 


Here are the colours I wore: 


MMM graph final


  • Lots of white, which makes sense because I like patterns that balance bright colours with neutrals.

  • Lots of navy, which includes jeans. 

  • Not nearly as much Emerald or Fuschia as I would have predicted! Now I’m motivated to shop for some fabric in these colours and work them into my wardrobe more.

  • A year ago I didn’t wear coral, and now it’s a major part of my wardrobe! Proof that trends do influence my colour choices!

So are these the right colours? Yeah, I think so! I do tend to wear lighter shades of these colours in summer, but still the same shades. One change is needed though…


MMM new colour palette


Purple! I’ve got a fair bit of RTW clothing in this colour, and I like it. Time to sew with it too! 


As for MMM itself, I loved it. Thank you so much to the amazing people on Flickr and here on my blog, who made every morning a little more fun! I’ll miss waking up to compliments! :P I loved seeing how other people dressed every day, and stealing style inspiration. It motivated me to think about shoes and accessories a little more, and to try out some new-to-me colour combinations and styles. 


Since June started I’ve worn me-mades both days, but enjoyed the sense of “rebelling” by wearing non-palette colours! Heck, I might even wear RTW tomorrow! Well, maybe…


Thanks for sticking through this long post, and a month of navel-gazing!