Sunday, March 30, 2014

Cake Carmine: Help!

You all know I love a knit basic, and I’m a big fan of Sewing Cake - I’ve made easily 10 pairs of Espresso leggings, and at least 10 Tiramisu dresses! 


So when Carmine was finally released, I bought it right away! I haven’t seen any finished versions of the pattern anywhere online yet, but I love the line drawing - it looks flattering and trim, and perfect for layering! 


3334 Front


Unfortunately, my first and second version didn’t turn out that way! I sewed both versions up in one morning - it’s such a fast pattern to make. Maybe even faster than a t-shirt!? 


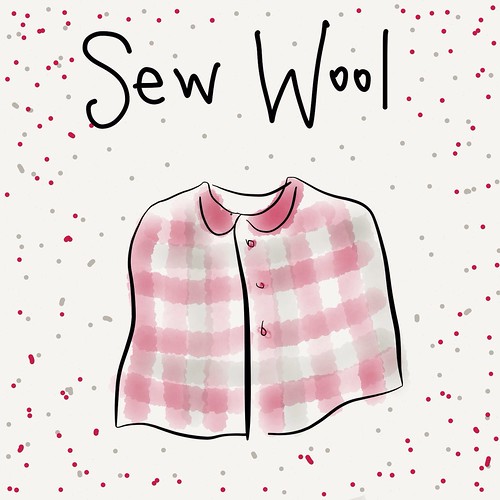
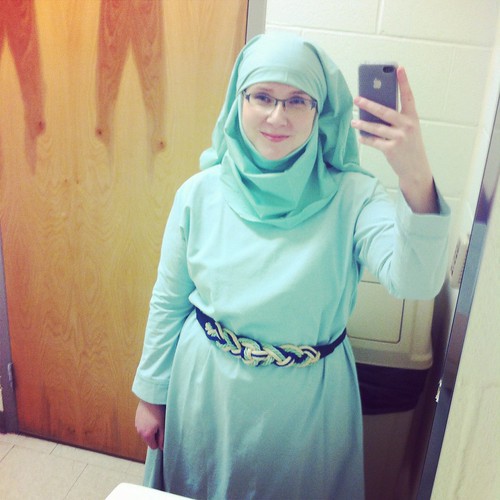
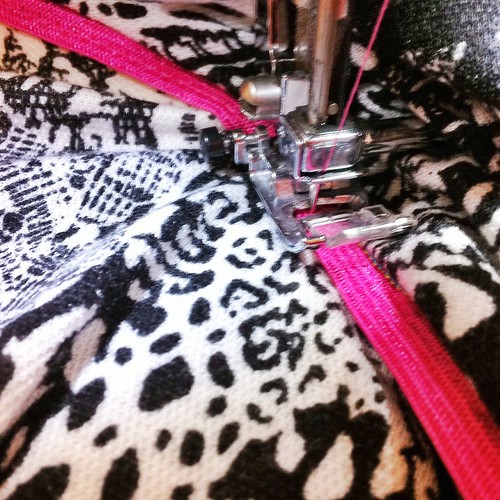
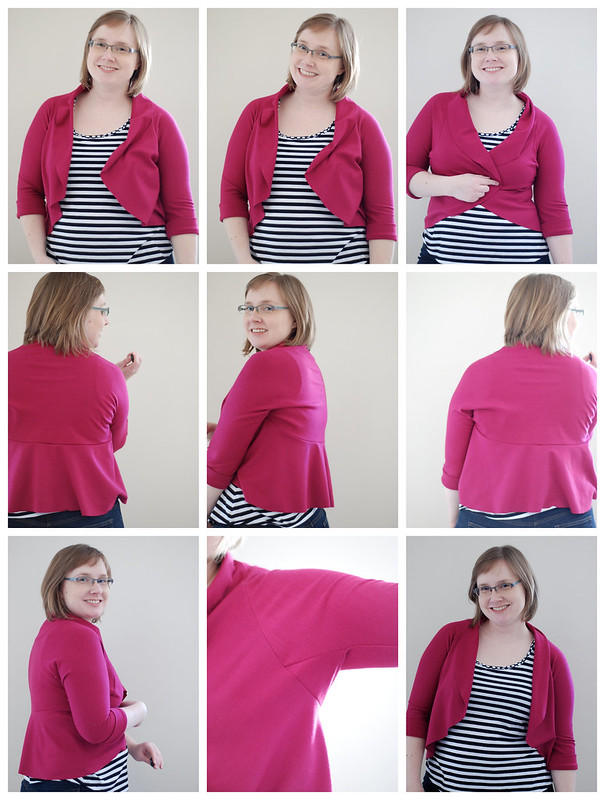
Here’s my first version, in cotton lyrca knit:


Carmine attempts...


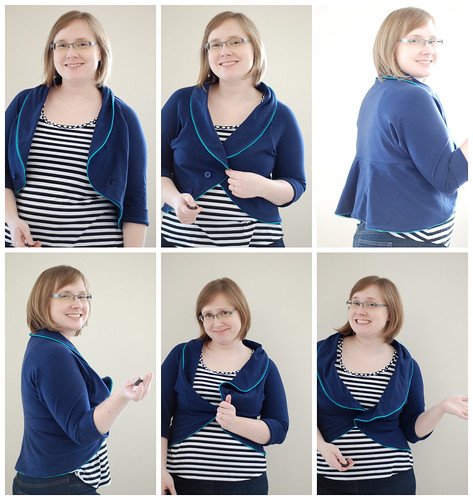
Eeeek! I think I might have stretched out the circle when I inserted the pique elastic as trim… which is such a shame, because I was sure it was going to look so cute! As it is, when the collar lays flat (like in the top row of photos) then I get a very unattractive tent in the back flounce. If I pull the flounce snug in the back (as in the bottom row), then the collar is massive and won’t lay flat!


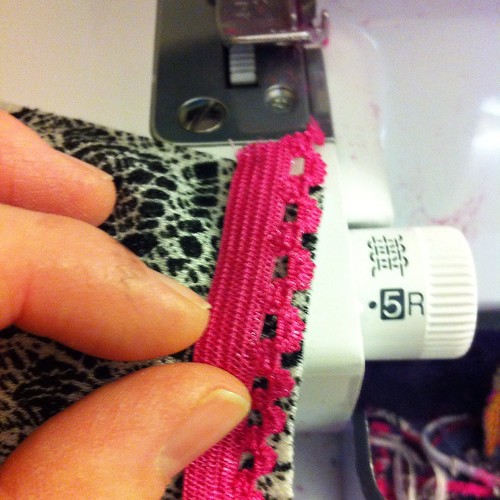
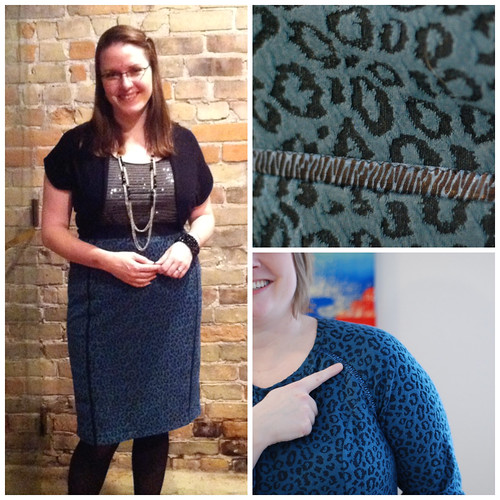
I tried pinning it shut in different ways, and thought maybe I could save it wit two button holes… but oh no…


Carmine attempts...


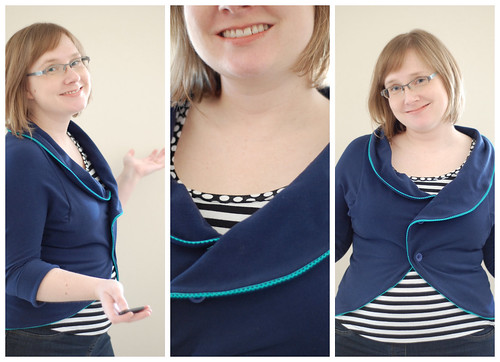
AGHHHHH! It’s technically wearable, I guess, but I’d never feel chic or put together when everything is pulling and flopping around like that. 


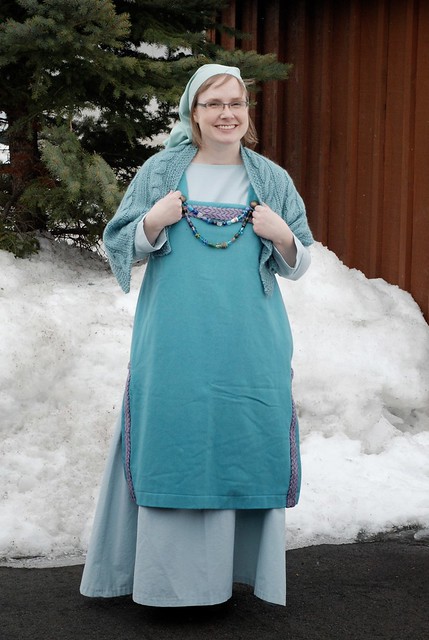
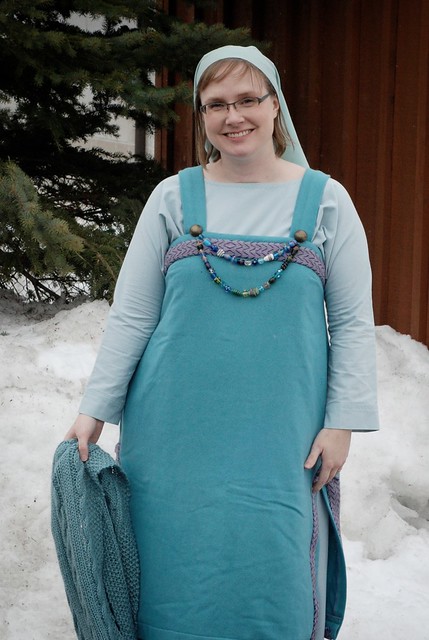
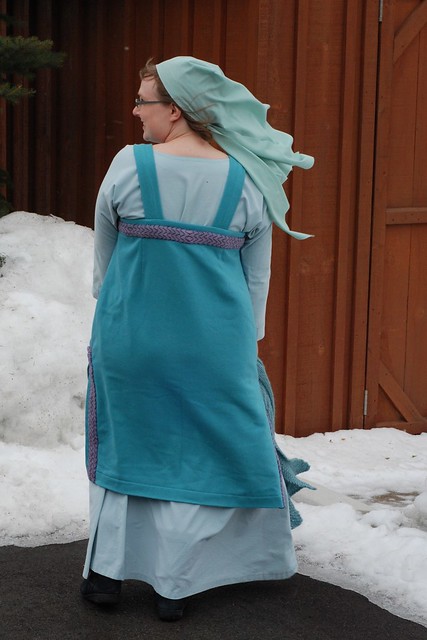
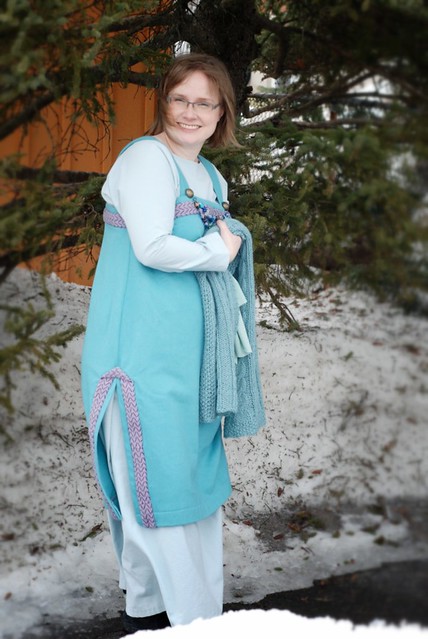
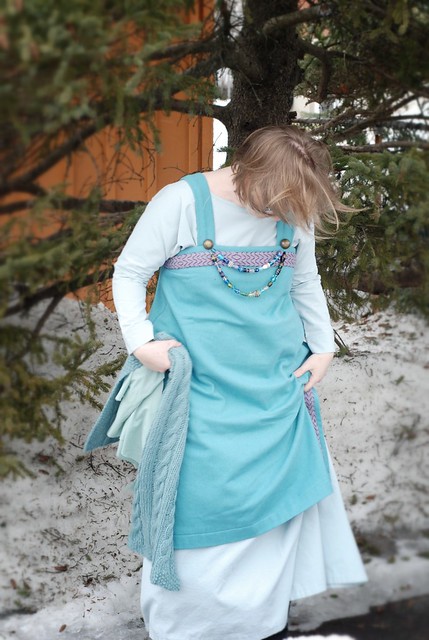
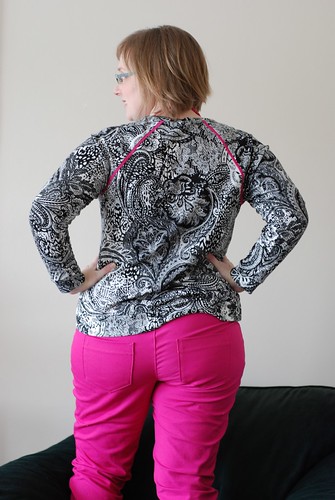
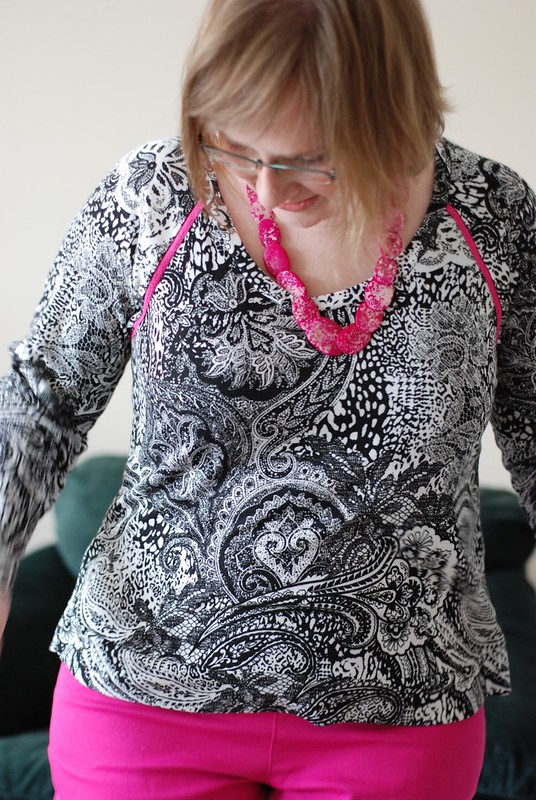
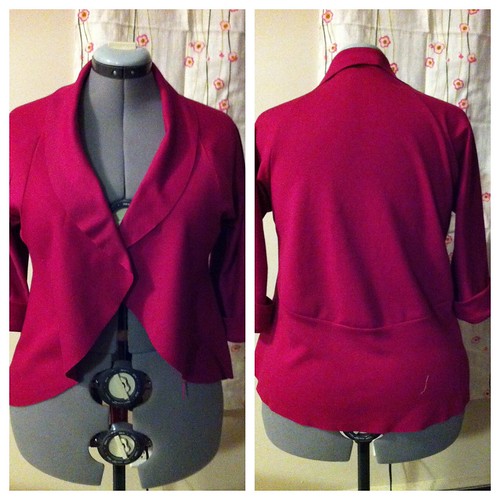
Undaunted, i made another version, this time without the piping and with a single layer collar in hopes that it would drape better. Well… It kind of does? 


Carmine attempts...


This version is sewn in a Rayon Poly Spandex ponte. When the collar is open, I still feel like drapes a bit awkwardly. I like the look more when it’s held closed like in the line drawing, but then it pulls oddly through the kimono sleeve. 


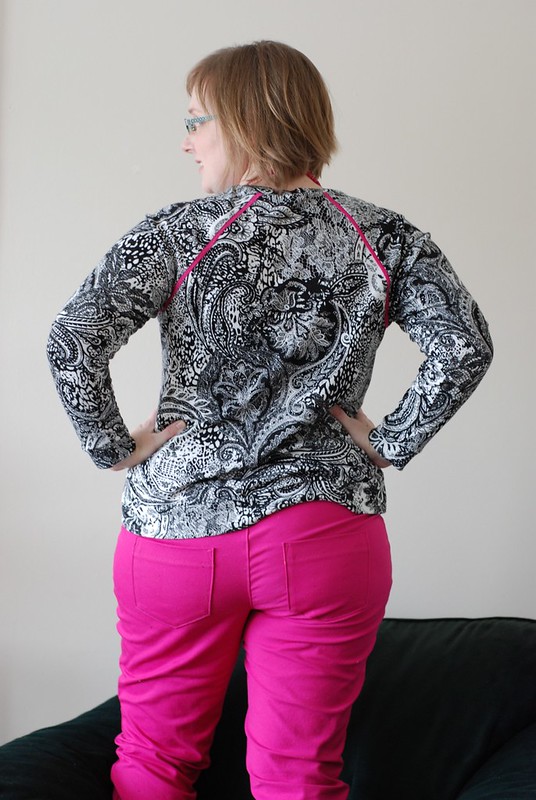
You’d never know it, I but I actually added an inch and a half in length to the centre back to try to get the flounce seam closer to my waist. Right now I feel like a linebacker from behind - look how broad and massive it makes my upper back look! 


I love the *idea* of this pattern, but it’s just not working for my body right now. How can I get the effect I want? 


  • Part of the problem, I think, is that the gusset isn’t sitting in my armpit, but way forward onto my bust. That doesn’t seem right, does it? Maybe I could move it backward somehow?

  • Take a few wedges out of the circular collar/flounce piece so that it drapes more smoothly?

  • Add 3” more length to the centre back so that the seam hits in the small of my back?

  • Or, the nuclear option: use my TNT raglan pattern with the circular flounce to make something that fits my shoulders properly? Right now the back, front shoulders, and sleeve are all one pattern piece, which makes it a challenge to alter. 

I’m completely open to advice on this one, so please, help me out! 


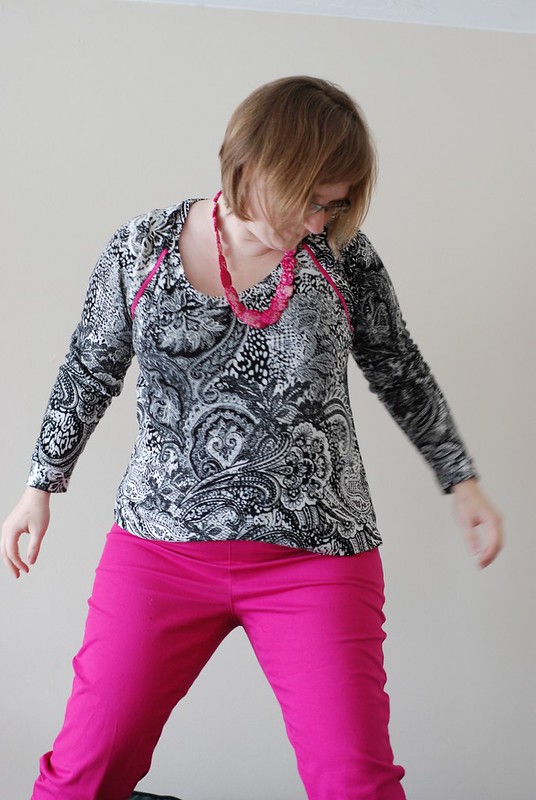
Update: I cut apart my pink version, did some draping on the manequin, and attached it to a raglan top. It much closer to what I envisioned, and maybe even wearable… but it would take a few more versions to really get it right! Thanks for the help, everyone!


Second Update: 


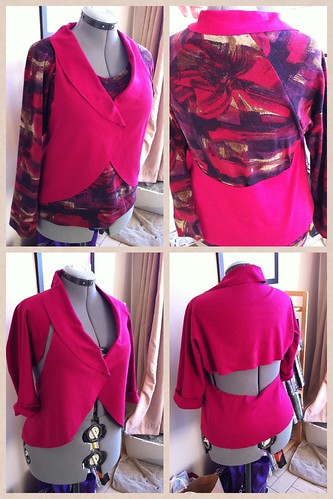
Here’s how I changed it… cut apart the flounce and bodice, and put them on my manequin to see what fabric I’d need to add to get the flounce sitting in the small of the back and draped smoothly across the front. I also tried draping it the same way over top of a Jalie raglan tee - and as I hoped the front seamlines matched up nicely!


Untitled


Since I was short on fabric, I managed to recut the Carmine kimono sleeve into the Jalie Raglan sleeve. I cut out a back piece, and some crescent moon shapes for the front… and got this! The back ended up an inch too long, and I had to ease the shirt part into the flounce.. but at least I’ve got something sort of wearable, right? If I try this pattern again, it’ll probably be another hacked version like this - I just think it suits my body shape better than the cropped jacket which it’s designed to be! 

Friday, March 28, 2014

Sewing a rectangle can be more fun than I thought!

Oh HAI!!!!!!


Look, my husband went to play video games with his brother last weekend, and the cat and I MAY have gone a little stir crazy without him… Because I suddenly realized that I could SEW new pillowcases for our bed instead of doing laundry!!! 


Untitled


We both like to have lots of pillows on the bed, which means that we basically have every single mismatched pillowcase in use at all times. As I lay in bed at midnight, it occurred to me that maybe my stash held the solution!


I have a lot of 2-3m pieces of lovely high-end quilting cotton that I bought when I first started sewing. I used to make lots of quilting cotton dresses, but I’m not really interested in making them anymore! Now that fabric is just taking up room. I’ve been thinking of giving it away, but I”m too sentimental to part with it!


That said, this gingham print is actually new to me - I won it from Danielle over at One Small Stitch! It’s just perfect for my husband’s pillowcases, because he likes graphic patterns and dark colours. Nothing else in my stash would have suited him! Thanks, Danielle!


There’s another sewcialist connection in these pillows, too… when I googled for tutorials, the first one I found was by Brooke! She made really cute pillowcases for a friend in the army a few years ago, and her instructions were a great starting point!


Untitled


I did make one small change to Brooke’s pattern. My favourite Japanese pillowcases have this inner flap thing that keeps the pillow from sliding out. My husband’s pillow cases ALWAYS slide off and it irrationally bothers me, so I figured this was a good solution! 


Untitled


If you are interested, here’s how I did it… (get ready for a one-picture tutorial! :P) Cut one side of the pillowcase the actual size of the pillow, and the other side 8” longer. Put them good-sides-together, and fold the long edge back like in the picture above. Then sew the 3 edges, and turn inside out - the flap should be neatly inside the pillow! 


We’ve been using the pillowcases all week, and I’m happy to report no pillows have escaped! I’ve got some other fabric earmarked to make more… and hopefully once I’ve got lots of pretty pillows I’ll be more motivated to finish the last damn seam on my quilt! So close, and yet so far. 


***EVIL LAUGH***


I just realized that I’ve covered the bed with my stash. I literally roll around in my favourite fabrics (in pillow and quilt form) every night. Is my husband aware that fabric is taking over? First the sewing room, then the living room, and now the bedroom… Sewing is taking over the whole apartment!!!! MUHUHAHAHA!

Wednesday, March 26, 2014

Shieldmaiden March!

First of all, I’m totally blown away by the comments on my post about how many blogs you read! It’s so interesting so see how we differ. I’m still working through trying to reply to everyone, but in the meantime, here’s a post I rafted earlier! ;)


And now for something completely different: 


DSC_0807


My first historical costume! 


DSC_0818


For Sheildmaiden March, I made up this Viking-style apron. This is my first ever project with wool, which means it also fulfills one of my New Years resolutions!


Untitled


I was a bit intimidated by sewing with wool, so I just plunge right in with scissors - no pattern, just a few measurements and some eyeballing the angles. The wool came from my stash, and I didn’t have much, so I didn’t have the option of doing anything too historically accurate! 


DSC_0825


Lucky for me, I was able to hide a lot of my terrible seams with the handmade trim that I won from Solvi at Delfinelise. I handstiched it all on so that I can take it off if I need to wash the dress or I want to make something else with it! I also saved a piece to show my elementary classes when they are learning about textiles or VIkings. Nothing beats show and tell!


DSC_0844


I couldn’t figure out how to replicate ornate broaches, so I stuck with simple metal buttons. The beads are from the dollar store - but I as really pleased to get handmade beads which are within the realm of historically accurate! 


DSC_0837


Even though my outfit isn’t very accurate, I wanted to be able to layer to at least make it more convincing! I dug out the rectangular knitted shawl that i’m holding (and wearing in the very first picture). I knit it before I got carpal tunnel from knitting, so it must be at least 7 or 8 years ago now… and for all that time it has sat unblocked and unworn! I’m glad it finally had a day in the sun!


Oh, and the underdress? That’s part of my mom’s costume from when we used to have a medieval festival in our small town! Early 90’s, I’d say? Lucky for me she did a lovely job sewing it, AND it’s shaped like a tent!


Untitled


Here I am at school wearing the dress, about to go teach kids about medieval England… and you can see the full wimple, which I’m using as a Viking headscarf in some of the pics. (Someday soon, I’ll be teaching in Greek and Egyptian clothes too… ‘cause who doesn’t love a bit of teacher-in-role?)


DSC_0832


There we have it! My least practical make ever, but at least I’m ready for Halloween. Thanks so much to Solvi for the trim - I don’t think I would have finished this project if I didn’t have that extra motivation and detail!


Now the obvious question to end this post with would be "Have you ever sewn costumes?"… but I’m going to go on a tangent here! 


Instead, I’ll admit that I’m completely addicted to watching BBC history documentaries on Youtube, and the Vikings have a particular fascination. I even wrote a post over on the Sewcialist blog linking to a few of my favourites. I don’t know what it is about Viking documentaries that so enthralls me - maybe it dispelling old stereotypes, or the fact that Viking history is such a big (yet rarely mentioned) influence on British history, and therefore my family history… or hell, maybe I just like the shiny gold and exciting sagas! 


So here’s my question for you: 


What topics (outside sewing) do you find particularly fascinating? Are you a space geek or makeup fanatic or World War II buff? Could you watch cooking shows for hours, or are you excited about, I don’t know, fencing? Come on, ‘fess up: What interests might we not know about? 

Sunday, March 23, 2014

How many blogs do you follow? And how many do you actually read?

I’ve always been fascinated by how people read blogs. Do they follow 5 blogs, or 500? Do they comment on every post, or rarely? Do they skim through posts on a blog reader, get email updates, or check blogs every so often for new posts? It’s such a mystery! 


Untitled


I got thinking about this last night when i was ready a Sewing Survey post where Sherri, the blog author, confessed that she felt overwhelmed sometimes by trying to keep up on the 38 blogs she follows… and the survey respondent who followed the most blogs follows 120 blogs.


**insert screeching car brake sounds here**


Whaaaaaa????? I follow about 500 blogs, and I guess I assumed everyone else did too! I turned to twitter, where Sewcialists admitted to following anywhere from 6 blogs avidly to skimming about 1000 blogs. 


So now I’m curious, and I’d love to hear from you in the comments! 


  1. How many blogs do you follow?

  2. Do you read everything or skim some/most?

  3. Do you use a blog reader, email subscription, or actually go to the website?

  4. Approximately how many blogs do you comment on regularly?

Here are my answers: 


  1. I follow about 500 blogs.

  2. I skip anything about food or sewing for kids… I skim plenty… and I carefully read posts by anyone I’ve met IRL, talk to often on Twitter, or who sews in a style like me. 

  3. I use Feedly on my phone or computer, and I love it!

  4. I probably leave about 10 comments a week? Mostly, again, for people I’ve met or feel close with. I admire people who comment more, but it stresses me out when I think of it as an obligation or duty. 

How about you? 

Tuesday, March 18, 2014

Flat piping knits using elastic!

Untitled


This is one of those happy accidents of sewing! I’ve tried it with both fold-over elastic and picot elastic, and they both work well. I’ve got a rainbow stash of elastics ordered off Etsy, so expect plenty of piping in the future! 


Here’s how: 


Untitled


First, serge the elastic onto the edge of the fabric. (I set the differential feed to gather slightly to that the seam doesn’t stretch out. Alternately, I suppose you could stretch the elastic just slightly, but I find the differential feed more reliable!) 


Untitled


I wanted the straight edge to show on the piping, so I serged right over the picot edge without cutting it off. Alternately, you could attach it the other way around and have the bumpy edge showing - could be cute! For fold-over elastic, just serge down on one side of the fold.


Untitled


When you attach the elastic, think about which way you want it to lay against the fabric. For example, I wanted the elastic to lie flat against the main body of the shirt, so I attached it to the front and back bodice piece.


Untitled


Now it’s time to sew your seams. I sewed right on top of the existing serging without trimming any off. The important thing is to keep the stitching even so that your piping is the same width all along the seam. (I’ll admit - I totally failed at this the first time, and had to cut the uneven piping off and try again! Which really, is not the end of the world…)


Untitled


Ta-da! Nice straight piping! 


Untitled


The final step is to zigzag the elastic so that it lies flat. 


DSC_0785


That’s it! The nice thing about using elastic as piping is that it bends and stretches with the knit, and doesn’t affect the drape of the seams. 


Here are a couple of examples using fold-over elastic: My Lola dress and a pencil skirt for my sister, which just happen to be in the same fabric! ;)


PicMonkey Collage.jpg


Happy sewing!

Saturday, March 15, 2014

Pink Pants!

DSC_0778


Pair number 9, babies!   ERMAGERD, PAIR #10!!!!! 


(Double digit pants… oh man, i really do love a TNT! Here are my verisons, just to prove it: V1-8, and V9!


DSC_0785


Yup, once more, Style Arc Elle Pants. I won’t even pretend to have anything new to say about them… but they are bright and make me happy in the dark days on winter! 


DSC_0769


I narrowed the calf a little on these - took out a couple of inches. I’ve also started fiddling a bit with the front crotch curve, experimenting to see if I can get the fit smoother. I also think I’ve been cutting the waistband elastic a bit big on the last few pairs. I’ve got another bright spring pair planned (green!) so I’ll try pulling the elastic a bit tighter.


Oh, and the top? V4 of the Jalie Raglan tee!


DSC_0794


It’s a lightweight pique/sweaterknit/mystery knit. I’ve been dreaming of cosy sweaters and sweatshirts lately. (Thank the continuing snowstorms for that!) 


My stash is filling up with black and grey prints these days because they are plentiful, but I have trouble working them into my wardrobe. I went window shopping the other day and noticed a lot of graphic black and white prints with bright colours, which inspired this outfit. 


To perk the black and white print up, I used some picot elastic from my stash as piping along the raglan seams. I’ve used elastic as piping a few times this winter, and I really like how it works with knits! I’m thinking of doing a tutorial, so I’ll share that later this week!


DSC_0774


Are you still sewing for winter, or have you moved on to spring? (Or, you know, the reverse if you live in the southern hemisphere! ;) Have you spotted any good trends in stores that you are looking to copy?