Wednesday, July 30, 2014

Colette Myrtle

Colette Myrtle


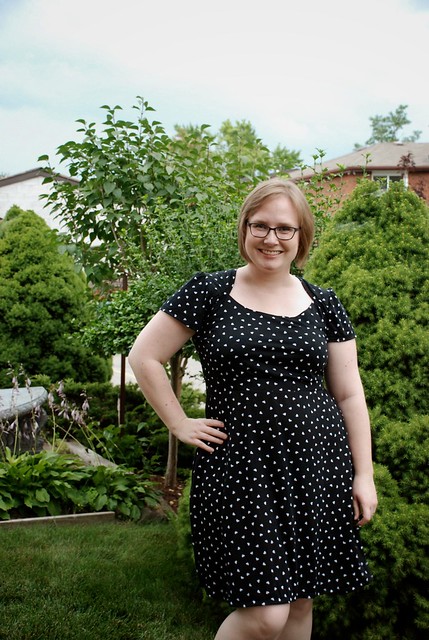
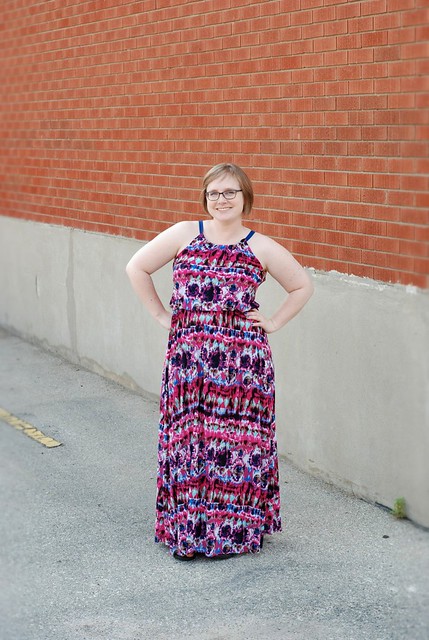
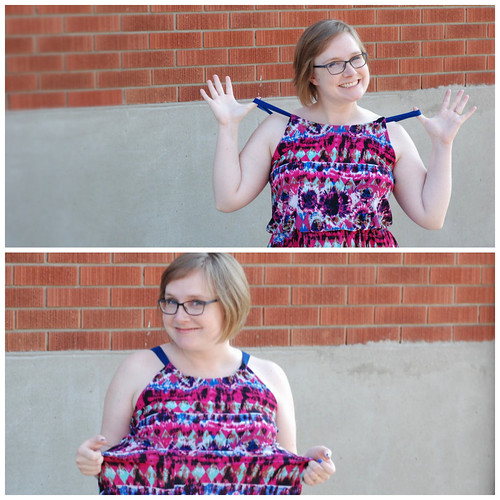
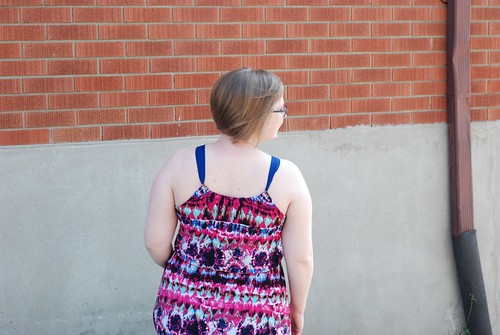
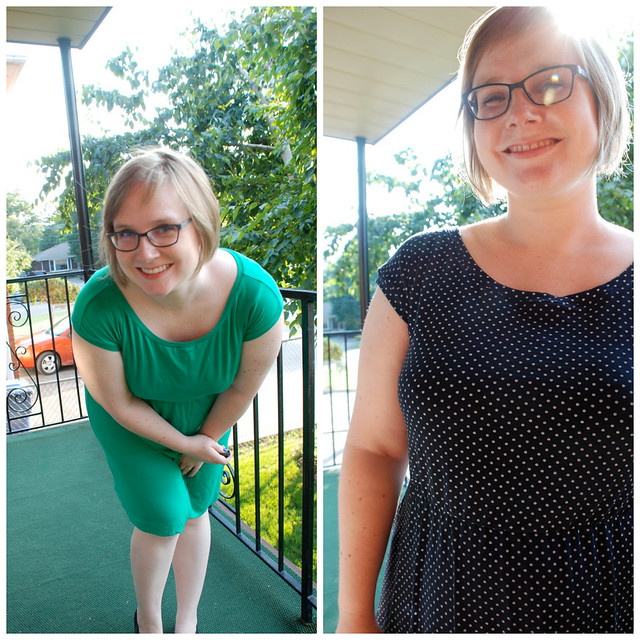
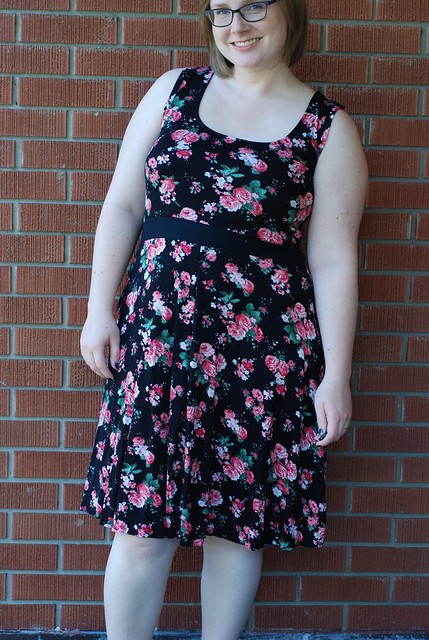
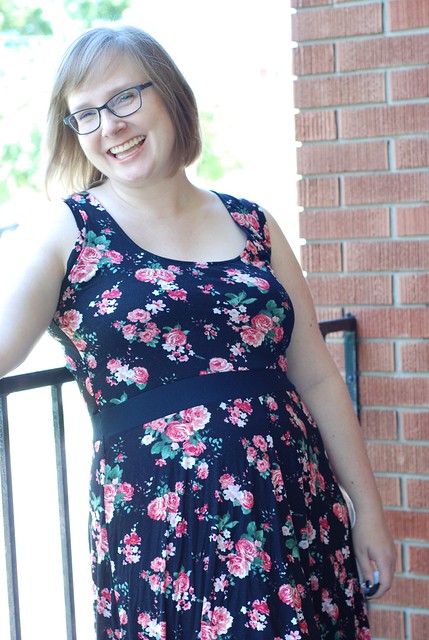
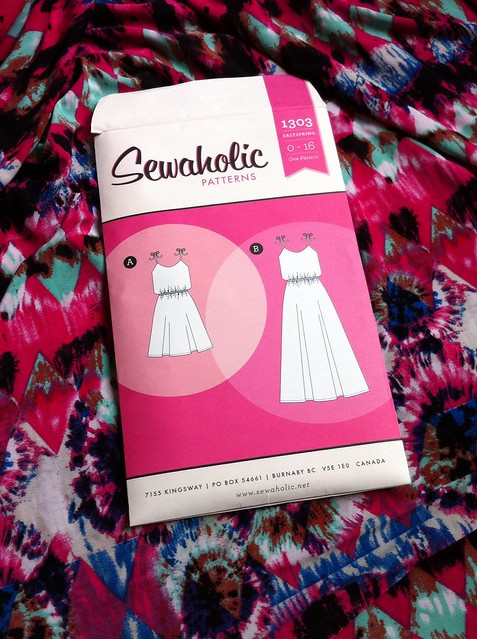
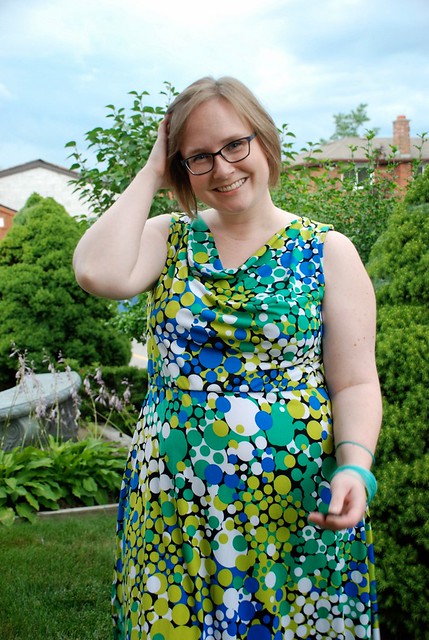
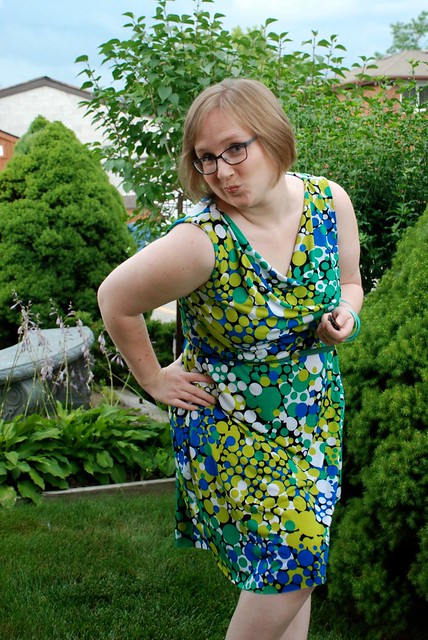
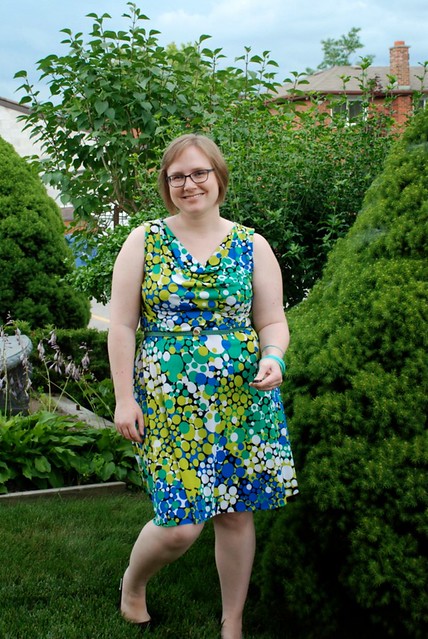
This, friends, is my sheepish face. Sheepish because I am once again showing you a knit dress (is this the 5th or 6th in a row?). Also sheepish because I admit I kinda love to hate on Colette’s knit patterns (so simple! so much ease! so many damn pages to tape together! strange finishing techniques!) but it turns out: I love this dress! 


Colette Myrtle


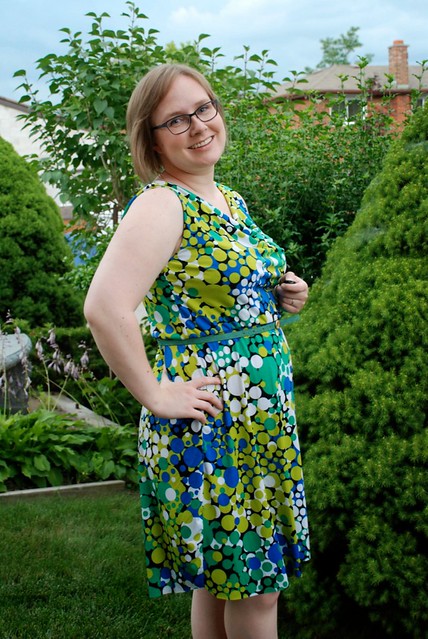
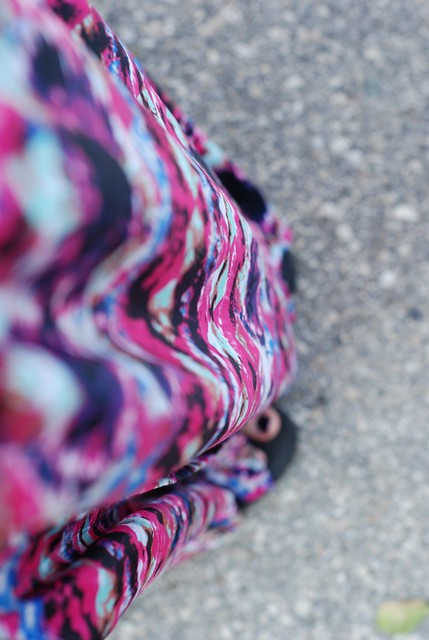
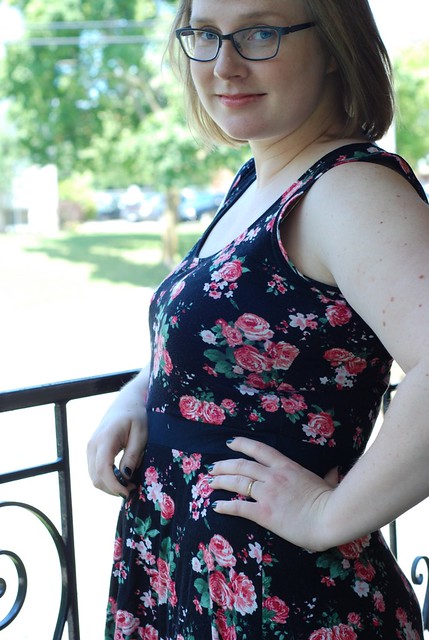
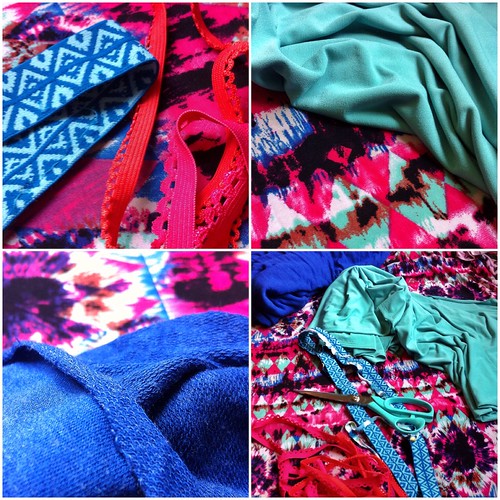
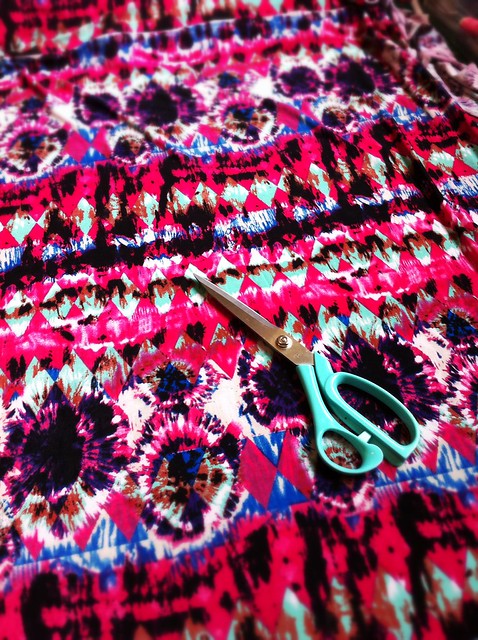
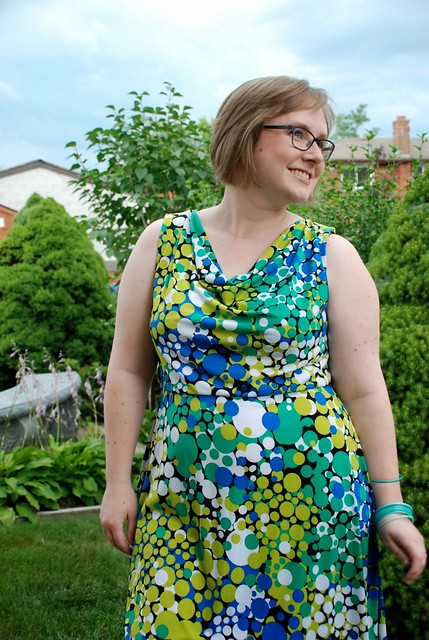
The fabric is ITY that I bought locally and stashed for a maxi dress - but I’m glad I made it into this instead. It’s an almost perfect work dress. Looks pretty, needs no ironing, will work in all seasons, and matches half the cardigans in my closet! (The only imperfect thing - even though I deliberately made alterations to make the drape higher than, say, a Maria of Denmark Day to Night cowl, I still don’t think I could bend over without flashing my whole bra. And in a classroom, bending over will always happen!) 


Colette Myrtle


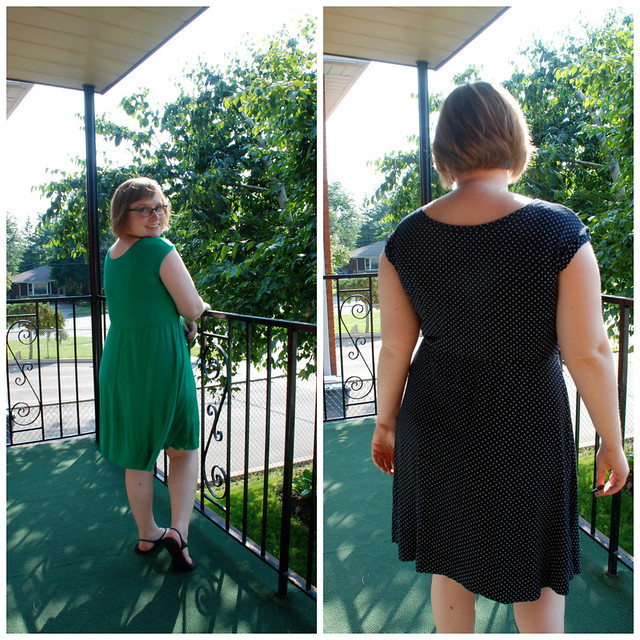
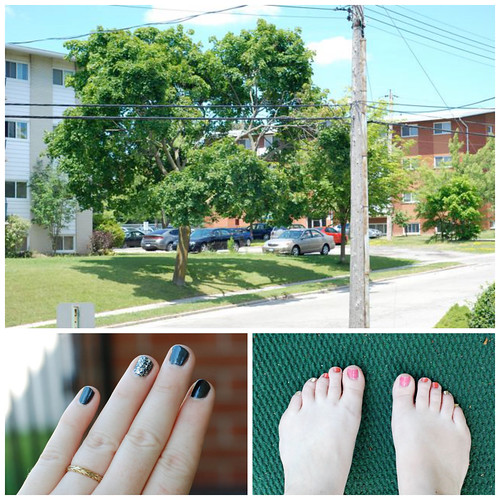
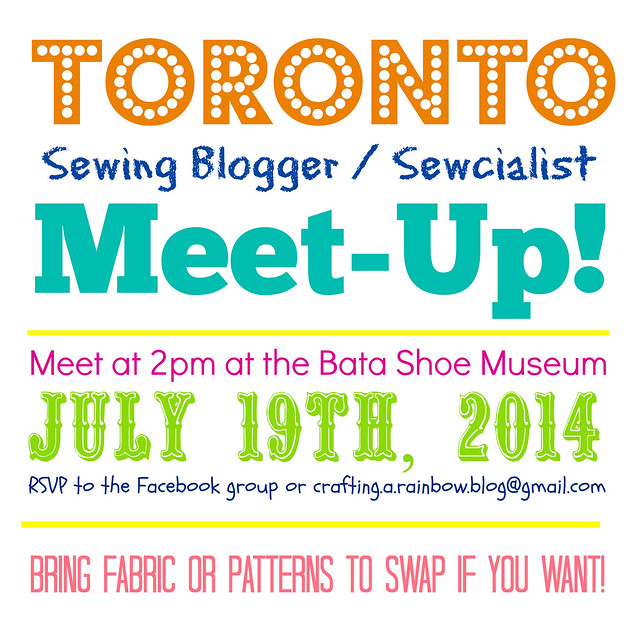
I took a lot of advice from two friends who had made this pattern before me: Stephanie from LoveTeachSew (edited: she just blogged it here!) and Sara from Hamilton Chicklets, (edited: blogged here) who whipped one up and wore it to our Toronto Meet-up. Based on what they told me about their experiences, I did the following: 


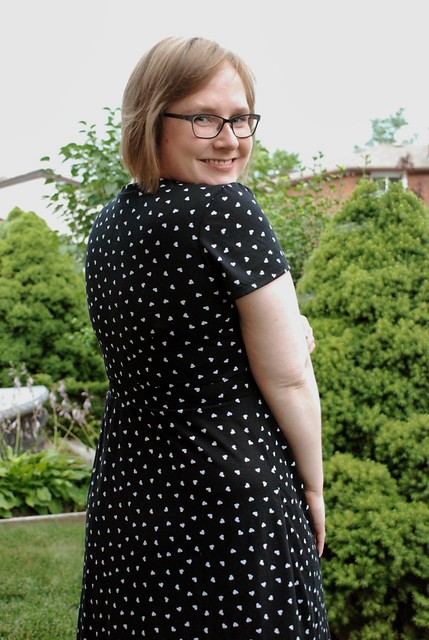
  • Lined the back bodice as well as the front. I’m not a fan of turning and stitching to finish an armhole, as the pattern suggested. 

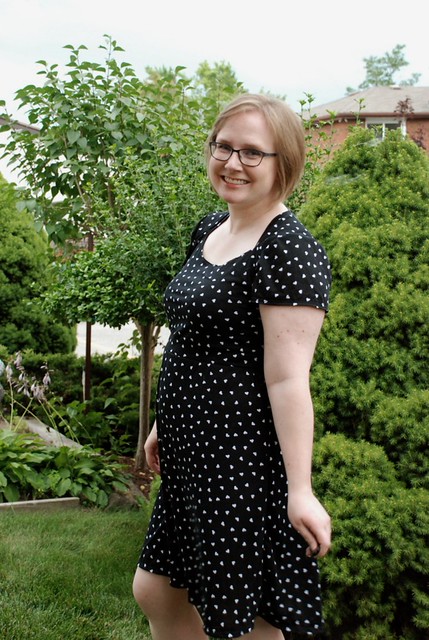
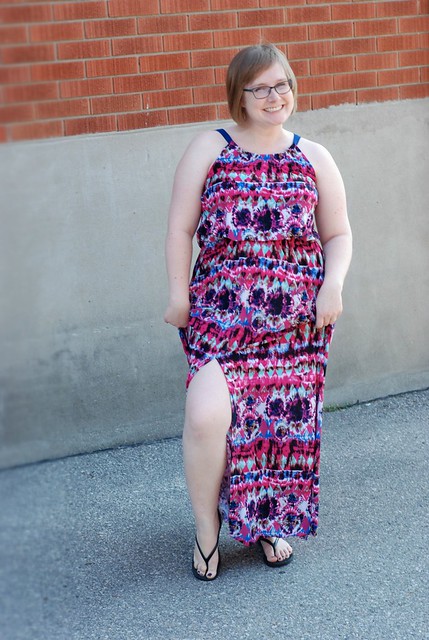
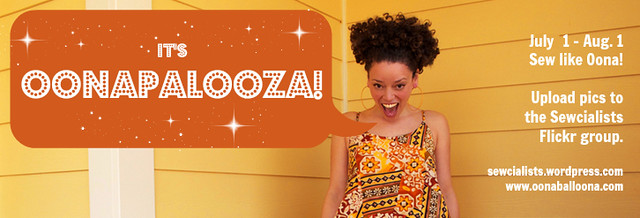
  • Swapped out the skirt for (you guessed it!) Kitschy Koo’s Comino skirt. The myrtle skirt pattern was 3” wider (which would have given me a skirt with 12” extra ease!) I learned from my Oonapalooza dress that i’m not a fan of a gathered skirt with a blousy top. This skirt has the perfect amount of wearing ease for me. 

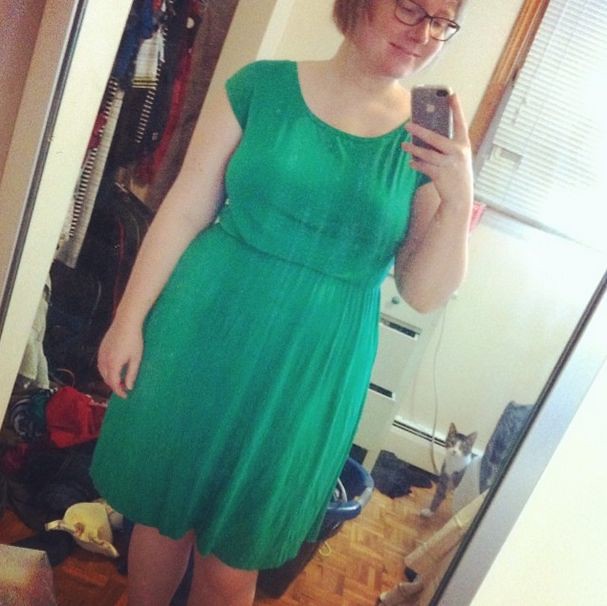
  • Use swim elastic at the waist, instead of doing a channel with1” elastic as suggested. No reason, really - just personal preference. 

  • Shortened the bodice at least 2” (because I wasn’t going to use wide elastic, and because I’m short waisted… and because I fear too much blousing in the bodice!)

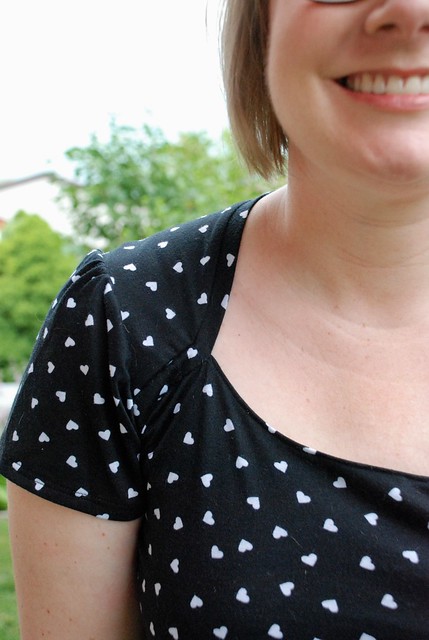
  • Graded from slightly larger than a medium at the waist to an XS at the shoulders. My measurements would have put me in a M at the shoulders and a L at the hips, but as drafted the pattern seems to have very wide shoulders straps (like, *almost* a cap sleeve, which I think looks odd!) 

Colette Myrtle


Once the bodice was put together, I had to: 


  • Take out an extra 1/2” at the armcye curve from the shoulder seam down.

  • Scoop out the underarms a bit. I had used stay tape on the seam, and combined with tracing an XS at the shoulder, I can see why I needed extra room. (I have a 42” bust, so just imagine the ease on someone with a 33” bust as suggested!) **Ack! Wait! I just looked at my pattern again, and I graded from a XS at the shoulders to a medium at the bust. I take it all back!  Colette sizing buts me in a L at the bust, and an XL at the hip, so I basically just went down a size at hips and bust, and down 3 sizes at the shoulder.**

  • Put elastic across the back neck, between the two layers of fabric. I forgot that Colette patterns are always too wide for me back there.

So basically, Myrtle was a starting point - but not much is left as drafted!


What I can say about the pattern is that it was definitively THE WORST pdf I have ever put together. 


Untitled


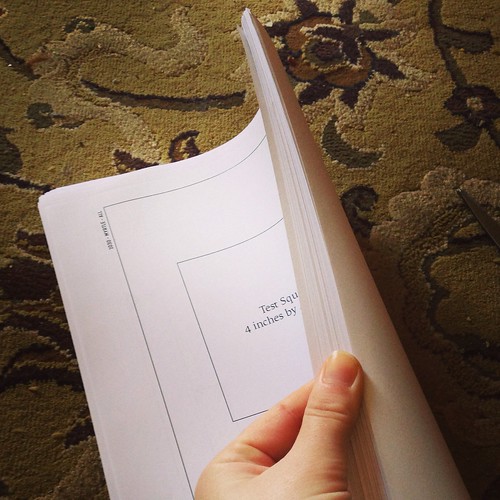
It’s 60 pages long, but look at the size of those borders! You loose so much of each page to trimming, and that’s totally unnecessary. On top of that, the 2 plus sizes are nested as a separate unit, so you have to tape together two of every pattern piece. Worse, the pieces are laid out like this: regular size bodice, next to plus size bodice, next to regular sized skirt, next to plus sized skirt. Why not cluster one size grouping together, and put the other size pieces together too? Then it would be so much easier to only tape half the papers. And the kicker - the giant rectangle of taped pattern pieces is something like 12 pages wide! Huge, unwieldy, and so much margin for error. In the end, the two bodice pieces were all I used, and that could have been printed on 15 pages easily. URGH. 


Now, in fairness, Colette is going to be reconfiguring the pdf and releasing it in sections so you can print only the size range you want. Thank goodness! I don’t know how it took them this long to decide to do that. It’s not like this is their first PDF pattern.


Colette Myrtle


One comment I’ve heard from people several times about the pattern is that it doesn’t look like the models in Colette’s pictures are actually wearing the size prescribed to them, because they don’t have as much ease! I’d agree with that… but I think part of that comes from how big the change from size to size is in the larger end of the pattern. For example, each size (s, m, l, xl, 2xl, 2xl) covers two dress sizes for a woven (0,2,4,6,8, etc). In the smaller sizes, than means a range of 2” different in bust size (i.e. if you measure 33” or 34”, make an XS) but in the larger sizes it’s a 4” range (if you are a 40, 41, 42, or 43”, make a large.) That’s a big difference in size! If you measure 40” you’ll be swimming in it, but on a 43” bust it might look more fitted. I vaguely remember Colette explaining why they did this in some post, but I can’t find it now. Personally, i think their knit patterns seems to have too much ease to begin with, but the shift in sizing increments does help explain how that ease could get exaggerated or masked, depending on where you fall in the range. 


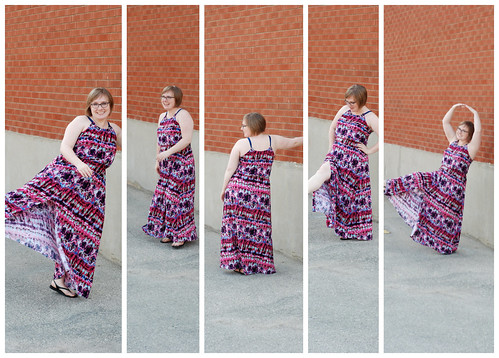
That was a lot of kvetching - sorry! The great thing is though, I have a dress I love, and a pattern I’ll definitely make again. 


Have you sewn with any Colette PDF patterns? What do you think of their knitwear? 

Monday, July 28, 2014

Bronte Knit Dress

Surprise! I made another dress! And it’s a knit! Oh, the thrills and chills, I tell ya. 


Jennifer Lauren Bronte Dress


This one is near and dear to my heart (ugh, I swear that wasn’t a pun) because it’s based on the Bronte pattern by Jennifer Lauren. I’ve gotten to know Jennifer a bit through Me-Made May and our blogs, so it’s fun to sew one of her patterns! 


Jennifer Lauren Bronte Dress


This is a rare project for me that involved multiple muslins to get the fit I wanted. I did TWO muslins, people! Most notably, I narrowed the front shoulders, extended the back tabs longer, and scooped the front neckline at least 3” lower. In retrospect, I could have gone even lower! The skirt is from the Comino cap dress, and the waistband is… just a rectangle. 


Jennifer Lauren Bronte Dress


The fabric is part of my Wanderlust haul… and I have to say, I loved it less the more I worked with it! After prewashing, it started clinging to itself like mad, which affects the drape. It’s a tissue knit, so I had to line the bodice… which of course, led to the eternal conundrum of which seams to sew first… 


Truth be told, I’m quite enjoying lining more of my knit bodices. The more I do it, the more intuitively I can figure out how to sew it together so that I can do alterations as I go. I usually do a combo of clean finishes (thank you, burrito method!) and folded bands where I want it to have more stretch recovery over time.


Case in point: 


Jennifer Lauren Bronte Dress


For the neckline, I clean finished and topstitched the front bodice, but I went for the folded band across the back bodice because a)I think it’s cute and b) I didn’t want that part to stretch over time! You can tell I did a slightly shoddy job of topstitching down the overlap - but who cares?


The sleeves were another conundrum… I’d already finished everything else, so when Instagram convinced me sleeves would be cute, I had to set them in the round. *GASP!* I haven’t bothered to do that in over a year. (Recently I realised I’ve probably also avoided zippers for a year or more too. Not that I struggle with them, just that I find them avoidable!) Back to the sleeves though - I slashed and spread about 3” total to try to make flutter sleeves, but they ended up just kinda loose. I sewed them in wrong-side out twice.. recut twice… and generally hated the process.


Jennifer Lauren Bronte Dress


The dress though, I like! It turned out very wearable, and as close to retro as I’ve made in a long while. Along the way I got really inspired by these custom knit dresses from Ureshii, which are a fun way to imagine different necklines and skirt shapes put together! A lot of the designs seems to have a similar sort of back bodice/shoulder neckline as Bronte, but often with cut-on sleeves like this or this. I’m curious to give that sort of design a go! (Bonus: Ureshii is run by two Canadian sewists, so I’m hometown proud… and the word “ureshii” means “happy” in Japanese!) 


Phew! That’s more than I’ve yammered on about fit or alterations in a  long time. Guess it comes from finally trying out some new patterns this summer! 


Meanwhile, despite all of my stashbuilding, my fabric supply is starting to feel a little thin. I tend to go through it pretty fast because nothing I sew takes more than a day or two. I’m in the market for multicoloured rayon knits - florals, abstracts, that sort of thing. They are surprisingly hard to find in colours I like…Can you suggest any online stores I should check out? 

Saturday, July 26, 2014

Oonapalooza dress done!

Oonapalooza Saltspring Mod


My Oonapalooza dress is done, worn, and photographed! Don’t know why that seems like such an accomplishment… but it IS a whole lot of ITY to wrangle!


You might remember my plans


Untitled


You guys wisely told me to do v2, and I did. It’s a modified Sewaholic Saltspring, with the front and back neckline raised. I traced a slightly smaller size, since I was using a knit, and took a few inches off the bodice length… I have to admit I didn’t use the instructions at all. Instead it was all a big geometry puzzle in my head! 


Oonapalooza Saltspring Mod


The straps are a double layer of fold-over elastic (pure laziness on my part) fed through a channel in the front and back bodice. I used swim elastic for the waist (again, laziness and it was all I had in the right width) which does work well because it’s quite stretchy but also strong enough to hold up the full maxi skirt!


Oonapalooza Saltspring Mod


Putting in a slit was an important part of Oona-fying this dress. The Saltspring skirt is HUGE , so I just cut from waist to hem, sewed to mid-thing, and folded back the rest to finish. It would have more impact if the skirt wasn’t as full, I think - it really doesn’t show much even when I walk! I *could* have done the slit higher… but truth be told, I always wear legging shorts under skirts to avoid friction, so this is a wearable compromise. 


Along the way, I learned that posing against a wall is harder than Oona makes it look! 


Oonapalooza Saltspring Mod


Yeah. You might be getting the vibe by now that I’m not in love with this dress. Nothing wrong with it, and it is perfectly fine… but meh. I’m not sure if it’s disappointing because I put a lot of work into altering the pattern, or if it’s because it turns out I don’t like this high faux-halter neckline as much as I thought I would! I think the dress suffers from being blousey everywhere. I think it would have been more flattering if the top was more body con with a defined waist, or the skirt was smooth at the waist and then flared out dramatically. As is… fine but very demure!


Oonapalooza Saltspring Mod


As a result of my haphazard drafting, the back is out lower than the front… and I actually rather prefer the back bodice worn in the front! But then the slit is in the back, and that’s just odd…


Oonapalooza Saltspring Mod


The great news is that the dress cost less than $20 in materials, and I got to test out my drafting skills and try out a new silhouette in the process. Learning-wise, this dress is a win! I’m sure I’ll wear it again sometime… family BBQ maybe, or something like that? For now, I’m happy to move on and think about the next dress - because I still need something to wear to weddings this summer! 


Tell me I’m not alone on being a little disappointed on some projects! What have you worked hard on, only to feel a bit “meh” in the end? 


ps. Speaking of slightly meh, I wore my navy polka dot Comino cap dress for the first time the other day, and realised that it’s too monochromatic for my tastes! I wore it with matching mint shoes and necklace, and felt rather generically pretty until I had layered on a pink cardigan and multi-coloured floral scarf! The dress itself was lovely to wear, but I really think I need to stick to multi-coloured fabrics! (Except my next dress coming up, which is black and white…) 

Wednesday, July 23, 2014

Style Arc Bengaline Review Video!

At a meet-up last weekend, Kristin from K-Line very generously gave me a good-sized chunk of stretch bengaline - that most illusive and mysterious of fabrics! She bought it online from Style Arc, and I’ve been bugging her ever since to find out what the fabric is like IRL. Lucky me - now I know, and I get to sew with it! Thanks Kristin!!


Stretch bengaline is what Style Arc recommends for their pull-on trousers, like the Elle pants that I love to make. Rumour has it that bengaline is sometimes available stateside, but that the quality varies a lot. (For more on that, read this post from Anne, aka. the Clothing Engineer, who is the Style arc and bengaline guru.)


Since it’s such a hard-to-find fabric, I thought I’d do  fabric review video! (Warning - I set the exposure to show the black fabric, so I’m ghostly overexposed for most of the film! ;) 


I think bengaline is one of those fabrics you either appreciate or hate. It’s super-stretchy in one direction, and feels, well… like icky polyester. Kristin was obviously not a fan herself - I’ll let her explain why, in her own words from this blog post


"I don’t like Bengaline - and I’m working with the "good" kind - the rayon blend (not the poly blend). I can only imagine how hideous the poly stuff must feel. There’s so much fucking stretch that I can pull the pants off without opening the zip. My highly modified (for me) Claudia pants pattern is suited to fabric having a max of 20 per cent stretch and probably 10 per cent stretch factor would be better.

The only things I can imagine wearing in Bengaline are panels in a dress (for stretch and contrast), a tailored jacket (that fits with the ease of a cardigan) or VERY close fitted pants. Seriously, you want at least 2 inches of true negative ease, maybe more. I’ll try my other yard with the Elle’s or “denim” leggings, but I don’t suppose I’m going to be a convert.

The fabric feels untenably fake. It’s a bit sheeny - equally on both sides, IMO, so I couldn’t figure which was which. I have no idea if the lighter colours are less or more sheeny but  that would make a difference going forward. (I want matte finish.) Bengaline seems never to iron completely. I mean, it presses a nice seam, but it’s almost like you iron-in the wrinkles as you go. It didn’t take my fusible interfacing well so there’s a bit of weird overstretch bubbliness on the underside of the facing (not a deal breaker but ugly).”


That’s pretty clear, isn’t it? :P (BTW, on the off chance you don’t read her blog, you should, because it’s scathing and insightful and funny in equal proportions!)


So what IS good about bengaline? Well, the RTW pants I owned in the past were great because they never wrinkle, they don’t bag out through the day, and they last forever. Yes, they feel polyestery and require no-VPL underwear… but they’ll stretch to fit you through thick and thin, and they look professional**, are washable, and are comfy as hell.


**Caveat: In my line of work the average day included getting chalk dust on my tush, some kid smearing boogers or paint on me, and leading stretches in gym - so stretchy, easy-care pants are a good thing! On the other hand, if I worked in a really nice office and those weren’t considerations, this probably wouldn’t be the fabric for me.


Have you touched, sewn with, or worn stretch bengaline before? What did you think? 


ps. I’ve started a new section for fabric review videos in the headbar just under my blog logo. Easier to keep everything in one place! :) 


pps. Do you know what I mean when I say you’ll get a “snowpant sound” when you walk? Just realised maybe that’s a reference you’ll only understand if you’ve trudged to school in snowpants as a kid!


Tuesday, July 22, 2014

Comino Cap Dress

The Kitschy Coo Comino Cap dress feels like an instant classic. Lady Skater never quite worked for my figure, but somehow this one makes me feel chic and comfy at the same time! 


Comino cap front Collage.jpg


The green version was a muslin trial… it’s just too bad that when I first got the fabric I thought it was *too* green so I tried to dye it darker… which didn’t change the colour but did leave dark splodges on some parts! Darn. It’s a very thin rayon cotton from fabric.com, which does rather show all the bumps and lumps under it. Even with a slip. Darn again. Guess I just need more green fabric? 


The navy is the bamboo knit that I showed in my fabric.com haul video… and it sewed up just as nicely as I hoped. Hart’s has similar fabric in a whole bunch of colours, and I’m seriously tempted to order a lot of it! 


Comino Cap back Collage.jpgBack to the pattern. I shortened the bodice about 2”, and put fold-over elastic at the waist seam to keep it snug. The “waist” on both dresses sits just at the bottom of my rib cage, which is quite high - but that’s how I like it! My hips start right under my ribs, so an empire waist is more flattering on me. 


(Actually, when I first made the green dress is did a nice little blousey thing at the waist… 


cc ig


…but then for some reason I now forget, I had to resew that seam and lost some of that length. The elastic was too tight, maybe? I’d like to explore that style again on another version though…)


What I like most about the pattern is the wide scoop neck that still manages to cover bra straps. The cap sleeves fit nicely, too. I think I have more ease in the skirt than the design calls for, because I raised the waist, but I like how it turned out. 


Comino Cap closeup Collage.jpg


It’s the perfect basic dress, really. It would look great with a belt (but I hate the thought of wearing a stiff belt when I’m in a stretchy dress), and it’s going to be great for layering and accessorizing. This version, without the sweetheart neckline, is the sort of wardrobe basic that you could wear all the time without people noticing the repeats. Not a show stopper (at least not the way I’ve sewn it), but the sort of dress that gets worn again and again!


So, could you help me choose? *If* I were to order some bamboo dot fabric from Harts, should I get the purple, coral, green, or blue

Thursday, July 17, 2014

Wanderlust Fabric Haul Video!

Time for another fabric haul! I just received an order from Wanderlust Fabrics, so I made a quick video to show what the fabrics are like. (BTW, the comments on my haul videos of Fabric.com and Girl Charlee had lots of interesting discussion in the comments, so thank you!)  


Wanderlust seems to be a fairly new online store - at least, I hadn’t heard about it until recently! They are sponsoring True Bias in her Hudson Pant sewalong. I’ve come across them on a few other blogs too, and so far the reviews seem positive. 


I’m happy to report that I’m also very pleased! As you can see in the video, all three fabrics I ordered are nice, and they sent along a bundle of swatches that are all good quality. (No caked ink here!) The descriptions of weight seem accurate. Most fabrics are $6.50/yard, so it’s quite affordable. 


The only downside for me is that the shop doesn’t have a way to automatically calculate international shipping, so you have to ask for a quote through email. I got a response right away, which was great, but I prefer the independence of being about to experiment with different order combinations to get the most fabric for the lowest shipping! For example, I originally asked for a shipping quote for 4 yards of fabric, which ended up being about $21 shipping for $26 worth of fabric. I emailed back to ask if the shipping cost would change if I ordered a few more yards, and ended up getting 6m shipped for the same $21 shipping.


Of course, those shipping costs are what USPS charges, and I’m not questioning that cost… it’s just a matter of wanting to make it better value by filling up the package! I almost never shop from online stores that make me put in an order and THEN ask for a quote. It’s surprisingly common, but really annoying. The shipping cost is a big part of the price for me, and I can’t make decisions without knowing what it will cost. I’m sure there’s some reason it’s hard to quote international shipping, but I really appreciate when it is possible!


That said, I’ll definitely be buying at Wanderlust again! I like the selection of prints and the quality is good. Stock seems to change quickly, so (oh no!) I’ll just *have* to check back regularly. Life is hard sometimes, right? ;) 


(BTW, if there are any Wanderlust Fabric you are thinking of purchasing, I might have a swatch, so let me know if you want me to report back to you on a particular print!) 


Happy sewing! 

Saturday, July 12, 2014

Nettie/Tiramisu Mashup!

Nettie-Tiramisu Mash-Up


It’s a Nettie-Misu! Nettie bodice, and Tiramisu half-circle skirt. Basically, it’s a Moneta/Lady Skater copycat that fits my shape better than either of those patterns actually do. That, my friends, is the magic of sewing! 


Nettie-Tiramisu Mash-Up


The fabric is from the recent Girl Charlee order that I did a video about. It was the one piece of fabric I was happy with… but I’m very happy with it! The bodice is lined in black jersey, like the contrast waistband. I chose the finish the neckline cleanly by sewing it to the lining, but I finished the arms with a folded band. I figured that the bands would help support the dress, and not let the weight of the skirt pull down the bodice. (To tell the truth, my first bands were accidentally cut with the grain, and ended up way to tight… I managed to cobble together scraps to make bands cut with the stretch, which turned out loose but better than before!)


Nettie-Tiramisu Mash-Up


Look, no gaping! One of the reasons that I wanted to try the Nettie bodice is that I’d like to make some, well, slightly sexier and more youthful dress for summer! Most of what I sew is work-wear, but I’d like to break out of that rut. I went back and forth on this one, raising the neckline then lowering it again… next time I think I’ll make it a little lower for my desired effect! I also cut out sleeves, but decided to skip them so that this would count for the Summer Sundress Sewalong!


Nettie-Tiramisu Mash-Up


I have to admit, I’ve got a love/hate relationship with this set of pictures. On the one hand: Ermagerd, I think I look pretty! That is not how I think of myself in real life. On the other hand, the magic is entirely down to using a 50mm lens that makes everything look washed in light, and creates shallow depth of field so that the backgrounds are softly blurred. Oh, and makeup - remembering to put on more makeup than I usually would so that it shows up as normal on camera! (For what it’s worth, none of these pictures are edited - they are straight from the camera.) 


The other big trick is lighting from behind, I’d never tried standing between the camera and the light until Creating in the Gap wrote about her photo tips during Me-Made May. Here’s a photo with that same lens, but without light behind me… 


Nettie-Tiramisu Mash-Up


Fine but certainly no magically flattering! (Incidentally, this is THE ONLY picture I got where you can see how long my skirt is!)


So to balance out how flattering the pictures are above, here’s a couple of outtakes which perfectly capture the range of expressions I make when displeased while teaching!


Nettie-Tiramisu Mash-Up


Four Stages of Teacher Face: (From left to right)


1. Is that kid really doing that?


2. I see you doing that. 


3. Stop now. 


4. You will stop that RIGHT NOW. 


(Step five is me frowning my face off with lips pursed, telling you EXACTLY what bad choice you are making! In kindergarten, it’s probably something like “You are hurting ____. They said stop!” or with 10 year-olds “You are drawing on your desk. Students need to use that for years to come!”) 


It’s funny to see versions of teacher-face on myself, because obviously, there’s no mirror for me to look in when I’m in the middle of class! (I did once accidentally teacher-glare at my husband when he hopped up and rolled on an Ikea cart - he stopped immediately, and confessed 5 min later that I scared him! Oops!)


I’m sure we’ve all got variations on these faces, the ones we never show to the camera or even the mirror, and certainly not on our blog! As a blogger, I take heaps of pictures, and delete the ones where I’m wonky-eyed, grimacing, double-chinned, or just generally looking crazy. I think that’s a good thing, too - it’s certainly helped my self-esteem in the past 3 years of blogging to feel like I can actually be pretty in pictures! On the other hand, life isn’t all finish garments and backlit photos, so it’s nice to keep it real. 


With that, back to the magic of a good lens and some backlighting!


laughing


I like this dress, and I’ll definitely be making more! 


How do you feel when you take good pictures of yourself? And do you have any “Stop that!” facial expressions that your family might recognise even better than you would yourself?


(Oh, uh… please don’t ready any of this as a request for compliments! I like myself just fine, but growing up as a unstylish chubby smart kid gave me unshakeable faith in my brain and talents over my physical charms!)

Friday, July 11, 2014

Name these shorts!

Can you tell which pattern I used? Shorts collage


There’s a slight hint in the hem of the white pair… They are, in fact, Prefontaine Shorts! Except I got quickly bored with sewing the distinctive piping, and then I got bored of sewing patch pockets, and voile - I have 3 pairs of very basic shorts! 


I think the pattern is excellent - I was so pleased to find that the back crotch curve almost perfectly matches my TNT Style Arc Elle pants.The front crotch curve is all kinds of crazy on me, but I find I really don’t care. These are shorts for lounging around the house or doing errands. And for that, they are perfect!


shorts details.jpg


All three pairs are made with stretch twill with about 30% stretch. The pockets are lined with quilting cotton. I wanted to avoid unflattering gathered fabric in the front, so between the two pockets the waistband is stable and not stretchy. The other 3/4 of the waistband have elastic, though really, I should have been brave and pulled it tighter. They all slouch down pretty fast… but then again, I don’t really care! 


It’s been a few years since I had shorts that fit, so I’m really enjoying throwing these on when the weather is hot! (The rest of the time I can be found huddled under a quilt on the couch… :)


Of course, this is the time of year when teaching suddenly becomes the best job ever. Two whole months of vacation? Oh yeah, baby. Of course, Jamie and I are both unpaid over the summer, and I don’t have any work yet for fall, but ya know, vacation!!!


Summer Collage.jpg


We live in a little triplex apartment, so summer is filled with the sounds of people and kids talking, fighting, playing, and listening to universally terrible music. I’ve been enjoying the luxury of having time to paint my nails: black fingers, in Jamie’s honour, and pink, orange and gold toes. I’ve also been seeing lots of friends and family, which is a real treat. We also bought an eliptical machine, and have been trying to work out at home. So far so good, although MAN I’m out of shape!


cat Collage.jpg


Most fun of all, we adopted a second cat two weeks ago! His name is Frank (Both cats are named after the mad scientists from Mystery Science Theatre 3000). Frank is 8 years old and very chill… Clay is now 1 year old, and rather spooked! They are both getting more relaxed by the day now, even going so far as to sleep or play in the same room for short periods of time. It’s progress! Having cats to watch and care for really does make our lives so much richer. Three cheers for cats! 


Have you tried anything new this summer? Food, patterns, hobbies, adventures… new flavour of chips? What’s new in your world?

Wednesday, July 9, 2014

Have you tried knits from quilting cotton designers?

Wow! I’m relieved that you enjoyed my fabric haul videos - and glad that many people took the time to leave really in depth comments. Thank you! 


One of this topics that came up in the comments is how more and more quilting cotton companies are starting to release knits. I think this is a brilliant change in the industry - but are the knits any good? I thought maybe we could pool our experiences so that we can shop smart!


Looking around online, here are the quilting cotton lines that seem to branching out into knits - and what I’ve heard, if anything, about their quality!


(And since several people mentioned how pleased they are with shopping at Hawthorne Threads, I figured I’d use their site for links. Thanks to Gail who pointed out just how many knits they have now!) 


  • Riley Blake: They’ve been into knits for a while, and seem to have a good selection of basic graphic dots, stripes, and chevrons. I know Steph from Sewing Cake has been pleased with the Riley Blake knits she’s used… according the post I link to, she says they wash and wear well, don’t curl badly when you sew, and are printed on grain!

  • Westminster Knits, including Anna Maria Horner: Listed as interlock, so probably quite stable? 

  • Robert Kaufmann Laguna Jersey: These have been around for quite a while too. Lots of variety of solids and prints! 95% Cotton/5% Spandex. Robert Kaufmann also has other prints

  • Briar Rose Knits by Heather Ross:  Finally one I’ve touched! I bought some of this from fabric.com and it was AWFUL. It’s interlock (which makes me afraid of all those other interlocks) with almost no stretch and the same crusty ink that bugged me about Girl Charlie fabrics. Definitely NOT something I would recommend! It’s made by Windham, so I’d be wary if they start releasing other knits…

  • Art Gallery: They are releasing a bunch of interlock prints in September - I’m curious to see how they are! 

  • April Rhodes: Also produced by Art Gallery, but these are a 95% Cotton/5% Spandex blend. Heather made a top recently in this tomahawk print, and she said the quality is good - like a slightly lighter Lillestoff, I think she said, which is high praise! 

The curious thing that jumps out at me is that so many companies are coming out with interlocks instead of jersey. Why? (For reference, a classic man’s t-shirt would be made of interlock. Beefy, little stretch, not much drape. I stand corrected! Lisa G points out below that men’s shirts are jersey… I did some research and an interlock would look like the right-side of jersey on both sides. Could be soft, thick and stretchy, or very stable.) Is a stable knit more appeal for people used to sewing with quilting cotton? Or is it more popular for kid’s clothes? To my mind, a cotton/spandex jersey blend is much more forgiving, both for sewing and wearing. In my dream world, they’d make drapey rayon knits too!


Now to my point: Have you touched/bought/sewn with any of these brands of knit? If you have, or know of a blogger who has, please let us know what the fabric is like in the comments below. I’ll make a second post with more detailed reviews, if we come up with more information! And if you haven’t sewn with these knits, what kind of base fabric would you like them to use?


Oh yeah - and what brands did I miss?

Tuesday, July 8, 2014

Online Shopping Review: Haul Video from Fabric.com and Girl Charlee!


Remember a few months back when I was debating shifting from fabric shopping in person to shopping online? Well, I’ve put in a couple of orders online, and I thought I’d do a review! I’ve done two orders from Fabric.com, and one order from Girl Charlee. Both have low prices, and a wide choice of knits. **Spoiler: I’m much happier with one shop than the other!**


The challenge of ordering knits online is trying to decode the written descriptions to guess what the fabric will really be like in person. To help share my own experience, I thought I’d try “haul videos” so that you can really see the stretch and drape of each fabric, and the overall quality of each store!


(Yes, this concept might just be self-indulgent and weird. If you don’t watch I won’t hold it against you! ;) 


First up: Girl Charlee


And here are links to the fabrics I ordered:


Next: Fabric.com


More links to what I ordered:


Overall Thoughts:

In the end, I found fabric.com to have much more accurate and reliable descriptions of their fabric. In all three orders I’ve ever done at Girl Charlee, a lot of their fabrics turn out to be thinner and more stable than the descriptions indicated. I just can’t get over the caked on ink in their custom prints, either. I’ve had good and bad fabric from both places, but I’m disappointed enough that I won’t shop at Girl Charlee again. 


What has your experience been of shopping online? Do you have any suggestions for what I could make with my thin, stable, and not-drapey knits from Girl Charlee? Help! 


Wednesday, July 2, 2014

Toronto Sewcialist Meet-Up!

We’re having another meet-up in Toronto! I know there are a few people who aren’t part of the Facebook group, so I wanted to post about it here too. (Sorry to those of you who aren’t in southern Ontario!) 


Toronto Sewcialist Meetup, Summer 2014


We’ve had a couple of big meet-ups in the last year and a half, starting with this one that Adrienne and I organised last spring. It’s always fun to meet like-minded people who love sewing! (The hilarious bonus is the conversations with first-name-only mentions of this blogger or that new pattern… i.e. “Did you see Heather’s Tiki Anna?” Totally unintelligable to anyone but a sewing blog reader!) 


We’ve shopped the fabric district a coupe of time, and checked out the sewing supplies in nearby Hamilton… so as a change, we’re going to go check out the Bata Shoe Museum instead. It’s one of my favourite museums in Toronto because it’s just the right (small) size to visit without getting exhausted! They’ve got a new exhibit called “Fashion Victims: The Perils and Pleasures of dress in the 19th Century”. (Thanks to Rochelle for bringing the exhibit to my attention on twitter!)


Afterwards we’ll find a place to eat, drink, relax, and have a little swap! Not sure where though - Torontonians, do any of you have a suggestion? 


If you can join us, RSVP on the Facebook group or send me an email at crafting.a.rainbow.blog@gmail.com Feel free to grab the image from above and spread the word on your own blogs - The more, the merrier! 


I was going to ask if you have any meet-ups planned this summer, but that seems sort of cruel to isolated sewists… So instead, tell me: Can you shop in a group, or do you need to be on your own to make decisions? I almost never buy anything at meet-ups because I’m so distracted by chatting, and I don’t feel like I can take the time to pick something out. I’ve never been good at shopping in groups - even when I go to another city with my husband, we ALWAYS split up and do our own thing so that the other won’t have to wait around bored! 

Tuesday, July 1, 2014

Oonapalooza Plans!

Did you hear? It’s Oonapalooza month over on the Sewcialists Blog! 


Oonapalooza


Basically, the challenge is to get inspired by Oona’s sense of style, colour, drama and fun. Make whatever you want, but step out of your comfort zone and have some fun! 


I’m really excited about the theme, because summer is such a great time to add some sass and pizazz into clothes! I’ve been feeling the urge lately to experiment more with pattern drafting, and try out some new-to-me silhouettes, so this is the perfect excuse. (I’m seriously obsessed with this site.) Plus, I don’t have to wear work clothes until September, so it’s the right time to sew something flirty, or dare I say it, sexy? (I honestly don’t think I’ve ever sewn something sexy, and the idea kinda freaks me out! Which means it’s probably time to try it!) 


Baby steps first though… The first project I’m planning is a hack of the Sewaholic Saltspring. My awesome bloggy buddies Leila and Heather bought me the pattern last year, and it’s finally the right time of year to try it!


Untitled


I’ve got 3m of ITY to work with, and I’m deciding between two options:


Untitled


(Ooops, looks like I forgot to add green to the one drawing…)


#1: Straight-ish Mission-maxi style skirt with a slit, and wide bands on the Saltspring bodice.


#2: Raise the Saltspring neckline to be halter like I asked about here. Keep the tie straps from Saltspring, and go buy a strapless bra that fits! Draft an a-line panelled maxi skirt that would sit smoothing at the waist and be dramatic in a windstorm. 


I’m leaning towards version #2, because it has more elements that i wouldn’t normally sew! Everything I make is SOOOO practical, which makes for a good wardrobe but not much drama. Time to spice it up! 


Untitled


To up the ante, I pulled out a few potential contrast fabrics and trims from my stash. The turquoise is ITY, so maybe I’ll incorporate it into a braided strap or something? The blue is a lovely drapey french terry which I have just enough to make a shrug of some kind. I don’t know how I would incorporate the elastic, but maybe as piping at the neckline or pockets, if I add some?


Here’s a better look at my fabric - it’s got a lot of my palette colours in it! Pink, minty turquoise, and royal blue, plus white and black. I’d love to find another print to clash/go with it - maybe even black and white stripes or something? If I make a shrug, it’s definitely going to need spicing up with some kind of contrast, trim, or something!


Untitled


Are you inspired to join in Oonapalooza? Even if you don’t have a particular project in mind, just keep Oona’s voice in the back of your mind as you sew, and maybe you’ll surprise yourself! If you do make anything Oona-esque, upload pics into the Sewcialist Flickr group, because Oona will be giving out a wee prize! (That said, sew what you love! No point sewing for a contest if you don’t like what you make. I’ve fallen into that trap, and it’s just a waste of energy.) 


Also, which version of the dress do you think I should make? And how can I Oona-it-up some more?