
Confession: I really don’t think I’ve ever set in a woven sleeve properly. I ALWAYS have little gathers!
One of the many reasons that I love sewing with knits is that sewing sleeves is completely painless and foolproof. No gathered basting stitches, no fancy matching of notches…. just a couple of pins and one quick seam!
The key to knit sleeves is that they are sewn in flat, before the side seam is sewn. If you’ve ever sewn a Renfrew, Lady Skater, or any other knit pattern I can think of, you’ll have tried this method. But just in case a complete knit newbie is reading this, or someone who has only tried knit kimono sleeves, I thought I’d explain how I handle the process!
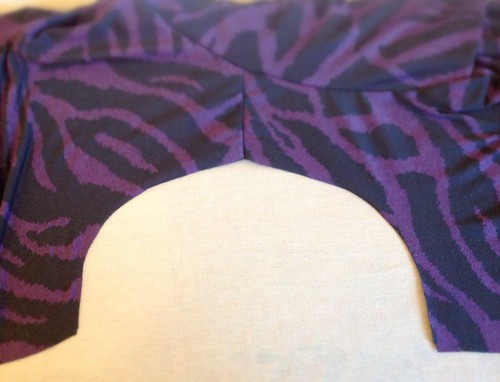
Step 1: Sew the shoulder seams, and finish the neckline. Lay out the shirt and sleeve with the right-side up. See how the armscye and sleeve curve are basically the same length but slightly different curves?
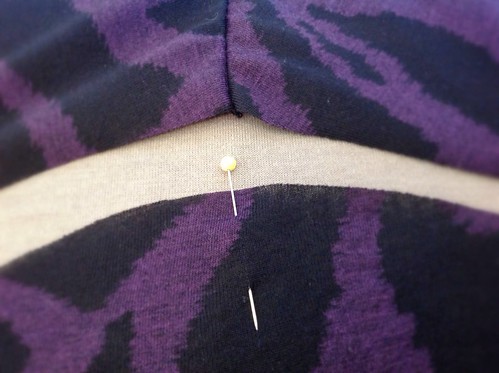
Step 2: Use a pin to roughly mark the straight of the grain at the highest point of the sleeve cap. When you sew, this point will line up with the shoulder seam.
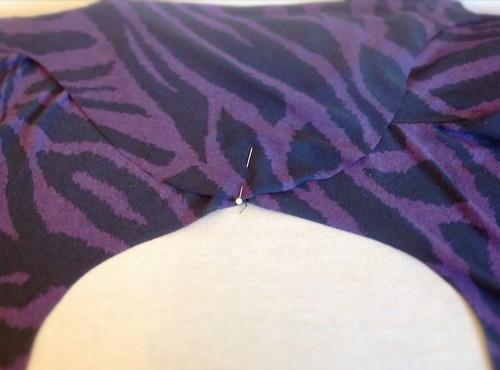
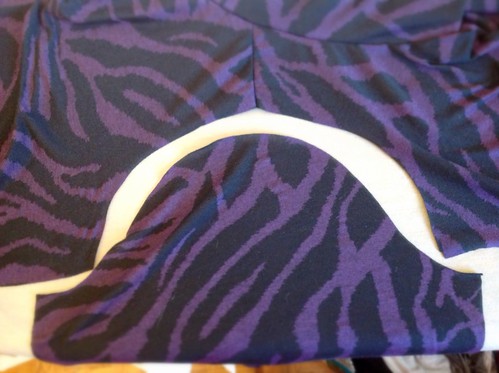
Step 3: Flip the sleeve up so that it is right-sides together with the shirt. Re-pin through the shoulder seam and top of the sleeve cap.
Step 4: Once you’ve pined at the shoulder seam, bring the corner of the sleeve down to line up with the armscye. I put a single pin in the corner at the start and end of each seam. (Actually, I usually don’t pin the corner where I start… I just hold it in place until I start to serge! Why put a pin in that I’ll just have to take out 3 seconds later?)
Remember how different the curves of the armscye and sleeve looked before? They magically look more similar now. I find the first 15cm or more lines up quite neatly, the over the top of the shoulder I might have to stretch the shirt to east in the sleeve. Once I have the shoulder seam pinned to the top of the seam, it’s pretty clear how much easing will have to happen and wear. Just stretch it and MAKE it fit! Don’t be too gentle - Show that knit who is boss!
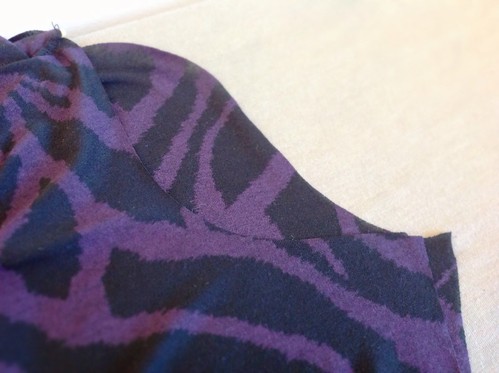
Step 5: Here’s what my seam looked like after serging! I don’t reinforce anything most of the time, nor do I use my sewing machine to reinforce the serging. I’ve been wearing my t-shirts steadily for a year, and never ever had problems with my 4-thread serger stitching popping open.
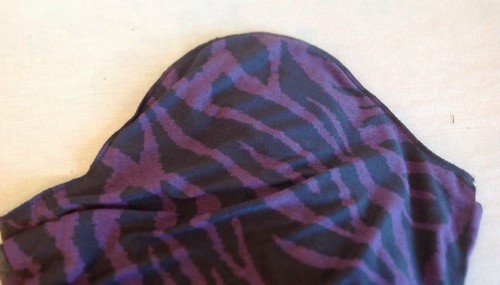
Step 6: Here’s how my sleeve seam looks form the outside. Don’t worry if the seam looks a little wobbly or bubbly.. your shoulder should fill that out just fine!
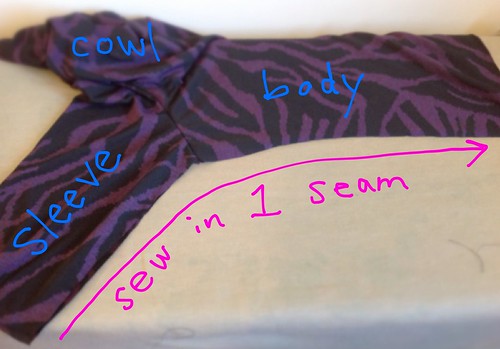
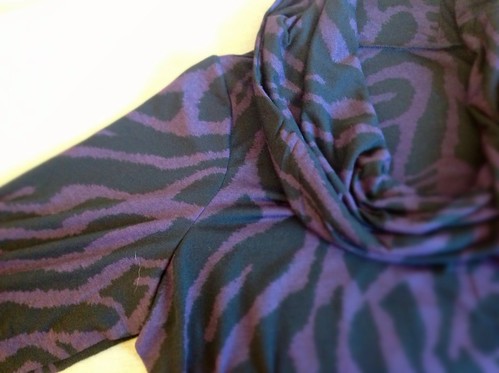
Step 7: The most satisfying step! With right-sides together, sew up the sleeve sides of the t-shirt in one go! I like to start at the sleeve end, concentrating on lining up the seams under the armpit.
After that, it’s time to finish the cuffs and hem, and you are done your shirt! I know some people like to finish the cuff flat before sewing up the sides… I prefer to do them after so that I don’t have to worry about perfectly lining up the edges of the cuff as I sew the sleeve.
So how do you set in sleeves on a knit garment? Has anyone ever tried setting them in the round? Do you have any tips or tricks of your own?
As always, my other Lazy Tips for Sewing Knits are gathered at the top of my blog page! I’m going to wrack my brain for new tips for the new year, so let me know if you have a question!
No comments:
Post a Comment