
My love for stretchy waistbands is well documented, from my post about pull-on “mom jeans” last summer to my recently-made collection of pull-on jeans! I really don’t have any pants with a zip and fly anymore… I’m a sucker for comfort!
With that in mind, here’s how I insert a stretch waistband. It’s really simple, but I thought a mini-tutorial might be helpful! For this example I’m making a pull-on version of the Sewing Cake Hummingbird skirt, but the idea is the same for any garment! The only things that matters is that your fabric has a decent amount of stretch.

Step 1: Cut a rectangle for the waistband. In this case, I used the pattern pice for the Hummingbird skirt!

Step 2: Fold the waistband lenghtwise, and iron. Sew the short ends together to make a loop about 2 inches shorter that your waist measurement.
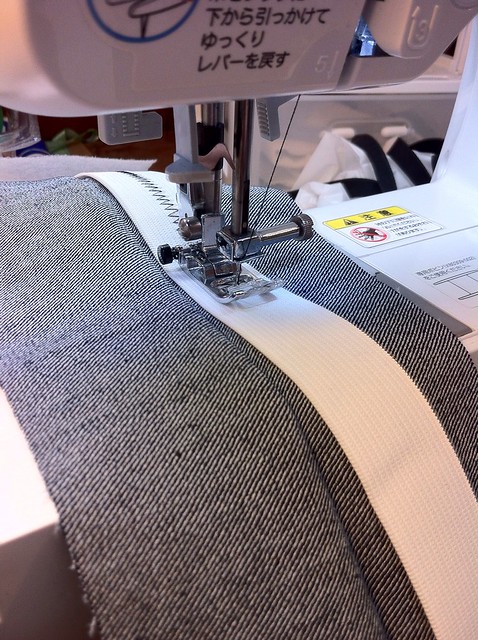
Step 3: For a longer lasting waistband, it helps to put in some elastic - but you don’t have too! (A simple folded fabric waistband works just fine if your fabric has good stretch recovery.) Cut the elastic to the same length as the fabric waistband. It’s job is to stop the fabric from stretching out, but it doesn’t need to pull tight or gather the fabric at all!
I like to zigzag my elastic to the waistband so that it doesn’t roll or twist. Since the zigzagging is only on one side of the folded waistband, you can hide it on the inside of the finished garment and no one will be the wiser!
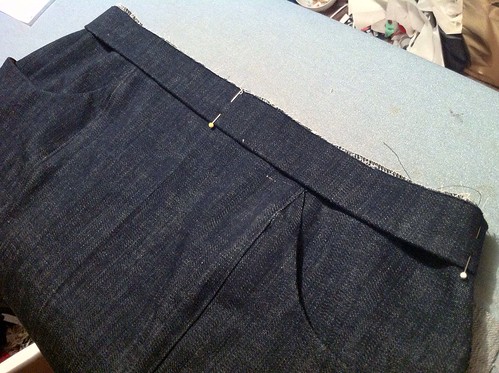 Step 4: Pin the folded waistband to the skirt at the sides and centre front/back.
Now, remember how our waistband piece is a bit shorter than the skirt’s measurements? I like to pin the waistband smoothly across the front, and ease the back to fit the shorter waistband. That way it doesn’t pull on my big tummy, and it snugs in above my big butt!
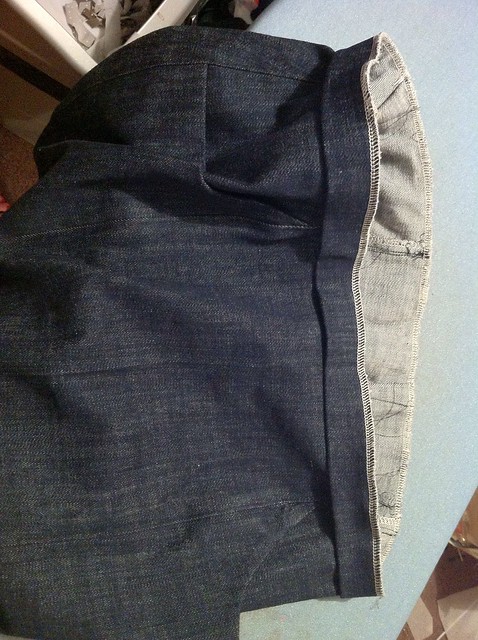
Step 5: Sew!!! I just serge it, but a purist would probably serge and sew with a stretch stitch. As you sew, gently stretch the skirt to fit the shorter waistband. It’s basically like sewing a folded band on a t-shirt!
 Step 6: Iron, and you are done! That’s it! Like I said, it’s really simple.
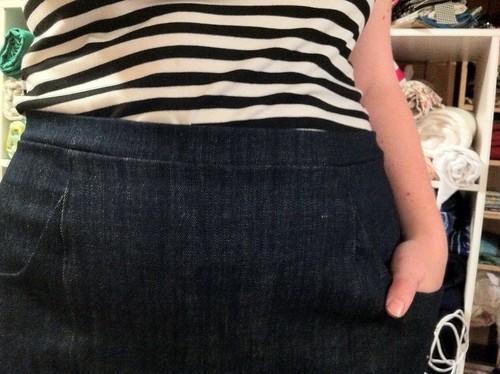
You can do a wider or narrower waistband depending on the look you want. I’ve done this technique on denim, twill, stretch bengaline and jersey, and they all hold up well to wear. For reference, my waist is 10” smaller than my hips, and I can wiggle into waistbands like these with no problem!
That’s it from me! There are heaps of other ways to insert a stretchy waistband, like Steph’s tutorial here, or a yoga-style waistband like I did on my lounge pants. On a skirt like this you could always insert a zipper and do a normal waistband… but why??? Avoiding zippers is so sweet, and the finished result is so comfortable!
How are the waistbands done on your RTW stretch bottoms? Do you have a favourite way to sew stretch waistbands?
No comments:
Post a Comment